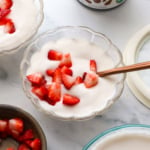
Coconut Milk Yogurt (Easy in the Instant Pot!)
Servings: 6
Calories: 262kcal
If you had told me I'd become someone who could make dairy-free yogurt at home, I wouldn't have believed you. I don't like to spend a lot of time in the kitchen, so trust me when I say that if I can do it... you can, too. All you need is a couple cans of coconut milk, some probiotic capsules, your favorite thickener (more on that below), and an Instant Pot with a yogurt button. Or, if you happen to own a yogurt maker, that would work, too. The whole process is pretty hands-off!
Print Recipe
Add to Collection
Ingredients
- 2 (13.5-oz) cans full-fat coconut milk
- 1 tablespoon agar agar flakes (see notes)
- 1 tablespoon maple syrup
- 4 probiotic capsules (vegan, if needed)
Instructions
- Be sure that all of your equipment is sterilized by using boiling water or sterilizing your equipment in the dishwasher. This helps prevent bad bacteria from forming on your yogurt.
- In the bowl of your Instant Pot, combine the coconut milk and agar flakes and bring the mixture to a boil. (I press the Sauté button to do this.) Use a whisk to stir, helping the agar flakes to dissolve as the coconut milk boils. Once the milk has reached a rolling boil (or 180ºF on your thermometer), turn off the Instant Pot and stir well, making sure all the agar flakes have dissolved. Stir in the maple syrup, then let the mixture cool to 110-115ºF for proper fermentation. This feels warm to the touch without being hot enough to hurt your finger. You can speed up the process by placing the Instant Pot bowl in an ice-water bath, but be sure it doesn't cool too much. Use a thermometer or a clean finger to judge when the coconut milk has reached 110ºF-115ºF.
- Once the coconut milk has cooled to the proper temperature, open the probiotic capsules and pour the powder in. Whisk well to dissolve. Press the Yogurt button on the Instant Pot, then use the arrows to set the fermentation time. I recommend letting it ferment for 18 to 24 hours for tartness, but you can do it in as little as 8 to 12 hours if you don't want a super tart yogurt. Place the lid on the Instant Pot to help keep the yogurt clean and at the proper temperature. (The pot will not be pressurized, so don't worry about the vent position.)
- Once the yogurt has fermented, be sure to taste it to make sure it has become tart enough to your liking. The texture will look watery and separated, with a possible cream-colored film on top, which is normal. (If there is a pink or gray colored film on top, that's a sign that the yogurt has gone bad and you should discard it in that case. When yogurt doesn't ferment correctly, it smells VERY bad and is nearly impossible to miss.) Pour the yogurt into a clean jar with a lid and refrigerate to set. The yogurt will thicken when chilled.
- The coconut milk yogurt may separate a bit when stored in the fridge, so stir it well before serving. It can keep well in the fridge for at least a week, if not longer.
Video
Notes
Nutrition information is for 1 of 6 servings, or about 1/2 cup. This is automatically calculated using an online ingredient database, so it's just an estimate, not a guarantee.
Coconut Milk Note: Some brands are better than others for making yogurt. I recommend starting with Native Forest regular (not simple) or Whole Foods 365 brand for the creamiest results. I don't like Goya or Simply Asia brands; they are too runny.
Agar Agar Flakes: I buy these near sushi ingredients at the grocery store. I can only find the flakes, but it's also available in powder-form which is much stronger, so you might want to use less in that case. If you don't need a vegan recipe, you can use a tablespoon of gelatin instead. Whisk it into 1/2 cup of cool water and let it rest for 5 minutes. Then whisk it into the boiled coconut milk and continue as directed.
Make Yogurt without the Instant Pot: Bring the milk to a rolling boil on the stovetop, then dissolve the agar flakes by whisking. Pour the mixture into a very clean jar, add the maple syrup, and allow it to cool to 110-115ºF. Stir in the probiotic powder, seal the jar with a lid, then wrap the jar in a towel to keep it insulated. Store it in a warm place, such as in your oven with just the light on. (Some ovens have an option to stay warm at 100º, if you have that.) You can also use a yogurt maker, a dehydrator, or a heating pad set to very low to keep your yogurt warm. Be sure the temperature doesn't exceed 115ºF or you'll risk killing the good bacteria. Just like the recipe above, you'll want to ferment the yogurt for 18-24 hours for the best tart flavor.
Update Note: This recipe used to call for 1 teaspoon of probiotic powder, but I can't find the brand I used to use. I recently retested this with probiotic capsules, and you only need about 4 of them to create a tart yogurt.
Nutrition
Calories: 262kcal | Carbohydrates: 6g | Protein: 2g | Fat: 27g | Saturated Fat: 24g | Sodium: 17mg | Potassium: 297mg | Sugar: 2g | Vitamin C: 1.2mg | Calcium: 32mg | Iron: 4.4mg