Healthy Butterfingers Recipe
Servings: 24
Calories: 166kcal
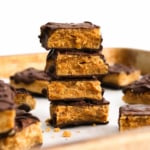
Made with five simple ingredients, these healthier Butterfingers have the same crispy, crunchy texture you love, without the high-fructose corn syrup.
Print Recipe
Add to Collection
Ingredients
- 1 cup pure maple syrup
- ⅛ teaspoon cream of tartar
- 1 cup peanut butter (creamy or crunchy)
- ½ teaspoon sea salt
- 1 ½ cups dark chocolate chips
Instructions
- Lightly grease a 9-inch square baking dish and line it with parchment paper. You'll want this ready to go before you get started, because this recipe moves quickly. Measure out the peanut butter and salt, as well, so you won't have to do that later.
- Pour the maple syrup into a small saucepan and stir in the cream of tartar until dissolved. This is the ONLY time you will stir this mixture.
- Attach a candy thermometer to the saucepan, making sure that the stem of the thermometer is not touching the sides or bottom of the pot. Ideally, the tip should be submerged in 2-inches of syrup, for the most accurate results. You can also use an instant read thermometer periodically as the maple syrup boils.
- Bring the maple syrup to a rolling boil over medium heat, then continue boiling until the temperature reaches 300ºF (the hard crack stage for candy). This can take anywhere from 7 to 10 minutes, depending on your stove top.
- When the maple syrup has reached 300ºF turn off the heat immediately and stir in the peanut butter and salt. Stir as quickly as possible, without splattering.
- Immediately transfer the peanut butter mixture into the prepared pan. Use a spatula to spread it out evenly while it's still hot, because it will harden fast. (Even waiting 2 minutes might mean the mixture will be stuck in your pan, hard as a rock.) Place the pan in your freezer to cool for 5 to 10 minutes.
- Remove the pan from the freezer while the bottom is still slightly warm. The bars are easier to cut while they aren't totally cool. Make 6 vertical cuts into the bars, then cut them in half to make 12 full-size candy bars. Or, cut those bars in half again to create 24 smaller fun-size bars. Return the bars to the freezer while you melt the chocolate.
- Melt the dark chocolate in a double boiler, stirring until it's smooth. (Or use a microwave in 30-second intervals.) Arrange the bars on a large parchment lined baking sheet, and spread the melted chocolate over the top of the bars. Once it has cooled, flip the bars over and coat the other size.
- Place the chocolate covered bars in the freezer to chill until firm, about 1 hour. Then they are ready to serve, straight from the freezer! These bars are the most crispy when served frozen, but you can also serve them from the fridge or at room temperature.
- Homemade butterfingers can be stored in an airtight container in the fridge for up to 2 weeks, or in the freezer for up to 6 months.
Video
Notes
Nutrition information is for 1 fun-size candy bar, assuming you get 24 from this batch and use ALL of the melted chocolate. (You might not.) This information is automatically calculated, and is just an estimate not a guarantee.
Be sure to read all of the tips in this post before getting started. I burned nearly 7 cups of maple syrup while testing this recipe, so I want to prevent you from wasting any expensive ingredients!
For an easier candy bar, be sure to try my favorite Crunch Bars or Snickers Bars.
Nutrition
Calories: 166kcal | Carbohydrates: 16g | Protein: 3g | Fat: 10g | Saturated Fat: 4g | Polyunsaturated Fat: 1g | Monounsaturated Fat: 4g | Trans Fat: 0.003g | Cholesterol: 0.3mg | Sodium: 98mg | Potassium: 172mg | Fiber: 2g | Sugar: 12g | Vitamin A: 4IU | Calcium: 28mg | Iron: 2mg