This post may contain affiliate links. Please read my disclosure and privacy policy.
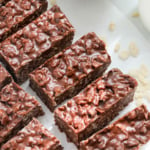
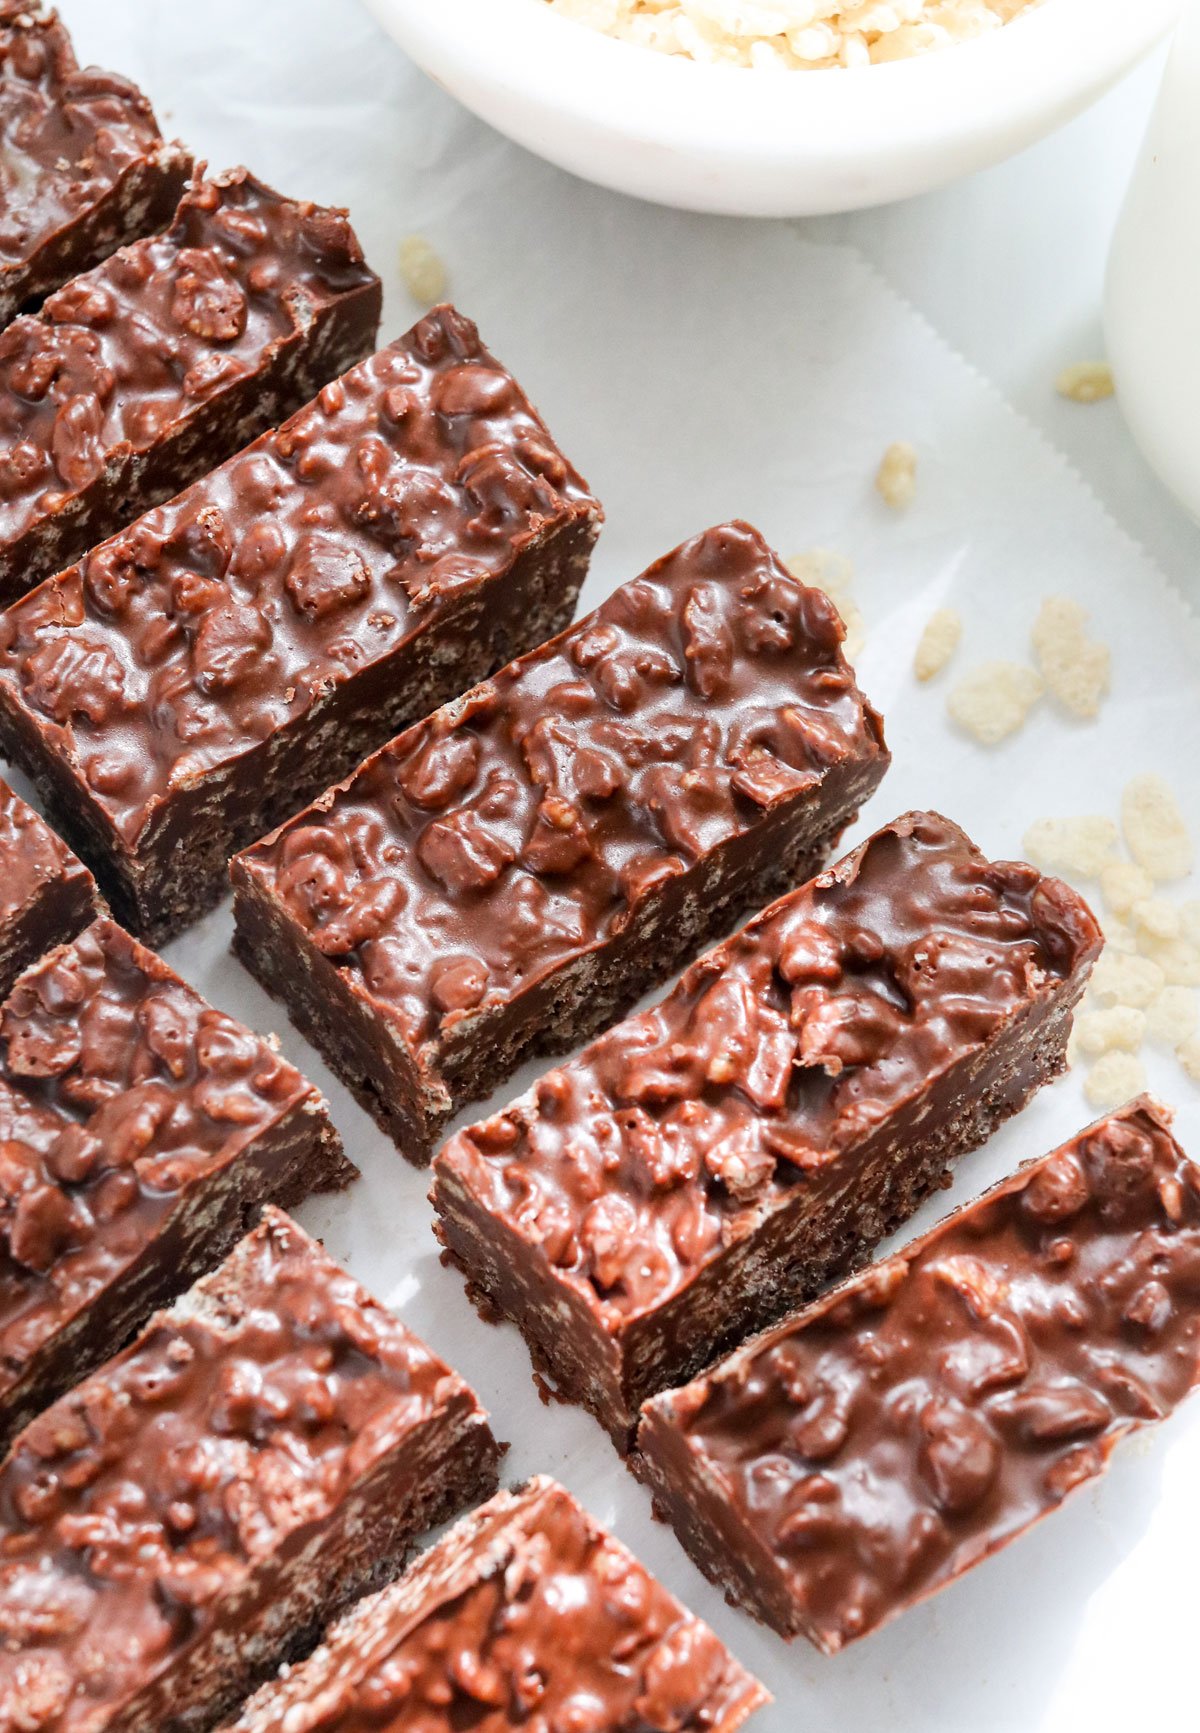
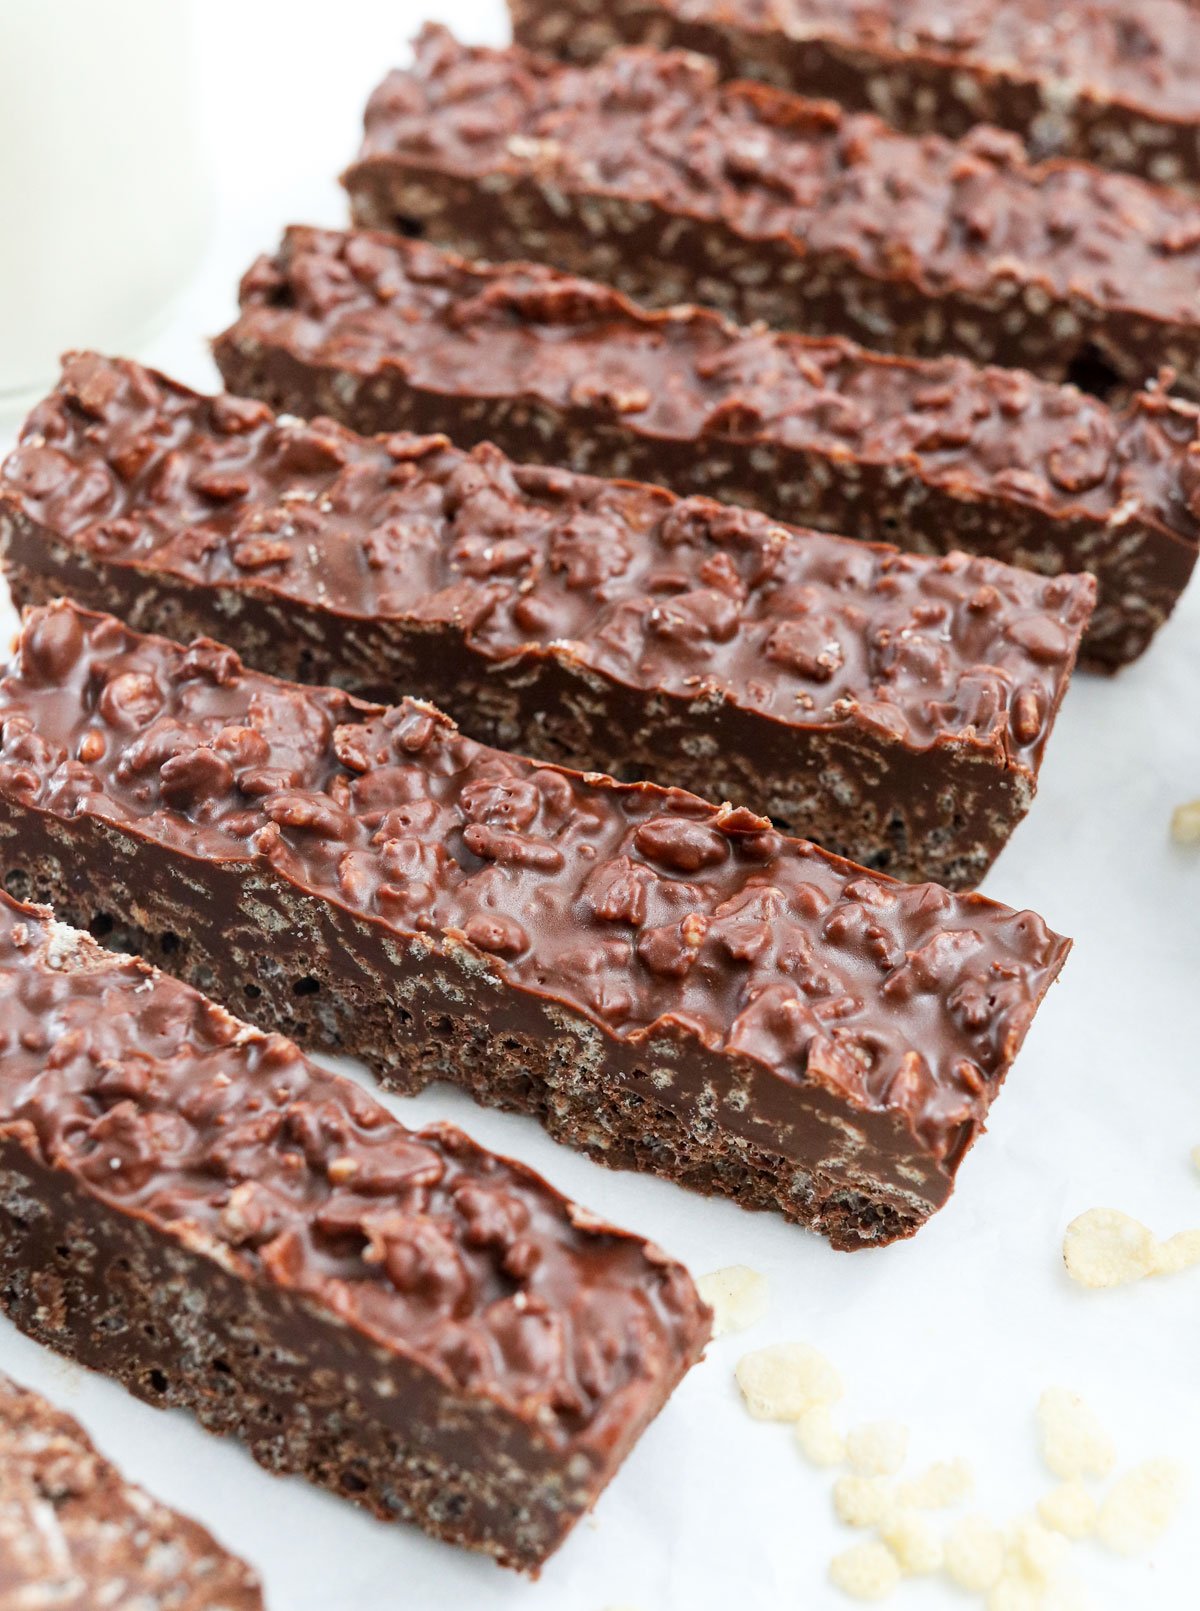
These Chocolate Crunch Bars are inspired by the popular Nestle version, but this recipe is made with just four simple ingredients. They taste better than the store-bought version, and my family can’t get enough of them.
I spent the past few weeks testing how to create a creamy texture in this chocolate bar without using added oil or emulsifiers. The answer is simple: adding peanut butter!
The result is unbelievably delicious, with no artificial flavors or preservatives.
⭐⭐⭐⭐⭐ Featured Review
“Okay, seriously??! These are so simple and soooo delicious. Could be my new favorite treat. I used brown rice crispies from Whole Foods and natural peanut butter. So easy and so good!” -Angela
Homemade Crunch Bars (Step by Step)
Step 1:
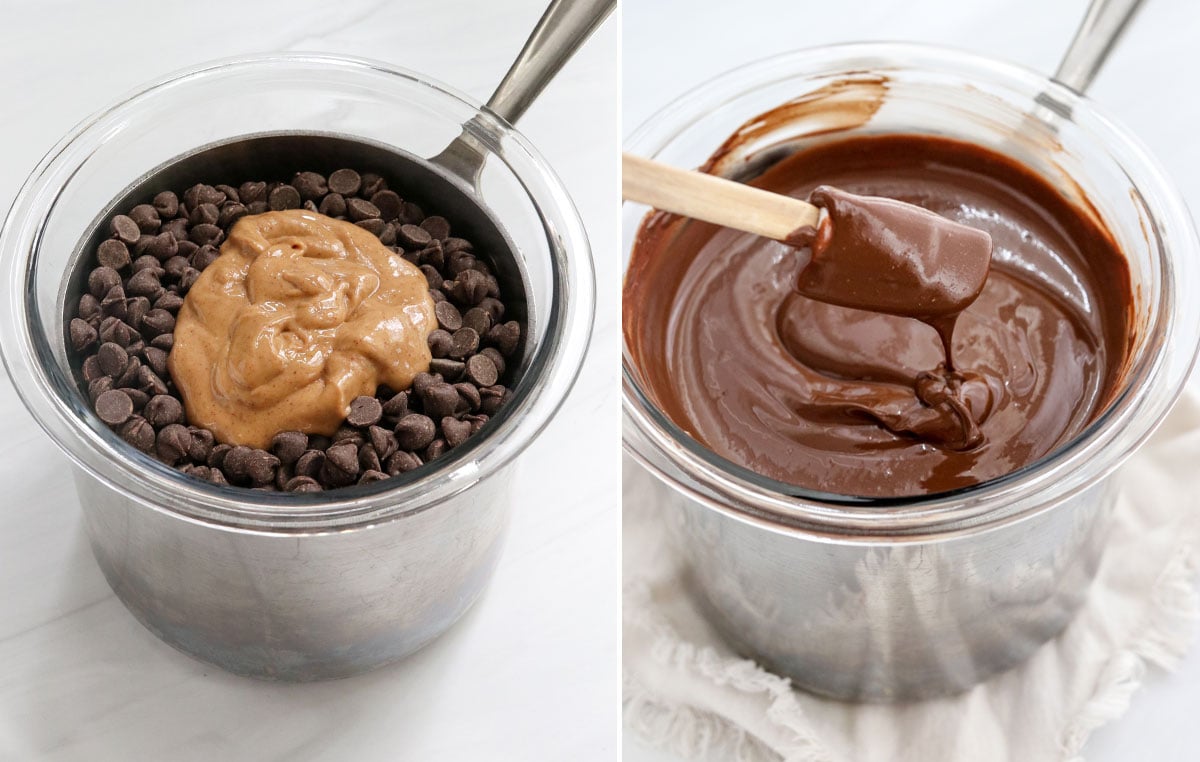
Prepare a double boiler by adding an inch of water to a small saucepan. Place a heat-safe bowl over the top of the pot, and bring the water to a boil.
Add in the chocolate chips and peanut butter, and stir until the chocolate has melted and looks smooth. (Alternatively, you can use a microwave-safe bowl and melt the chocolate in the microwave using 30-second intervals.)
Step 2:
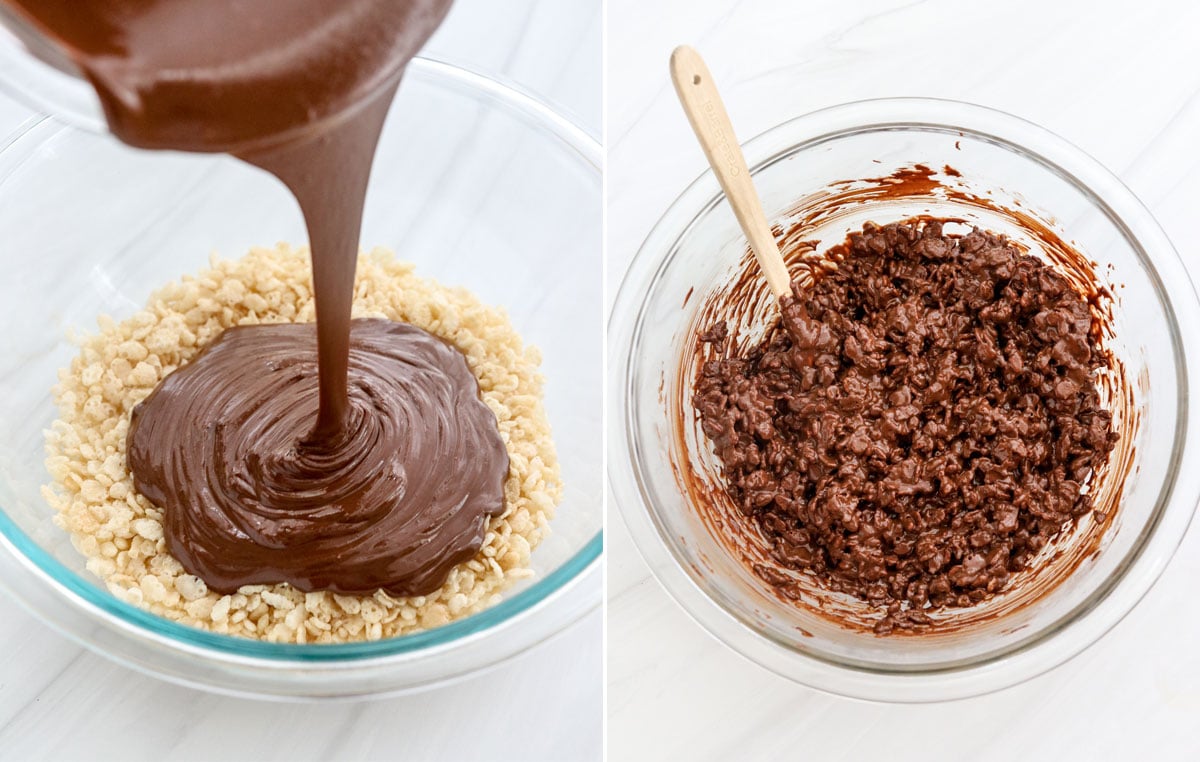
Add the rice cereal to a large mixing bowl, and pour the melted chocolate mixture over the top. I also like to add a 1/4 teaspoon of salt to make the flavor really pop.
Mix well until the cereal is evenly coated.
Want to save this for later?
Step 3:
Prepare a 9-inch by 5-inch loaf pan by spraying it with oil, then press a piece of parchment paper into the bottom of the pan.
Transfer the chocolate mixture to the lined baking dish, and press it evenly into the bottom. Place the pan in the freezer to set until it feels firm in the center, about 20 minutes.

Step 4:
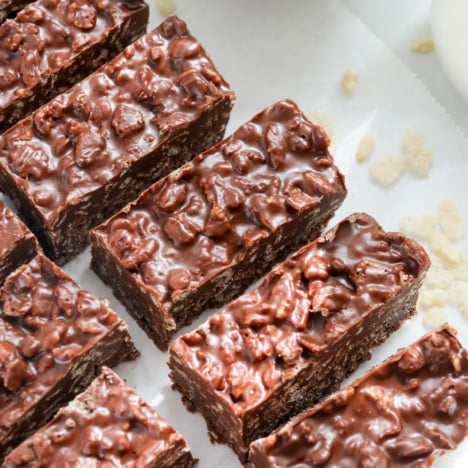
When the bars are totally firm, you can remove them from the freezer and slice them into bars. You can decide how thick or thin you want them to be.
I usually like to make “fun-size” bars by slicing them in half, too. But you can decide what size you prefer your candy bars to be.
Storage Tips
Store these homemade crunch bars in an airtight container in the refrigerator for the best texture and shelf life. They can start to soften if left at room temperature for an extended period.
Or, you can store them in the freezer for up to 3 months, if you’d like to make a larger batch to keep on hand.
Ingredients
- 1 ½ cups chocolate chips
- ½ cup peanut butter
- ¼ teaspoon salt
- 2 cups crisp rice cereal (see notes for gluten-free)
Instructions
- Melt the chocolate chips, peanut butter, and salt together. You can do this in a microwave, or in a double boiler by adding an inch of water to a small saucepan and placing a heat-safe bowl on top of the pot. Bring the water to a boil, and gently stir the chocolate chips, peanut butter, and salt together until they are smoothy melted.
- Place the rice cereal in a large bowl. Pour the melted chocolate mixture into the rice cereal and stir well, until evenly coated.
- Lightly grease a 9-by-5-inch loaf pan and press a piece of parchment paper into the bottom of the pan. (The oil will hold the parchment paper in place.) Transfer the crunch bar mixture into the pan, and smooth the top with a spatula. Place the pan on a flat surface in the freezer to chill until firm, about 1 hour.
- When the chocolate feels firm to the touch, you can use the parchment paper to lift the bars out of the pan. Use a sharp knife to slice the chocolate into 1-inch bars. You can make "fun size" bars by slicing the chocolate down the center, as well. (See photos for reference.)
- These crunch bars are best kept in an airtight container in the fridge, for up to 2 weeks. When you use an all-natural peanut butter, they will become softer when left at room temperature for too long. You can also freeze these for up to 3 months, if you'd like to store them longer.
Video
Notes
Nutrition
More Recipes to Try
If you try these homemade crunch bars, please leave a comment and star rating below, letting me know how you like them!


Love easy recipes and so delicious!
Would you prefer semi sweet or milk chocolate chips?
I am not a fan of milk chocolate chips, so I wouldn’t go any sweeter than semi sweet!
I used to have something very similar but it had butterscotch chips melted into them. Ever heard of that version?
Yes!! My mom made a peanut butter butterscotch rice crispy treat when I was a kid, and it was my favorite! I bet this would be tasty with butterscotch chips, too.