This post may contain affiliate links. Please read my disclosure and privacy policy.
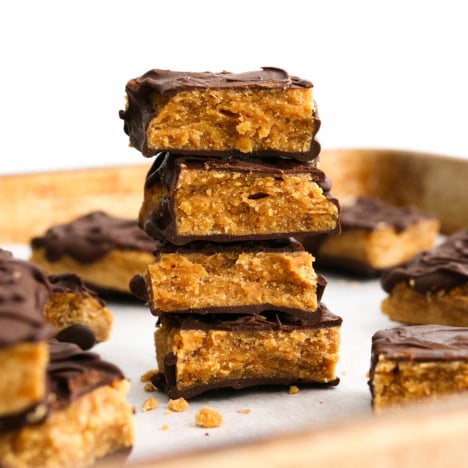
Did you know you can make butterfingers without candy corn or processed cereal? This recipe achieves its crunchy texture simply by boiling maple syrup.
(And don’t worry—you don’t have to be an expert candy maker to make these!)
The result is a less-processed Butterfinger candy bar with all the flavor you love. All you need are five ingredients to get started.
⭐⭐⭐⭐⭐ Featured Review
“These candy bars came out perfect and delicious. Thank you for sharing. No more store bought bars for me” – Heather
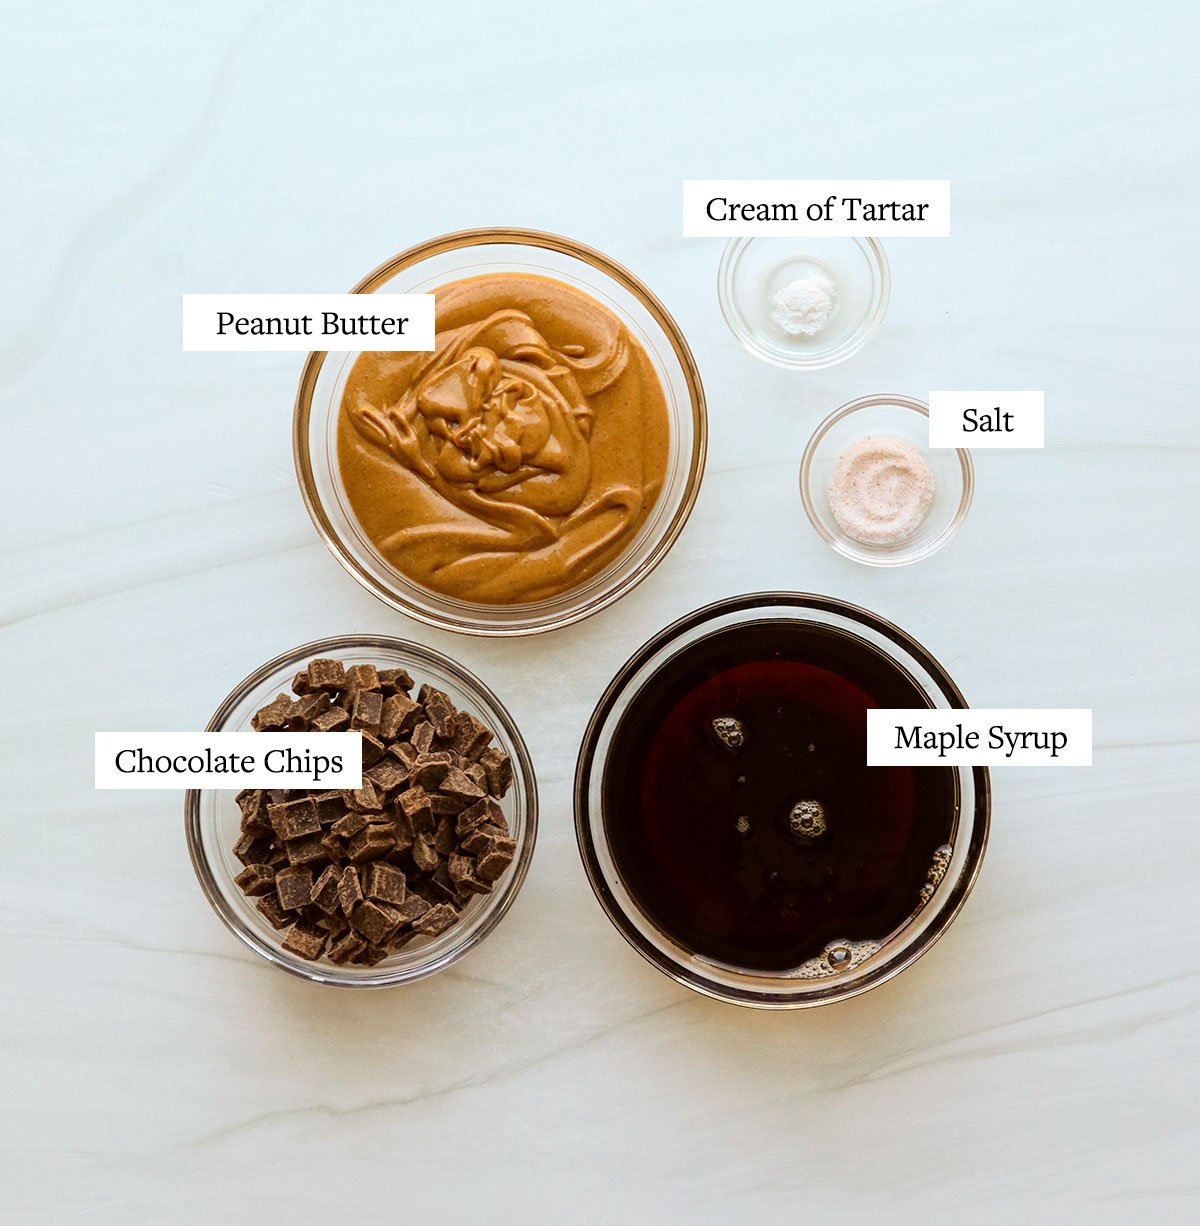
Homemade Butterfinger Ingredients
- Peanut Butter. Use all-natural peanut butter for the best flavor. (The kind you need to stir when you first open the jar.) I prefer using salted peanut butter for the most flavor, in addition to the added salt in this recipe.
- Maple syrup. This is not to be confused with the processed pancake syrup. Use 100% pure maple syrup for the best results.
- Cream of tartar. This ingredient prevents sugar crystallization in candy making. This addition means the peanut butter center will be easier to bite into as a result.
- Chocolate Chips. Use any variety of chocolate you like as the outer coating. Dark chocolate chips are my preference, but semi-sweet will work, too.
How to Make Butterfingers
Step 1:
Spray a square 9-inch baking dish with cooking spray and line it with parchment paper. This must be ready to go immediately, as the recipe will move quickly. Measure out the peanut butter and salt, too.
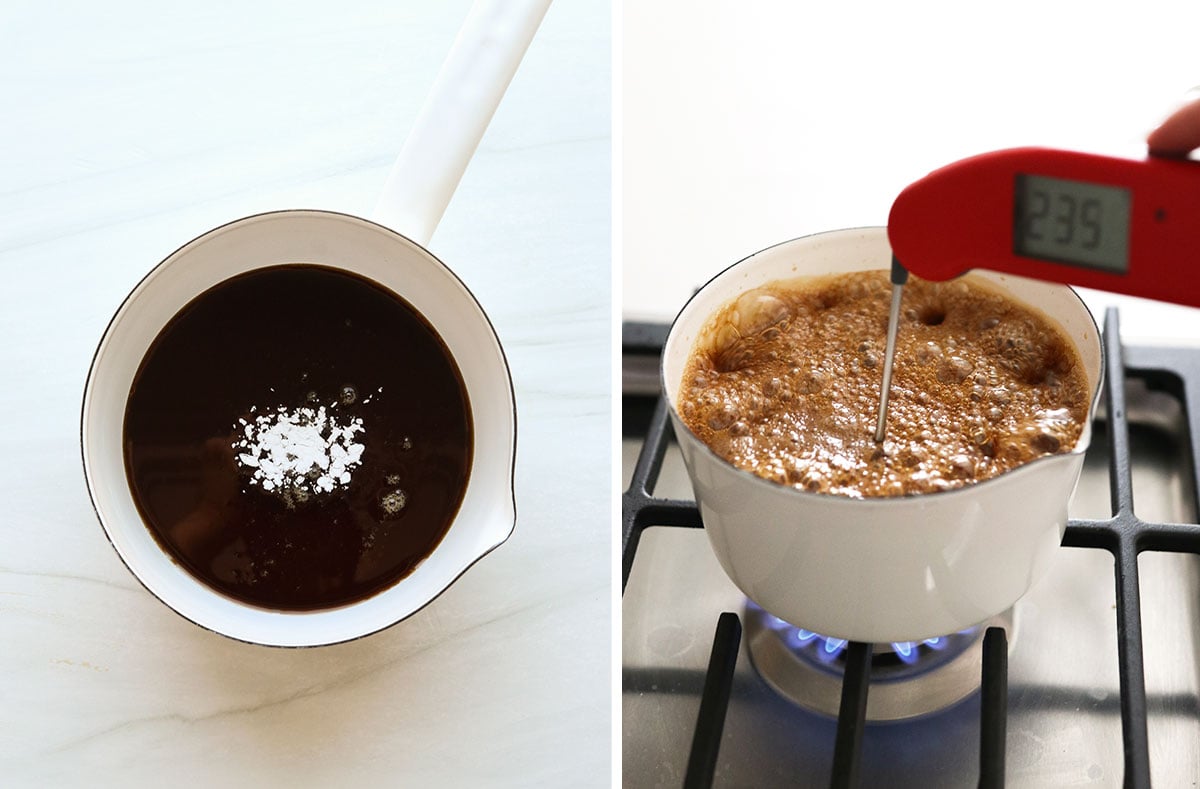
In a small saucepan, combine the maple syrup and cream of tartar. Whisk well until the cream of tartar has dissolved. This is the ONLY time you will stir this mixture.
Step 2:
Attach a candy thermometer (affiliate link) to the saucepan, ensuring the thermometer’s stem does not touch the sides or bottom of the pot. Ideally, the tip should be submerged in 2 inches of syrup for the most accurate results. Alternatively, you can use an instant-read thermometer periodically as the maple syrup boils.
Bring the maple syrup to a rolling boil over medium-high heat. Watch the pot to ensure it doesn’t boil over (lower the heat if it starts to rise too quickly) and continue boiling until the maple syrup reaches the “hard crack” stage, which is 300°F.
Detoxinista Tip
Candy making is tricky because the sugar can quickly burn once you get near the 300ºF goal temperature. You’ll get the crispiest results if you let the maple syrup reach 300ºF, but if you don’t want to risk burning it, you can remove it from the heat once it reaches at least 270ºF, which is the soft crack stage. (This stage is used for making toffee and butterscotch. It’s not quite as crispy, but it will still create a firm candy.)
Step 3:
Want to save this for later?
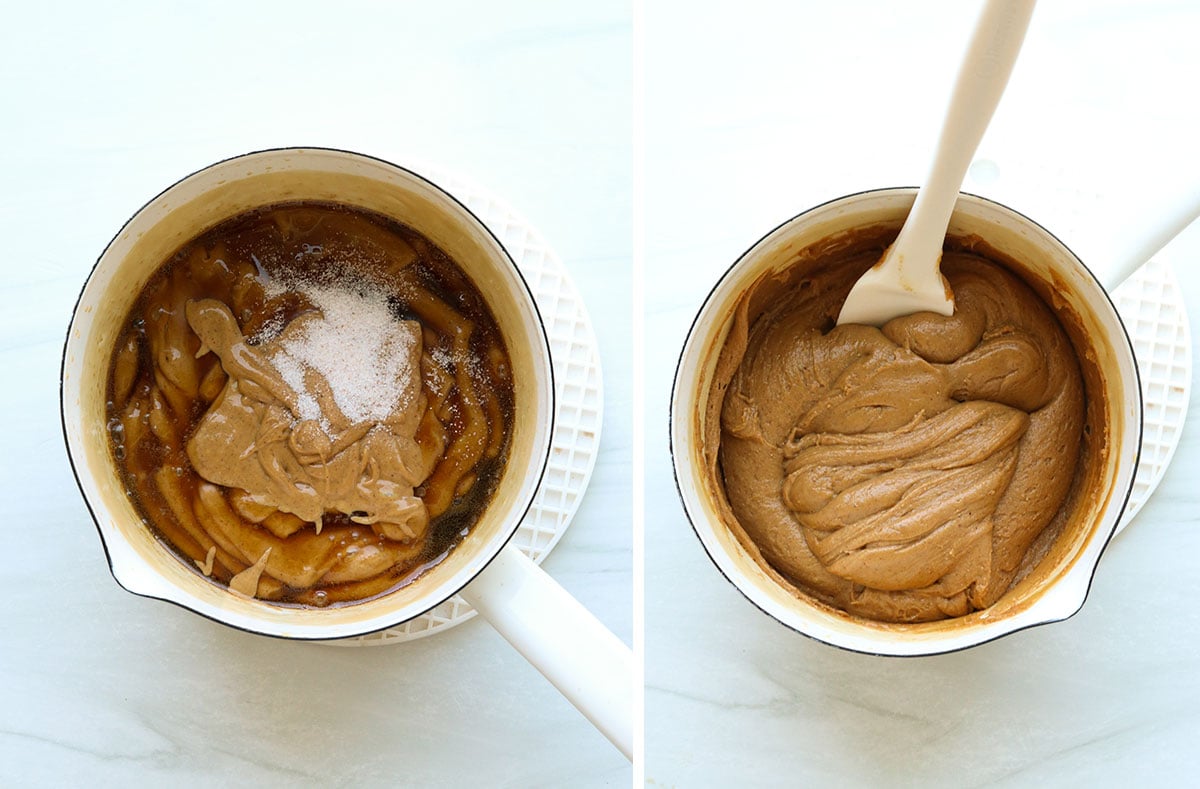
Once the maple syrup has reached the correct temperature, immediately turn off the heat and stir in the peanut butter and salt. Stir as quickly as you can without splattering (because it’s hot), then immediately pour it into the parchment-lined pan.
Use a spatula to spread the mixture while it’s still hot, as it will harden quickly. (For example, I took a quick photo of the mixture in the pot for this post, and it hardened in the pan before I could get to the next step. So work quickly!)
Transfer the pan to the freezer to chill for 10 minutes.
Step 4:
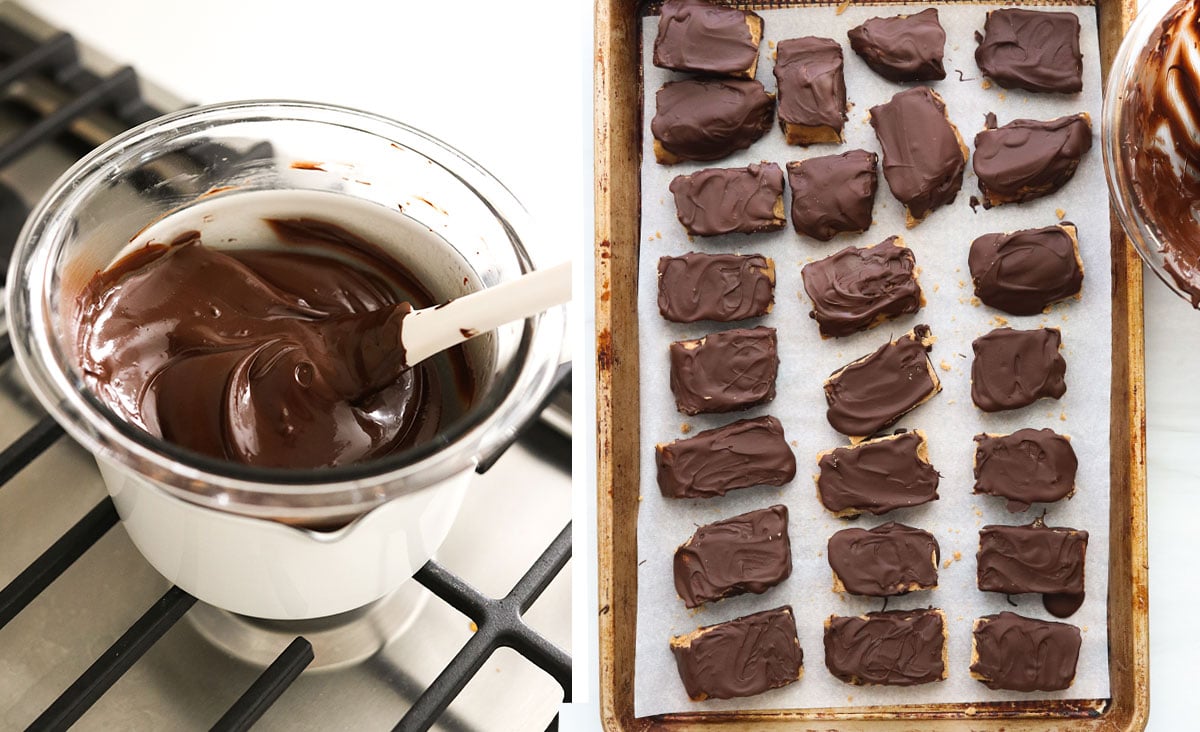
While you wait, go ahead and melt the chocolate over a double-boiler. The perk of using a double boiler is that the pan of boiling water can be kept underneath the bowl of chocolate, allowing it to stay melted while you coat both sides of the candy bars. (Alternatively, you can melt the chocolate in a heat-safe bowl in the microwave using 30-second intervals.)
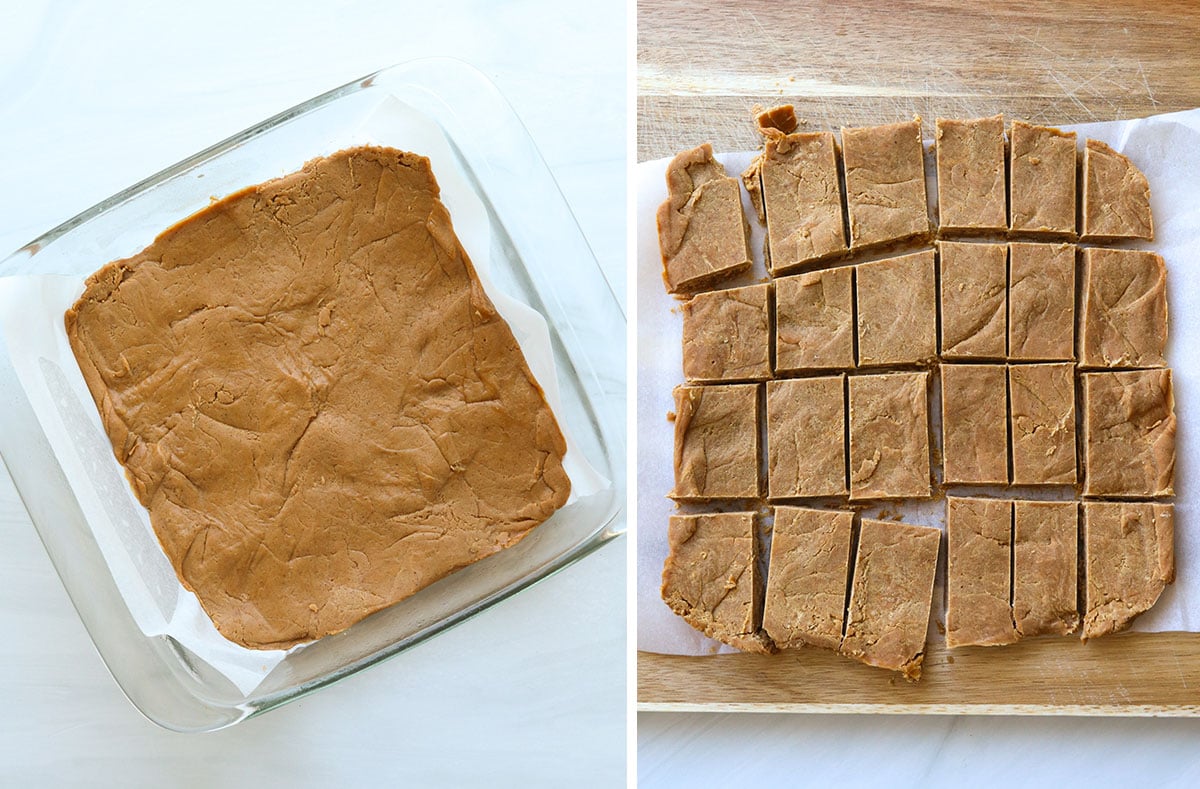
Remove the pan from the freezer. The bottom may still feel warm to the touch, which is good because the bars are easier to slice when they aren’t cold. Use a large, sharp knife to cut the peanut butter layer into bars.
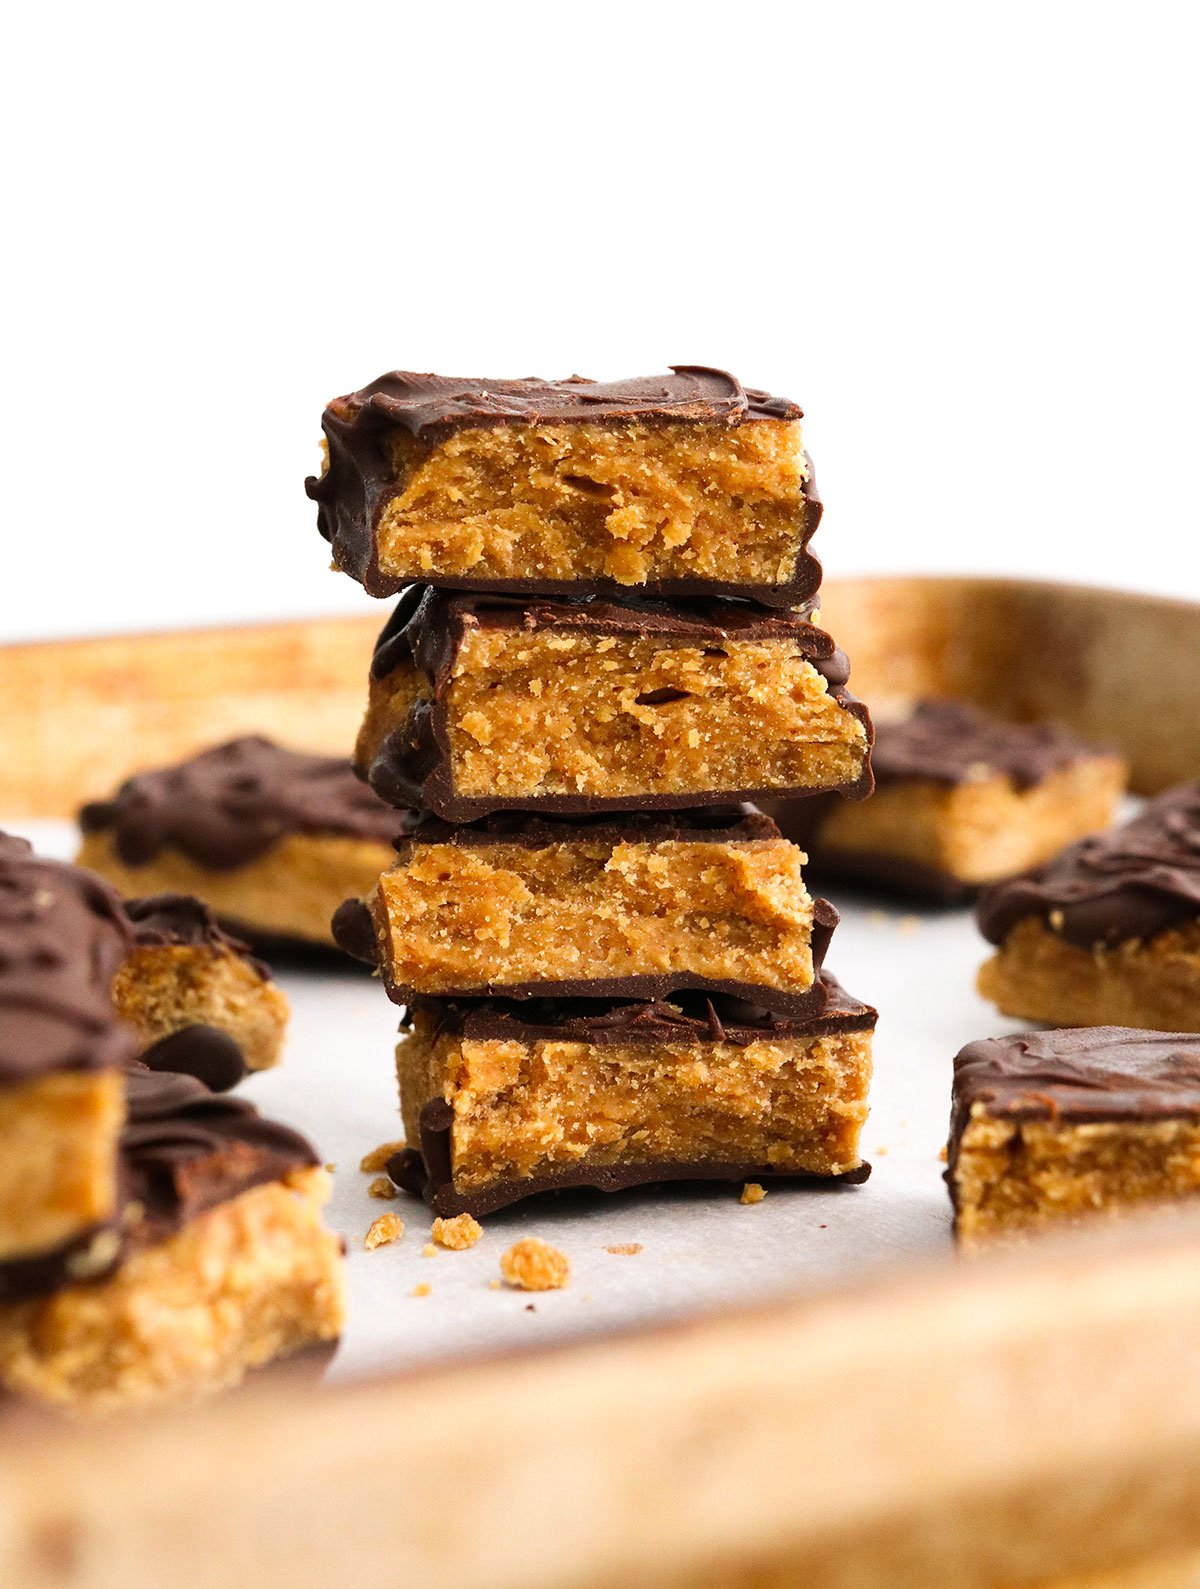
Make five vertical cuts to make six rows of candy bars, and then cut them in half to create 12 large candy bars. Or, cut them in half again to make smaller fun-size bars. (Or Butterfinger bites!)
Step 5:
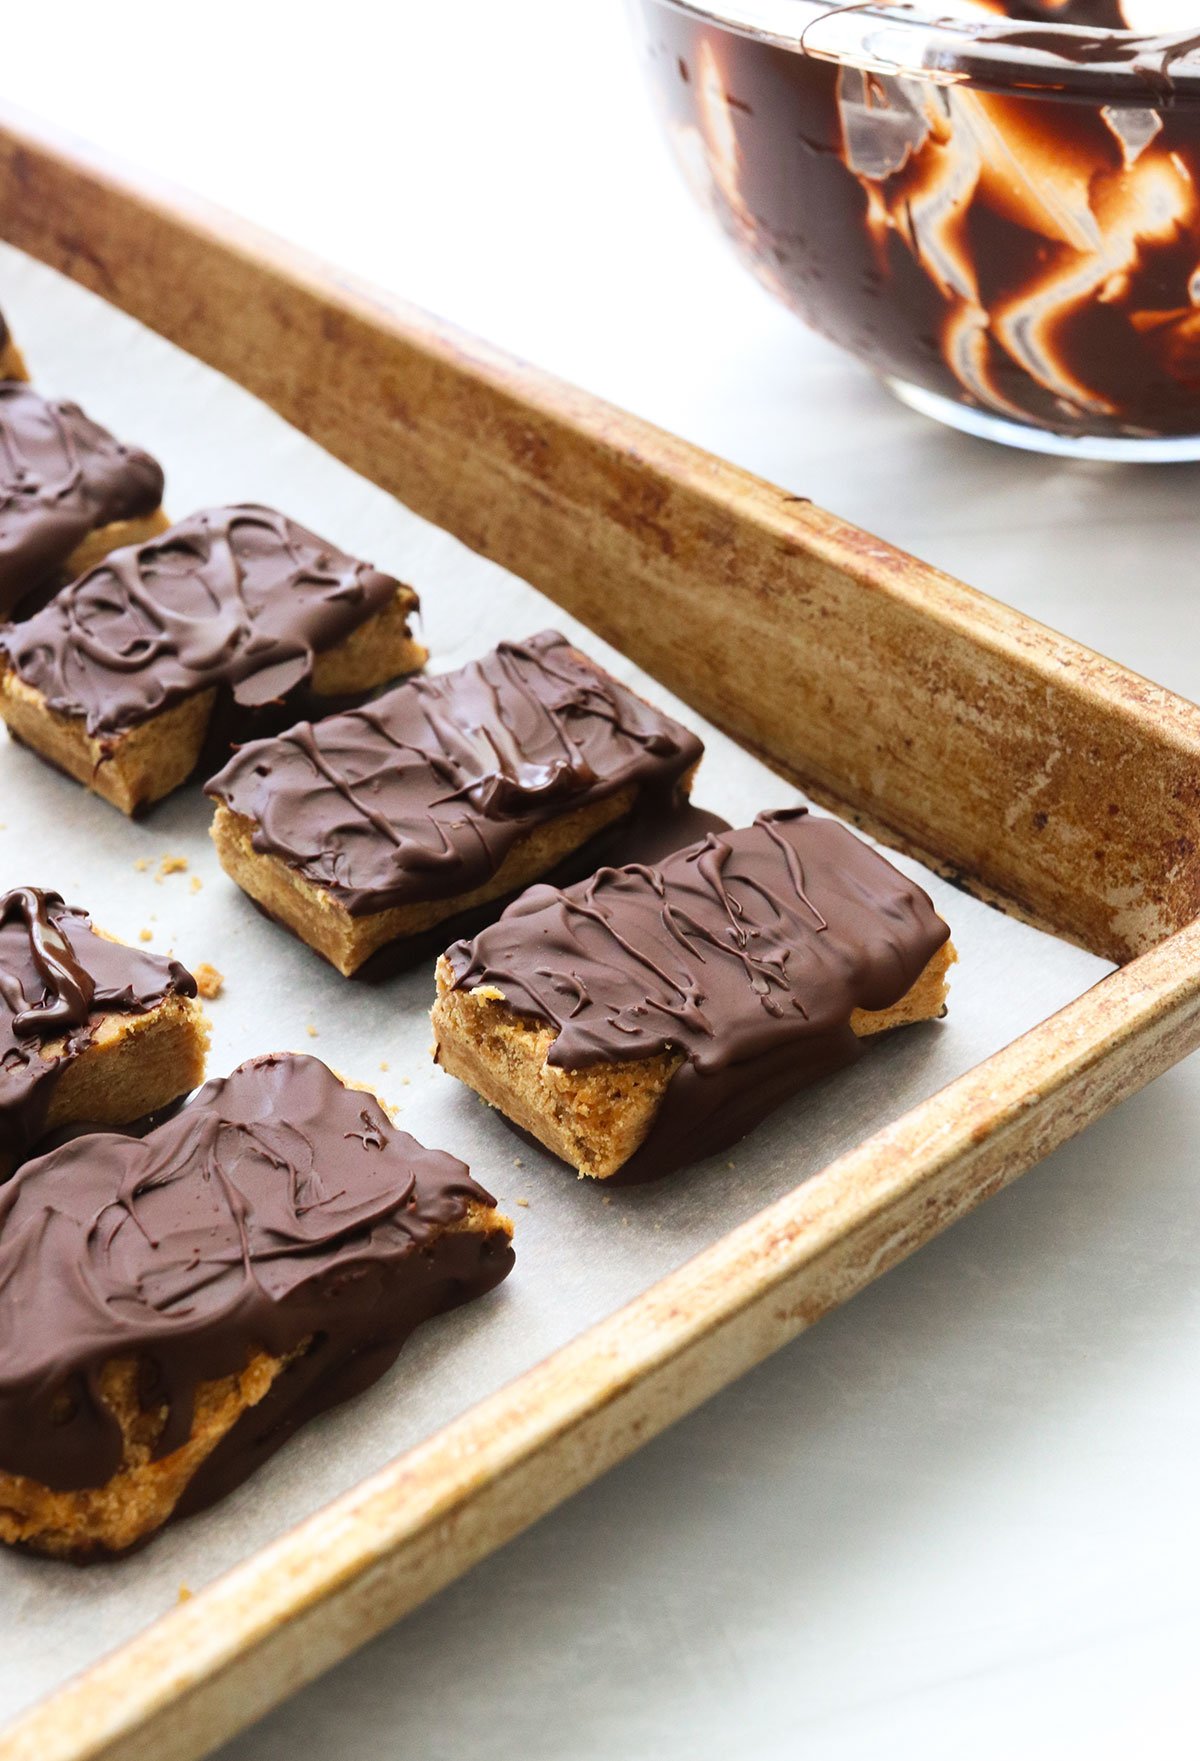
Use two forks to dip each bar into the melted chocolate, letting the excess chocolate drip off before placing them on a parchment-lined baking sheet. Or, use a spoon to spread the melted chocolate over each bar. Once the chocolate has hardened, flip the bars over and coat the other side.
There’s no need to be perfect or coat the sides of the bars because the process can feel tedious. (Next time, I’d probably coat the tops and call it a day.)
Butterfinger Recipe Storage Tips
Store homemade Butterfingers in the fridge or freezer for the longest shelf life and crispiest results. They will keep for 2 weeks in the refrigerator, or up to 6 months in the freezer.
Homemade Butterfingers (5 Ingredients!)
Ingredients
- 1 cup pure maple syrup
- ⅛ teaspoon cream of tartar
- 1 cup peanut butter (creamy or crunchy)
- ½ teaspoon sea salt
- 1 ½ cups dark chocolate chips
Instructions
- Lightly grease a 9-inch square baking dish and line it with parchment paper. You'll want this ready to go before you get started, because this recipe moves quickly. Measure out the peanut butter and salt, as well, so you won't have to do that later.
- Pour the maple syrup into a small saucepan and stir in the cream of tartar until dissolved. This is the ONLY time you will stir this mixture.
- Attach a candy thermometer to the saucepan, making sure that the stem of the thermometer is not touching the sides or bottom of the pot. Ideally, the tip should be submerged in 2-inches of syrup, for the most accurate results. You can also use an instant read thermometer periodically as the maple syrup boils.
- Bring the maple syrup to a rolling boil over medium heat, then continue boiling until the temperature reaches 300ºF (the hard crack stage for candy). This can take anywhere from 7 to 10 minutes, depending on your stove top.
- When the maple syrup has reached 300ºF turn off the heat immediately and stir in the peanut butter and salt. Stir as quickly as possible, without splattering.
- Immediately transfer the peanut butter mixture into the prepared pan. Use a spatula to spread it out evenly while it's still hot, because it will harden fast. (Even waiting 2 minutes might mean the mixture will be stuck in your pan, hard as a rock.) Place the pan in your freezer to cool for 5 to 10 minutes.
- Remove the pan from the freezer while the bottom is still slightly warm. The bars are easier to cut while they aren't totally cool. Make 6 vertical cuts into the bars, then cut them in half to make 12 full-size candy bars. Or, cut those bars in half again to create 24 smaller fun-size bars. Return the bars to the freezer while you melt the chocolate.
- Melt the dark chocolate in a double boiler, stirring until it's smooth. (Or use a microwave in 30-second intervals.) Arrange the bars on a large parchment lined baking sheet, and spread the melted chocolate over the top of the bars. Once it has cooled, flip the bars over and coat the other size.
- Place the chocolate covered bars in the freezer to chill until firm, about 1 hour. Then they are ready to serve, straight from the freezer! These bars are the most crispy when served frozen, but you can also serve them from the fridge or at room temperature.
- Homemade butterfingers can be stored in an airtight container in the fridge for up to 2 weeks, or in the freezer for up to 6 months.
Video
Notes
Nutrition
More Recipes to Try
If you try these homemade candy bars, please leave a comment and star rating below, letting me know how you like them.


I can not believe the way these taste! BETTER than the original. This is an unbelievably easy recipe with minimal ingredients.
These candy bars came out perfect and delicious. Thank you for sharing. No more store bought bars for me
We love these! If I’m really careful about monitoring the temperature they come out with the perfect texture just like the real deal. Thank you for making a dairy-free healthier option for us butterfinger lovers!
My kids ask for this all the time. We live abroad and can rarely get maple syrup but when we do, this is our first go to! Yum.
This is so good. WOW. Started to smell burn around 275 and so I stopped cooking. Still turned out perfectly!!!
I would love to make these! I have to keep my at sugar intake to a minimum. Is there a low-sugar alternative to the maple syrup?
This was delicious, even though mine cooled before I got it all in the pan! The crumbled bits tasted just as good. I live overseas and can´t get Butterfingers, so this was an amazing recipe to find. Thank you!