This post may contain affiliate links. Please read my disclosure and privacy policy.

If you’re a skeptic like me, prepare to be amazed. I’m not the type of person who wants to eat plain cottage cheese by the spoonful, but this cottage cheese ice cream has converted me into a full-fledged fan.
With that being said, you do have to like the flavor of cheesecake. (Because that’s what this tastes like!)
I’ve gone through several containers of cottage cheese this week to nail down the perfect ratio of cottage cheese to sweetener, because some of the other recipes I’ve tried online simply taste “too healthy.” This version tastes amazing—like real ice cream!—and happens to pack 12 grams of protein per serving.
⭐⭐⭐⭐⭐ Review
“Wow! This was AMAZING and could not have been simpler. It tasted exactly like those Sarah Lee cheesecake bites from back in the day. I made the recipe with my toddler and it was easy and fun.” – Jenny
Cottage Cheese Ice Cream Ingredients
Here’s what you’ll need:
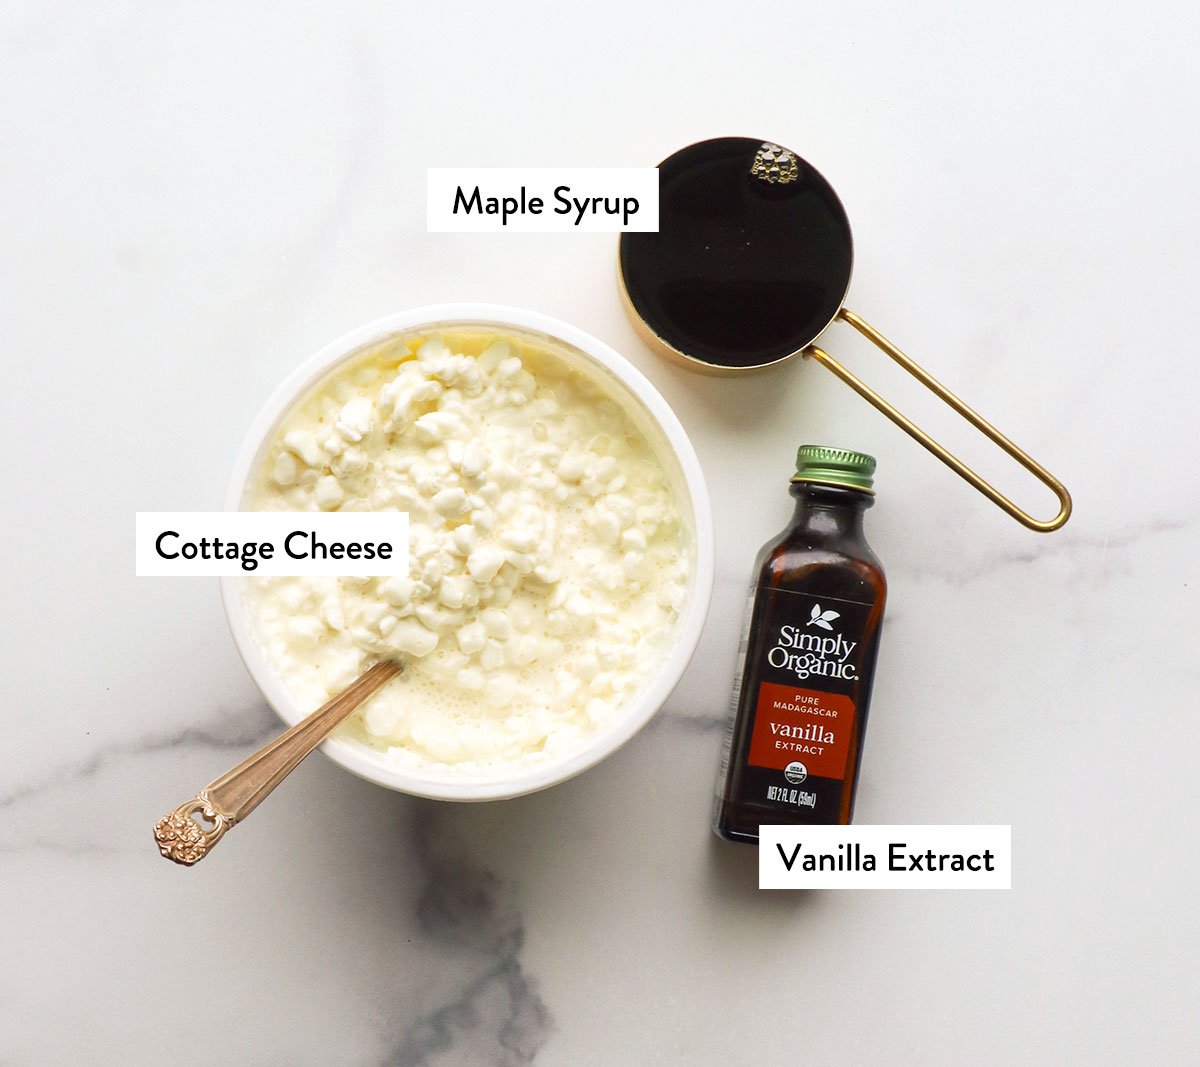
- Cottage Cheese. Use full-fat cottage cheese for the creamiest texture. (It has only 4% milkfat, which still makes it relatively low-fat.) If you prefer low-fat cottage cheese, you’ll save about 30 calories per serving, but the ice cream will likely be icier in texture.
- Maple Syrup. This natural sweetener acts as a liquid to help facilitate blending, but it also helps improve the texture after it’s frozen. The more sugar there is in ice cream, the less “icy” the texture is, so don’t cut back on the sweetener without expecting a different result.
- Vanilla Extract. This is purely for added flavor, so the ice cream will taste more like vanilla cheesecake.
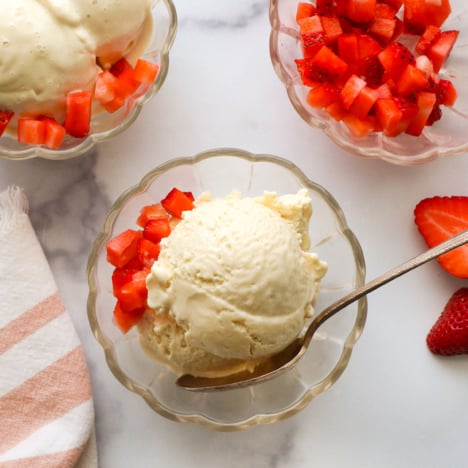
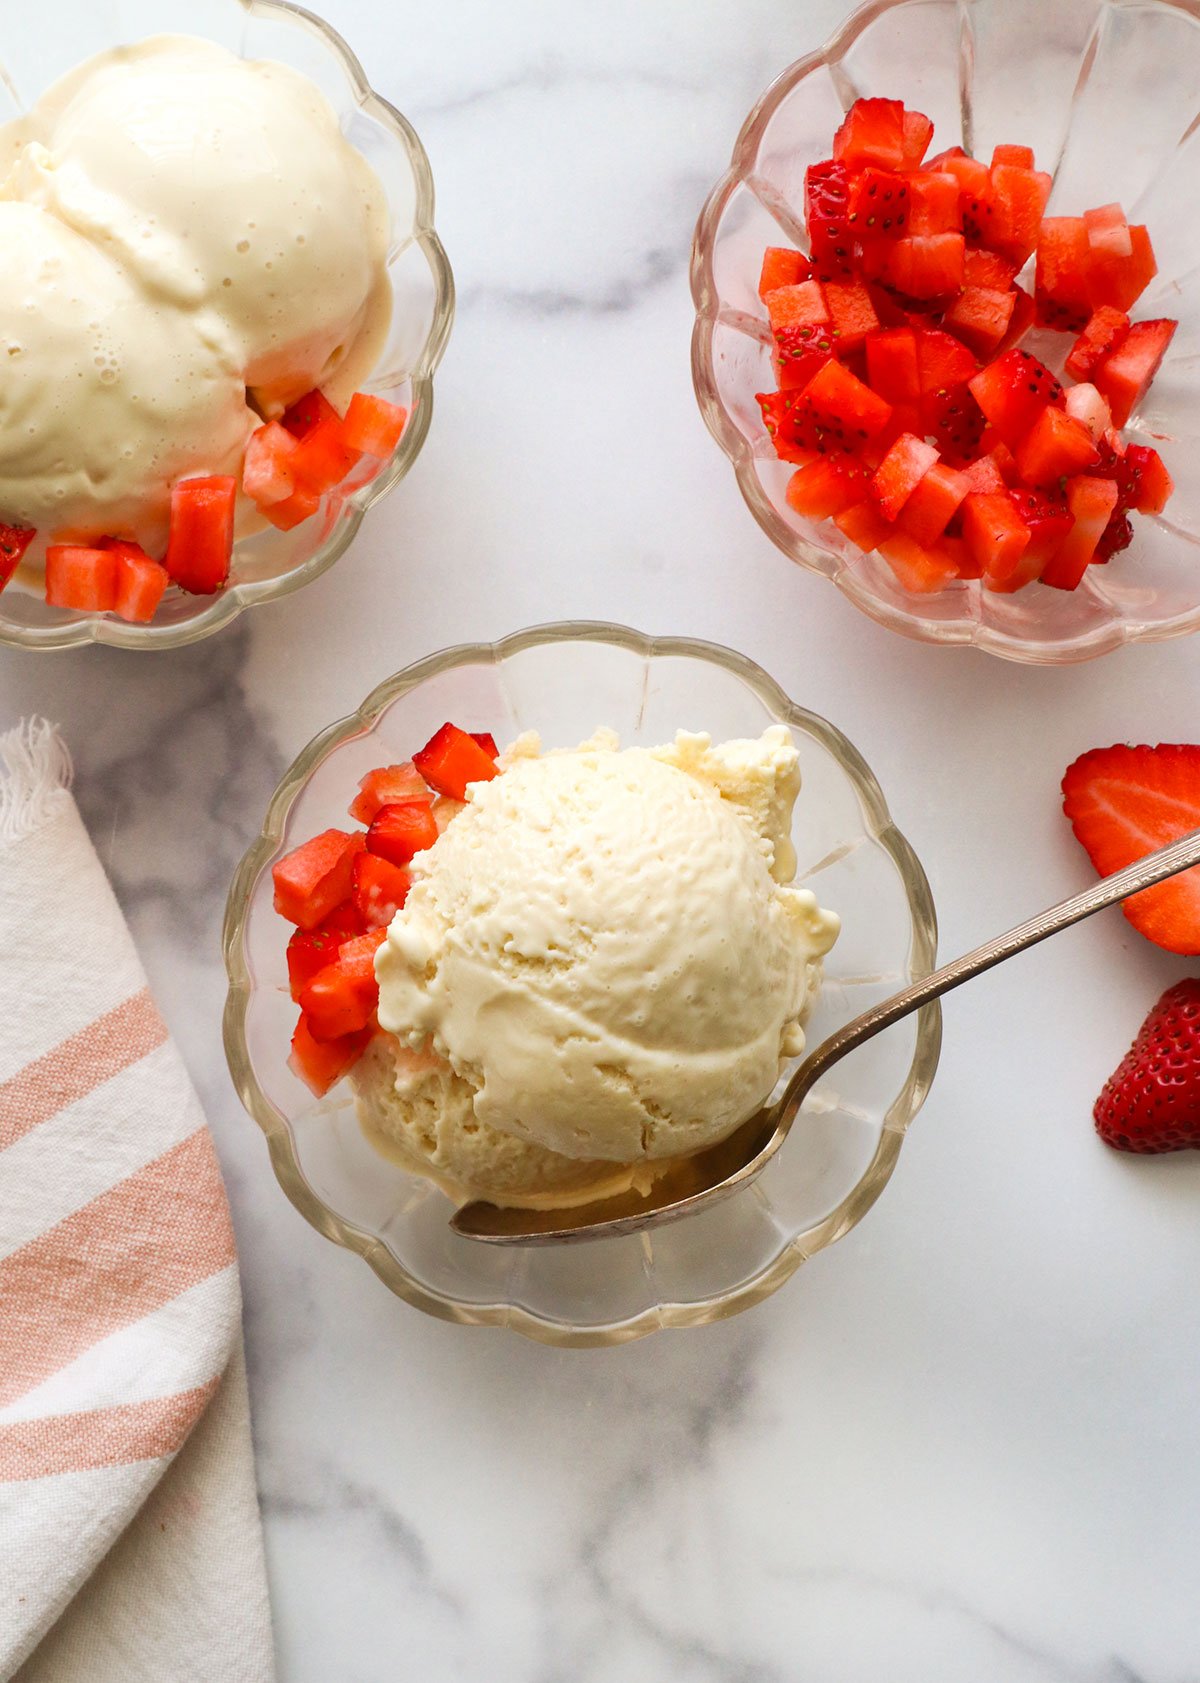
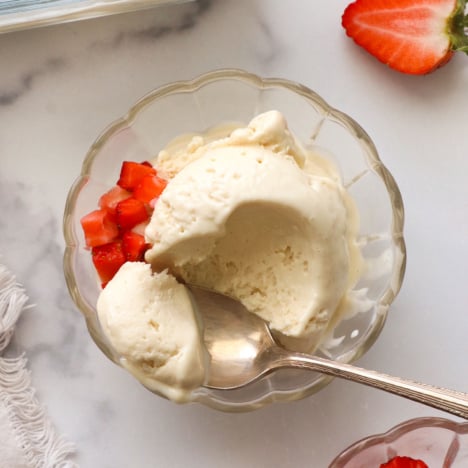
I also highly recommend having some fresh berries on hand, as they pair well with this ice cream for serving. (Think: strawberry cheesecake!)
How to Make Cottage Cheese Ice Cream
Step 1:
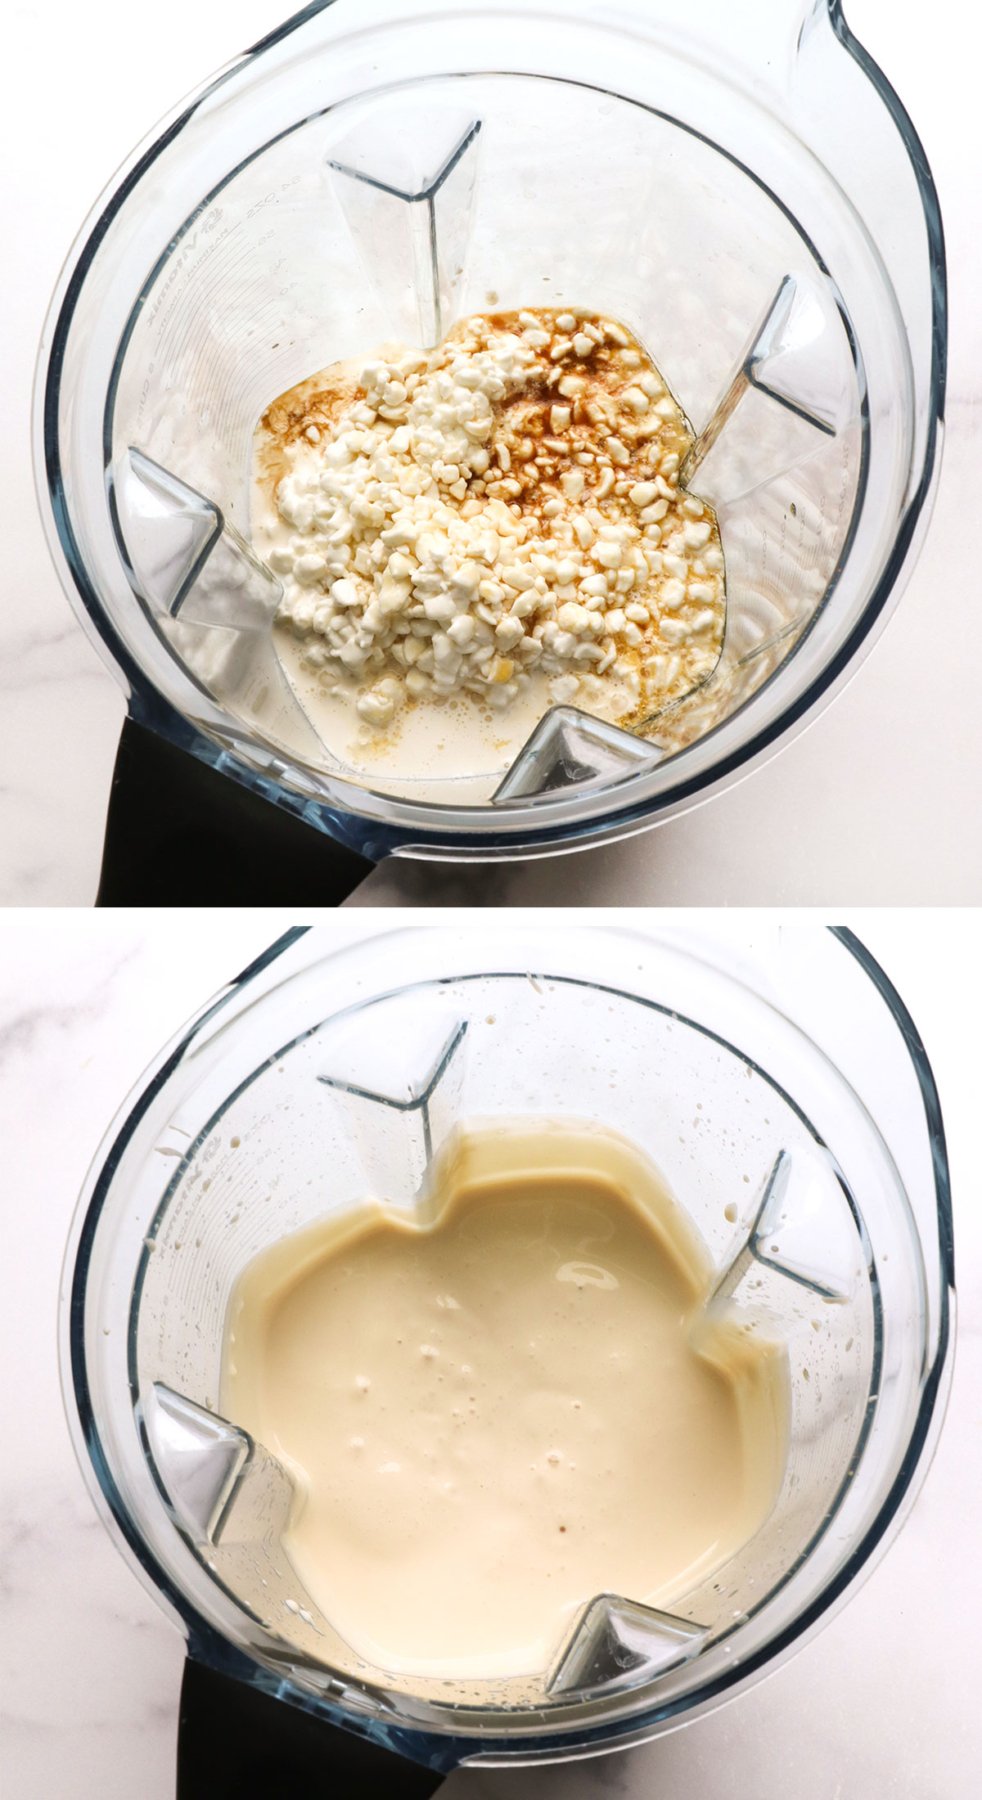
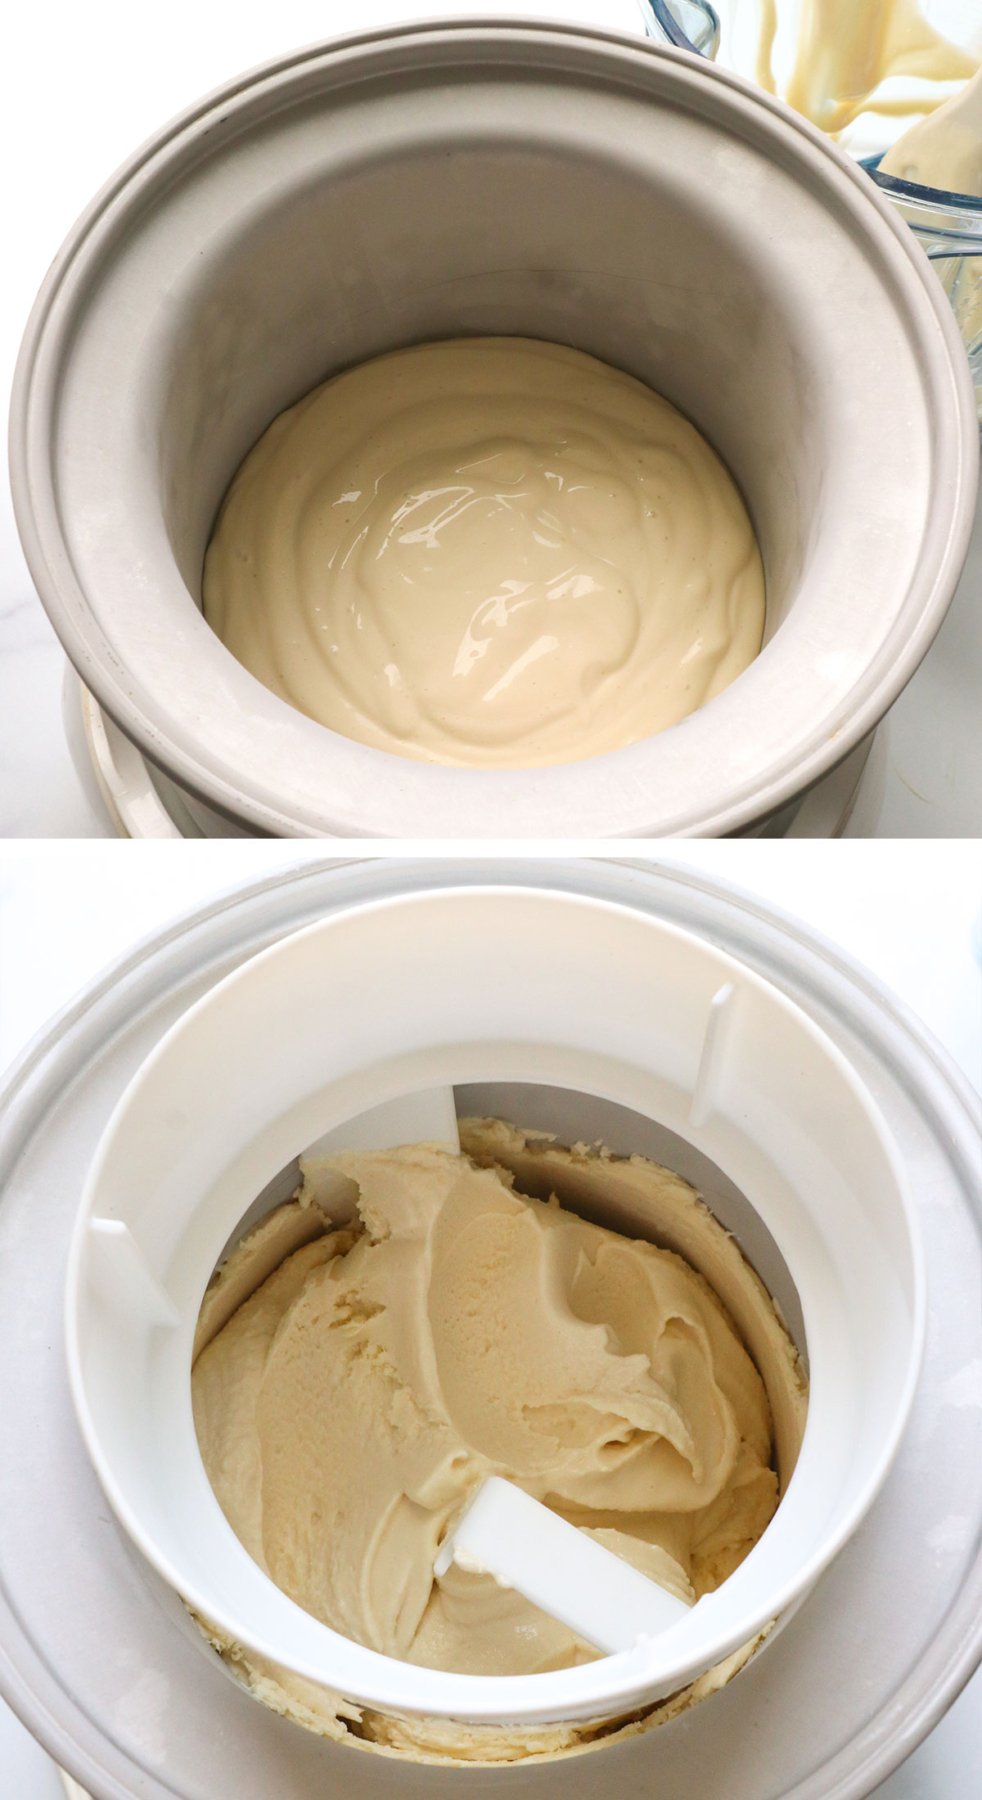
Combine the full-fat cottage cheese, vanilla extract, and maple syrup in a high-speed blender or food processor.
Secure the lid and blend until the mixture is smooth. Stop and scrape down the sides of the blender if needed. When you’re done blending, you should see no chunks of cottage cheese.
(Full measurements can be found in the printable recipe card below.)
Step 2:
Taste the mixture and adjust the flavoring if needed. You can add more sweetener for a sweeter flavor or stir in some chopped nuts for crunch. (Like pecans or peanuts.)
For the fastest, creamiest ice cream, pour this mixture into an ice cream maker. You’ll need to ensure the bowl has been in the freezer for at least 24 hours before making this.
Step 3:
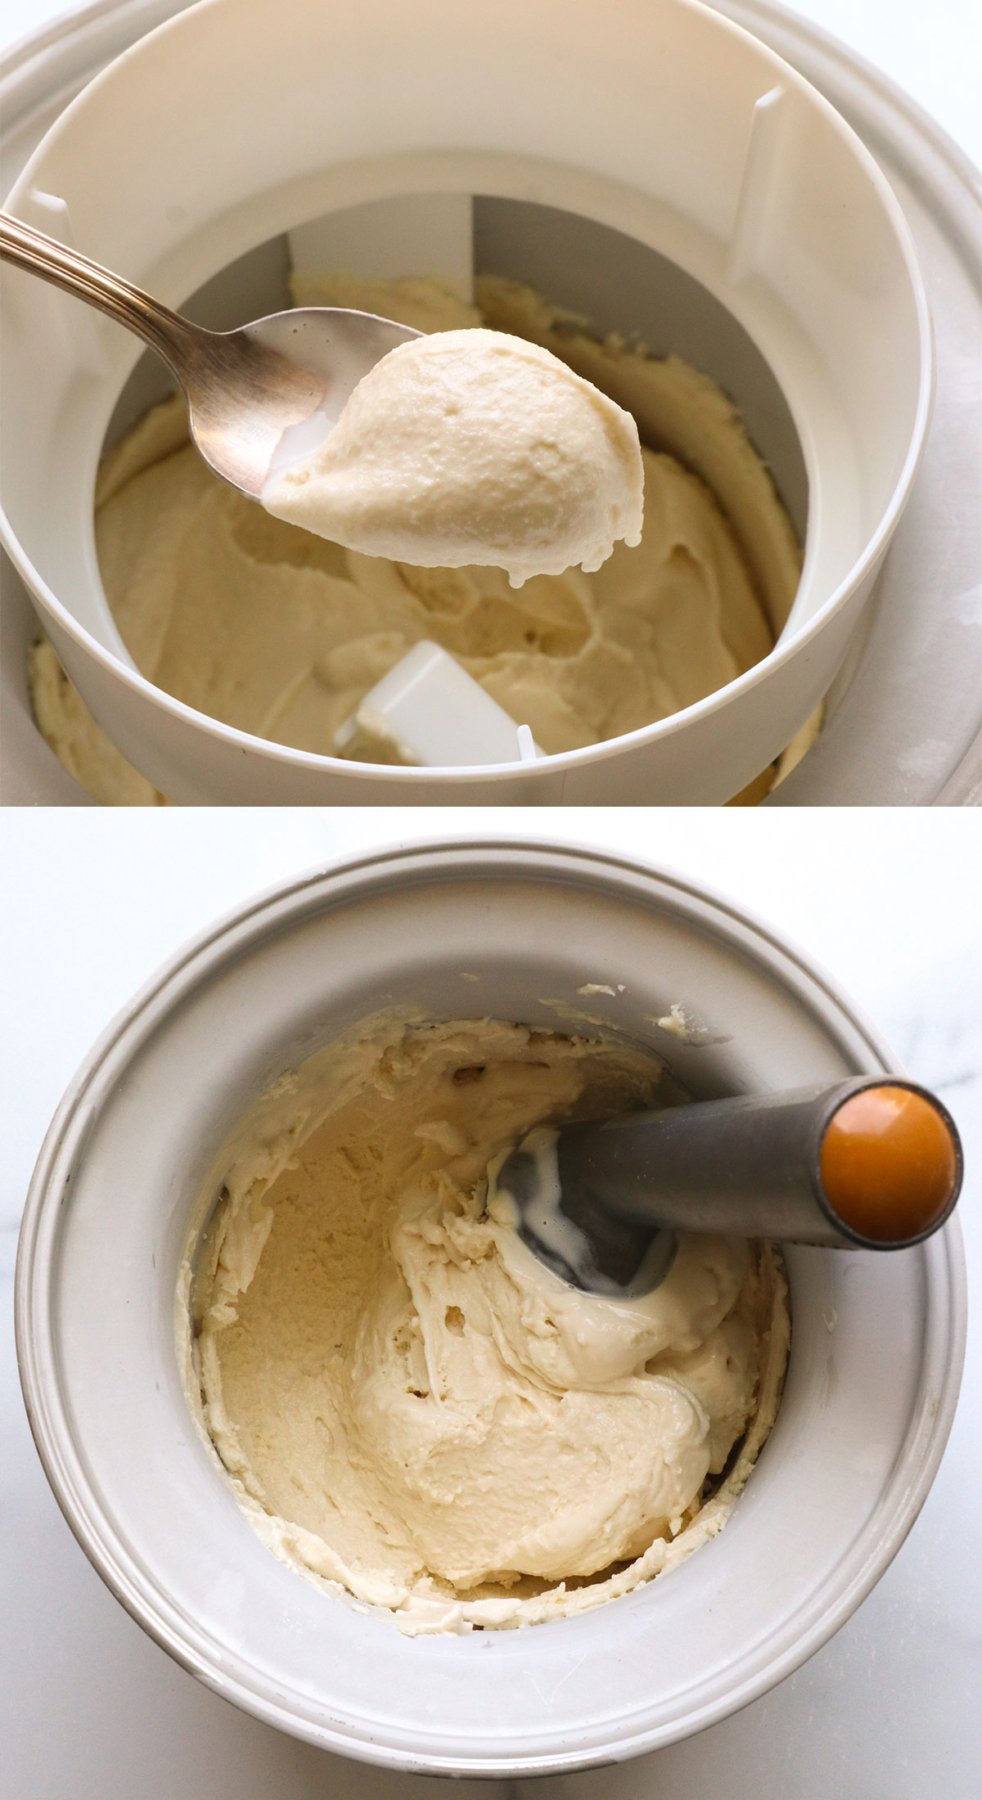
Turn on the ice cream machine and process until the cottage cheese ice cream has a creamy texture and soft-serve consistency.
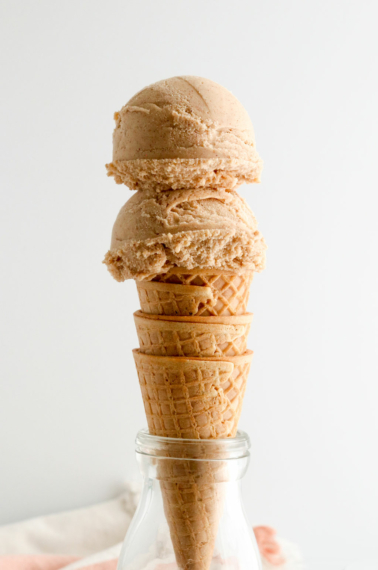
As soon as the ice cream reaches a consistency you love, it’s ready to serve.
Top with fresh strawberries for a strawberry cheesecake flavor. You can also top it with mango, blueberries, or any other fresh fruit you have on hand.
Cottage Cheese Ice Cream Variations
Customize your cottage cheese ice cream by adding Oreos, fresh fruit, graham crackers, cookies, peanut butter cups, or whatever you love. These are best added after 15 minutes of processing in your ice cream maker. Once the ice cream looks like soft-serve, add these mix-ins and process for five more minutes.
Making Cottage Cheese Ice Cream Without an Ice Cream Maker
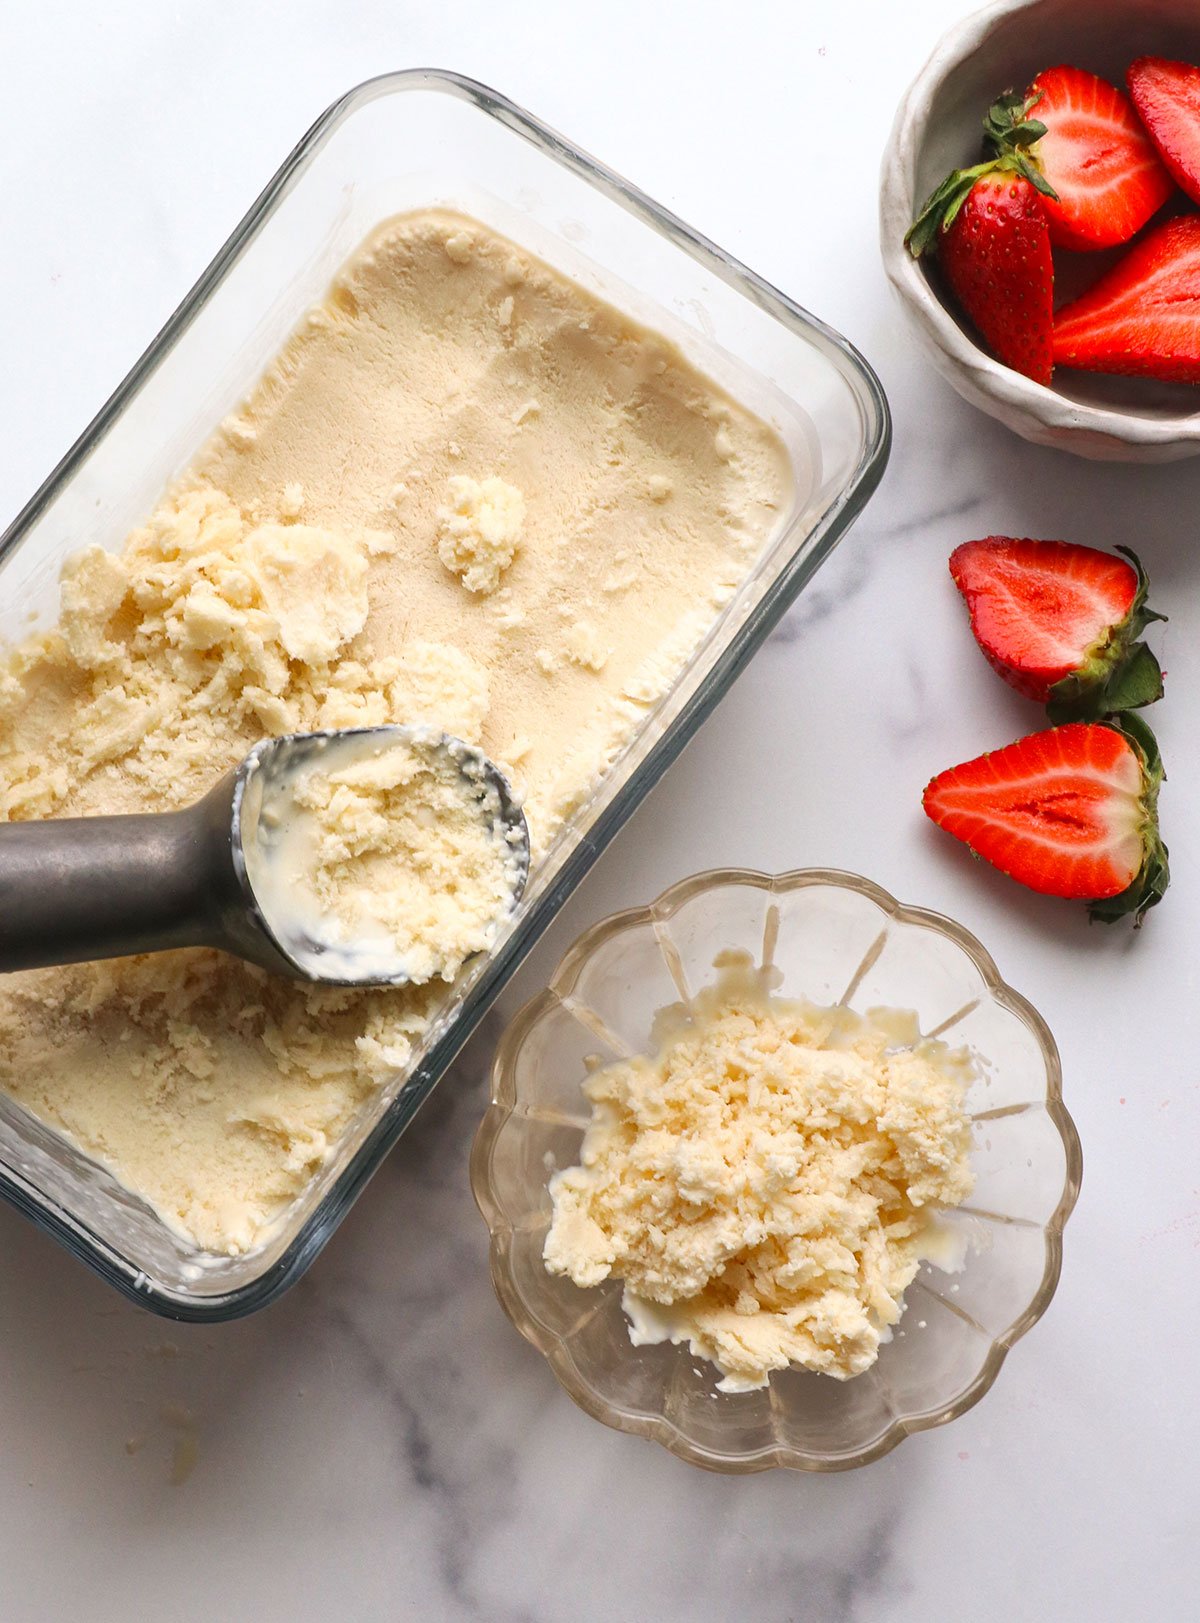
If you don’t have an ice cream maker, pour the blended cottage cheese mixture into a loaf pan and freeze it until firm, about 6 to 8 hours.
It’s important you adjust your expectations with this method, though. In this case, the ice cream becomes more like a block of ice that needs to be “shaved” to serve.
It’s delicious this way, but not very scoopable. (See the photo below.)
Even if you leave it out on the counter to thaw for up to 30 minutes, it still isn’t as easy to work with as when you make it in an ice cream machine. So, just keep that in mind.
My kids love this creamy “shaved ice” dessert!
Storage Tips
Store cottage cheese ice cream in an airtight container in the freezer for up to 3 months. When you freeze it overnight, it will become quite icy, so expect it to resemble shaved ice more than scoopable ice cream. (Like the photo above!)
Megan’s Recommendation
How to Make Cottage Cheese Ice Cream
Ingredients
- 2 cups full-fat cottage cheese
- ⅓ cup maple syrup
- 1 teaspoon vanilla extract
Instructions
- To use an ice cream maker, ensure the bowl has been frozen for at least 24 hours. Combine the cottage cheese, maple syrup, and vanilla extract in a high-speed blender. Secure the lid and blend for at least 60 seconds, or until it's very smooth with no chunks of cottage cheese remaining.
- Pour the mixture into the bowl of your ice cream maker and process for 20 to 25 minutes, or until it has a soft-serve consistency. Serve right away, or transfer the mixture to a loaf pan and freeze for one more hour. (This will make it slightly firmer and more scoopable; if you freeze it overnight, the ice cream will become icy and hard.)
- Leftover ice cream can be stored in an airtight container in the freezer for up to 3 months, but it will not be as easy to scoop as it is when you first make it. (See the photos in the post.) Its icy texture turns into more of a "creamy shaved ice," which is also delicious, but it will need to be scraped out of the pan, rather than scooped.
Notes
Nutrition
More Recipes to Try
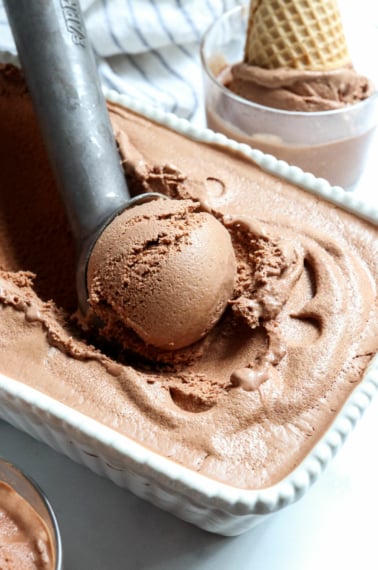
- Coconut Milk Chocolate Ice Cream
- Banana Ice Cream
- Almond Milk Ice Cream
- Fluffy Cottage Cheese Pancakes
- Cottage Cheese Dip
If you try this Cottage Cheese Ice Cream recipe, please leave a comment and star rating below, letting me know how you like it.


Could this be made with a ninja creami? Wondering how that would work bc you normally need some of your ingredients to be frozen…
Yes, you can but when I tested it you’ll need to make a slightly smaller batch to fit into the Ninja Creami pint. (I did 1.5 cups cottage cheese, 1/4 cup maple syrup, and a half teaspoon vanilla extract.) That will need to freeze for 24 hours, then you can run it in the Ninja Creami machine. It will require 2 re-spins for the creamiest results after the initial ice cream cycle.
Wow! This was AMAZING and could not have been simpler. It tasted exactly like those Sarah Lee cheesecake bites from back in the day. I made the recipe with my toddler and it was easy and fun. I cut the maple syrup down to 1/4 cup and it was plenty sweet. May cut it down to 3 Tbs next time. We already added cottage cheese to the list to make it again ASAP!
Easy to make and very creamy! Add your favorite fruit or topping and its cheesecake in a bowl!
Any update on using the Ninja?!? I would LOVE to try this!!
It’s in the freezer right now… I’ll test it tomorrow!
Yay!!! I cannot wait to hear how it goes!!
Update on the Ninja Creami: I made the batch smaller, so it would fit under the “max fill” line. So I used 1 1/2 cups cottage cheese, 1/4 cup maple, and a 1/2 teaspoon vanilla extract. I also blended in a 1/2 cup of fresh strawberries, but I think next time I would use more or leave them out. (Not enough strawberry flavor from that amount.) After freezing for 24 hours, I ran it on the “ice cream” setting first and the texture was chalky and fluffy. Then I ran it on the “re-spin” setting two more times. That created a very creamy, scoopable ice cream. So, feel free to use that if you prefer!
Yay!! Thank you so much!! I am trying it tonight!! 🩵