This post may contain affiliate links. Please read my disclosure and privacy policy.

Traditional cake pops are made by mixing baked cake and frosting. This is ideal if you have a leftover birthday cake on hand, but it’s a pain if you have to take the extra step of baking a cake first.
That’s why you’ll love these healthy cake pops. There’s no cooking involved!
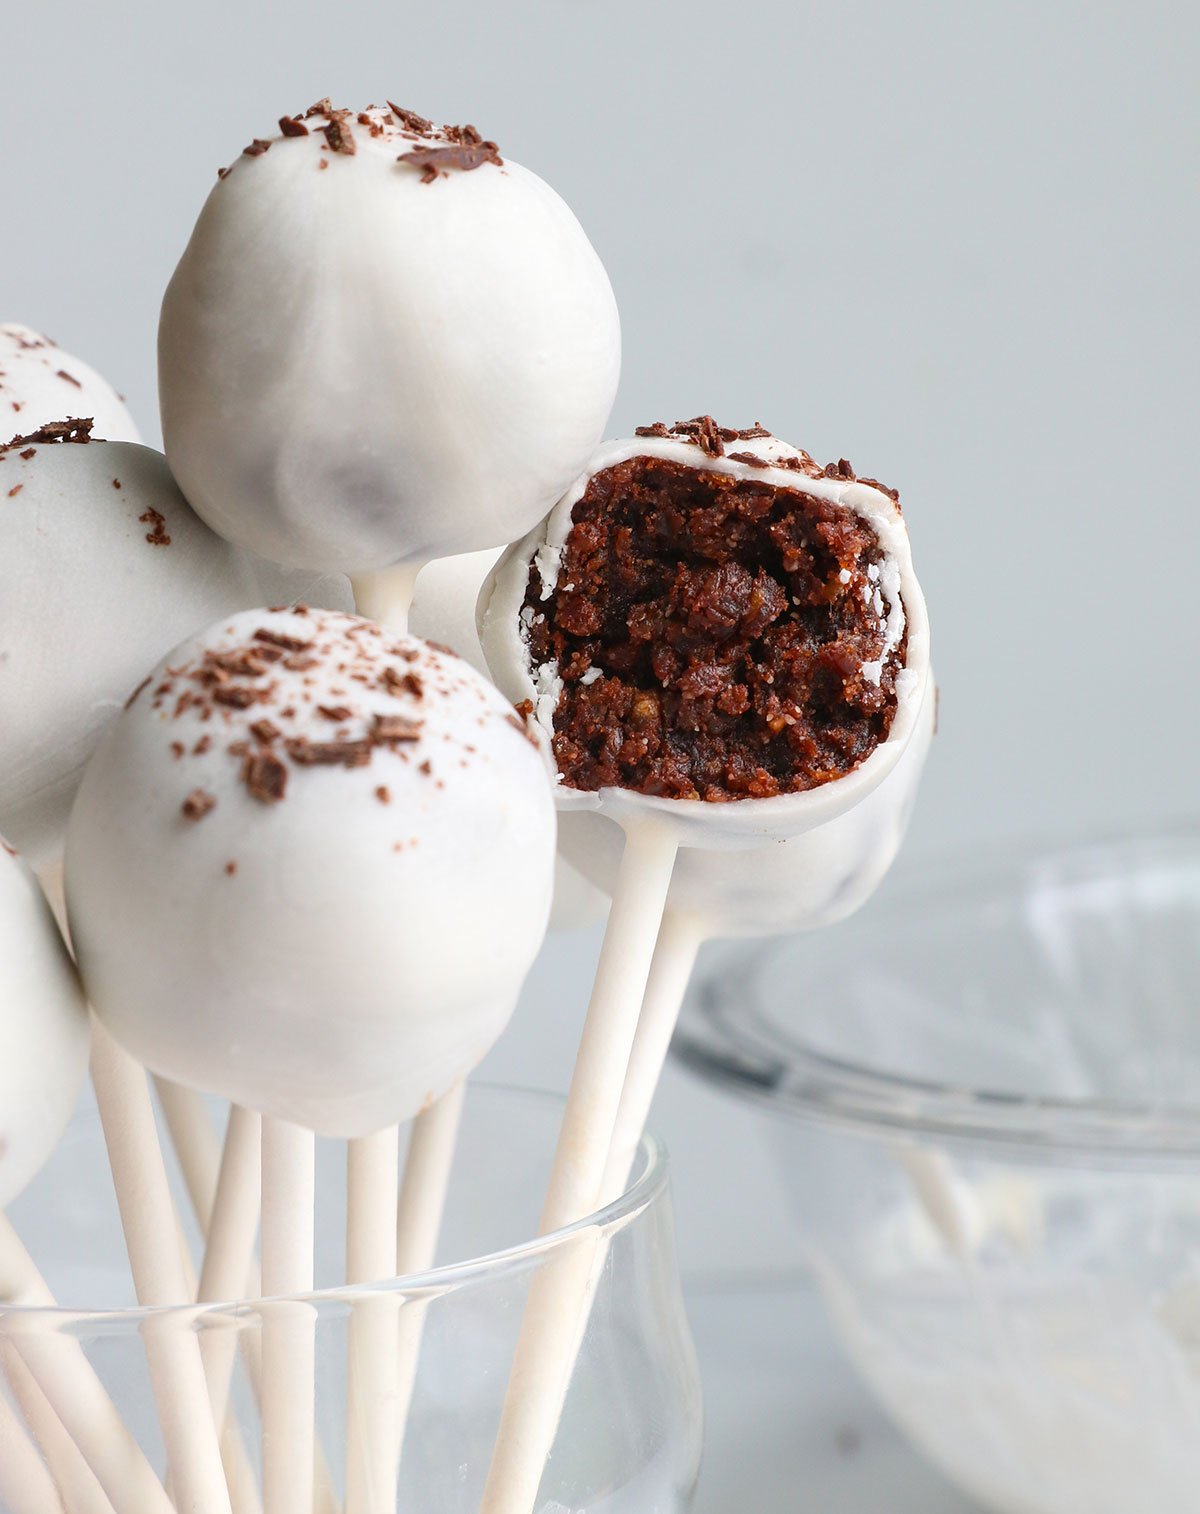
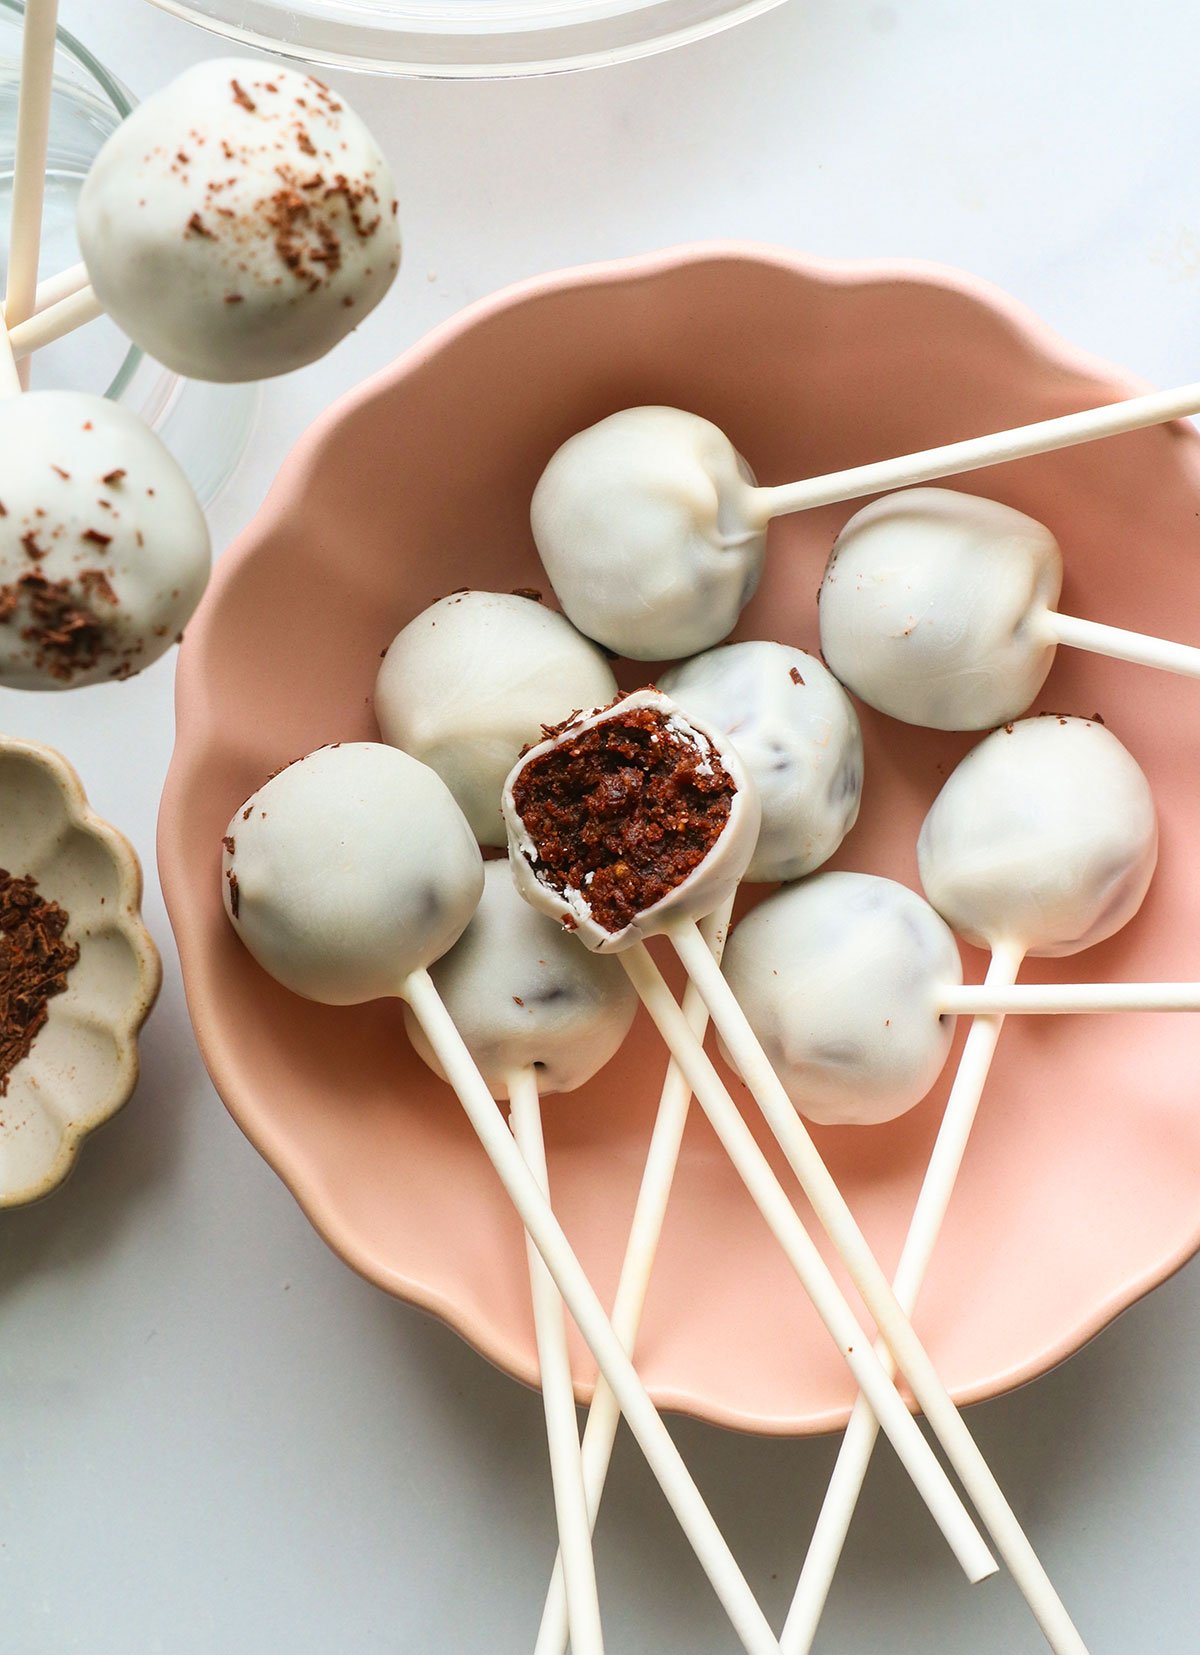
This recipe features a fruit-sweetened chocolate center and a simple white chocolate coating. It gives you a similar look to the Starbucks version, with less added oil and sugar. I love how they are perfectly portioned, too!
Healthy Cake Pop Ingredients
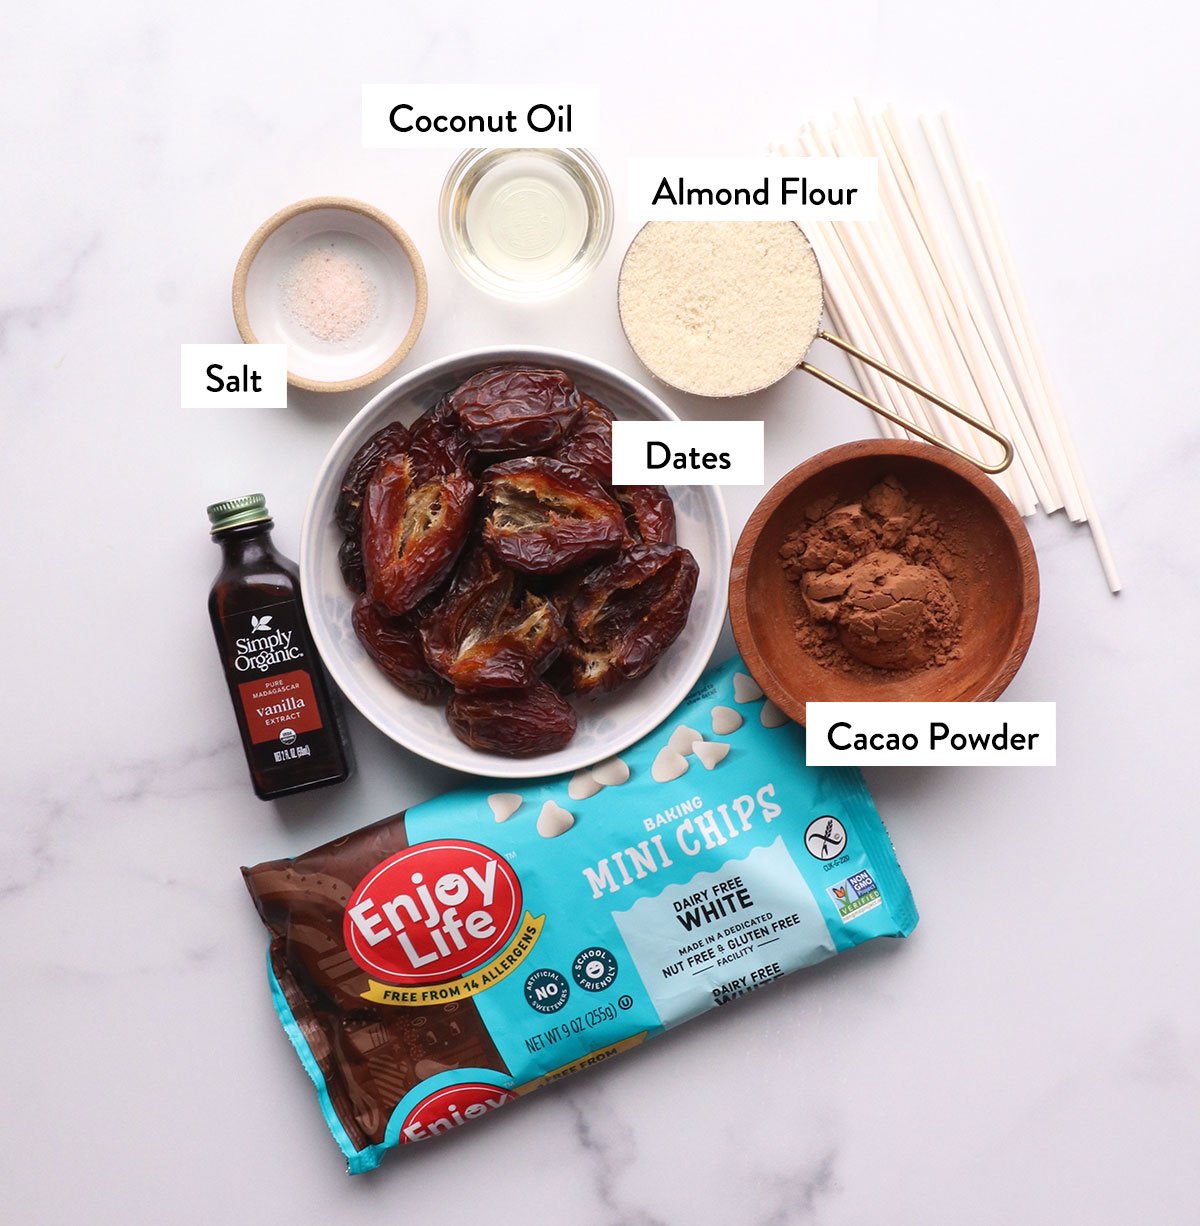
Here’s what you’ll need:
- Medjool dates. These act as the sweetener and binder for the chocolate centers. Because dates are dark in color, they work best when you want to make a chocolate-flavored pop.
- Almond flour. Made from 100% ground almonds, this flour is a nourishing option that’s gluten-free. It helps bulk up the chocolate center, but you can swap this for another nut if needed. (1/2 cup almond flour = 1 cup whole nuts.)
- Cacao powder. I use raw cacao powder because it’s less processed than cocoa powder, but either option will work in this recipe. Since it’s no-bake, you can taste the dough as you go!
- Coconut oil. Coconut oil is solid when chilled, making it ideal for thickening recipes while also providing a melt-in-your-mouth texture. (Because it literally will melt in your mouth!) Use refined or expeller-pressed coconut oil for zero coconut flavor in your recipe.
- Vanilla + Salt. These boost the flavor in the chocolate dough balls, but the vanilla won’t be missed if you don’t have it on hand. I don’t recommend omitting the salt, as desserts really need salt for the best flavor.
- White chocolate chips. I use Enjoy Life brand because it’s free from many allergens, but you can use regular chocolate chips or any other option for the outer coating. (I add a little chopped dark chocolate on top at the end, to mimic the Starbucks cookies & cream flavor.)
How to Make Healthy Cake Pops
Step 1:
Add one tightly packed cup of pitted Medjool dates to the bowl of a large food processor with an “S” blade. (If you prefer to weigh them, this is 8 ounces without the pits.)
Next, add a half cup of blanched almond flour, 3 tablespoons of cacao powder, a half teaspoon of vanilla extract (optional), a tablespoon of melted coconut oil, and a pinch of salt.
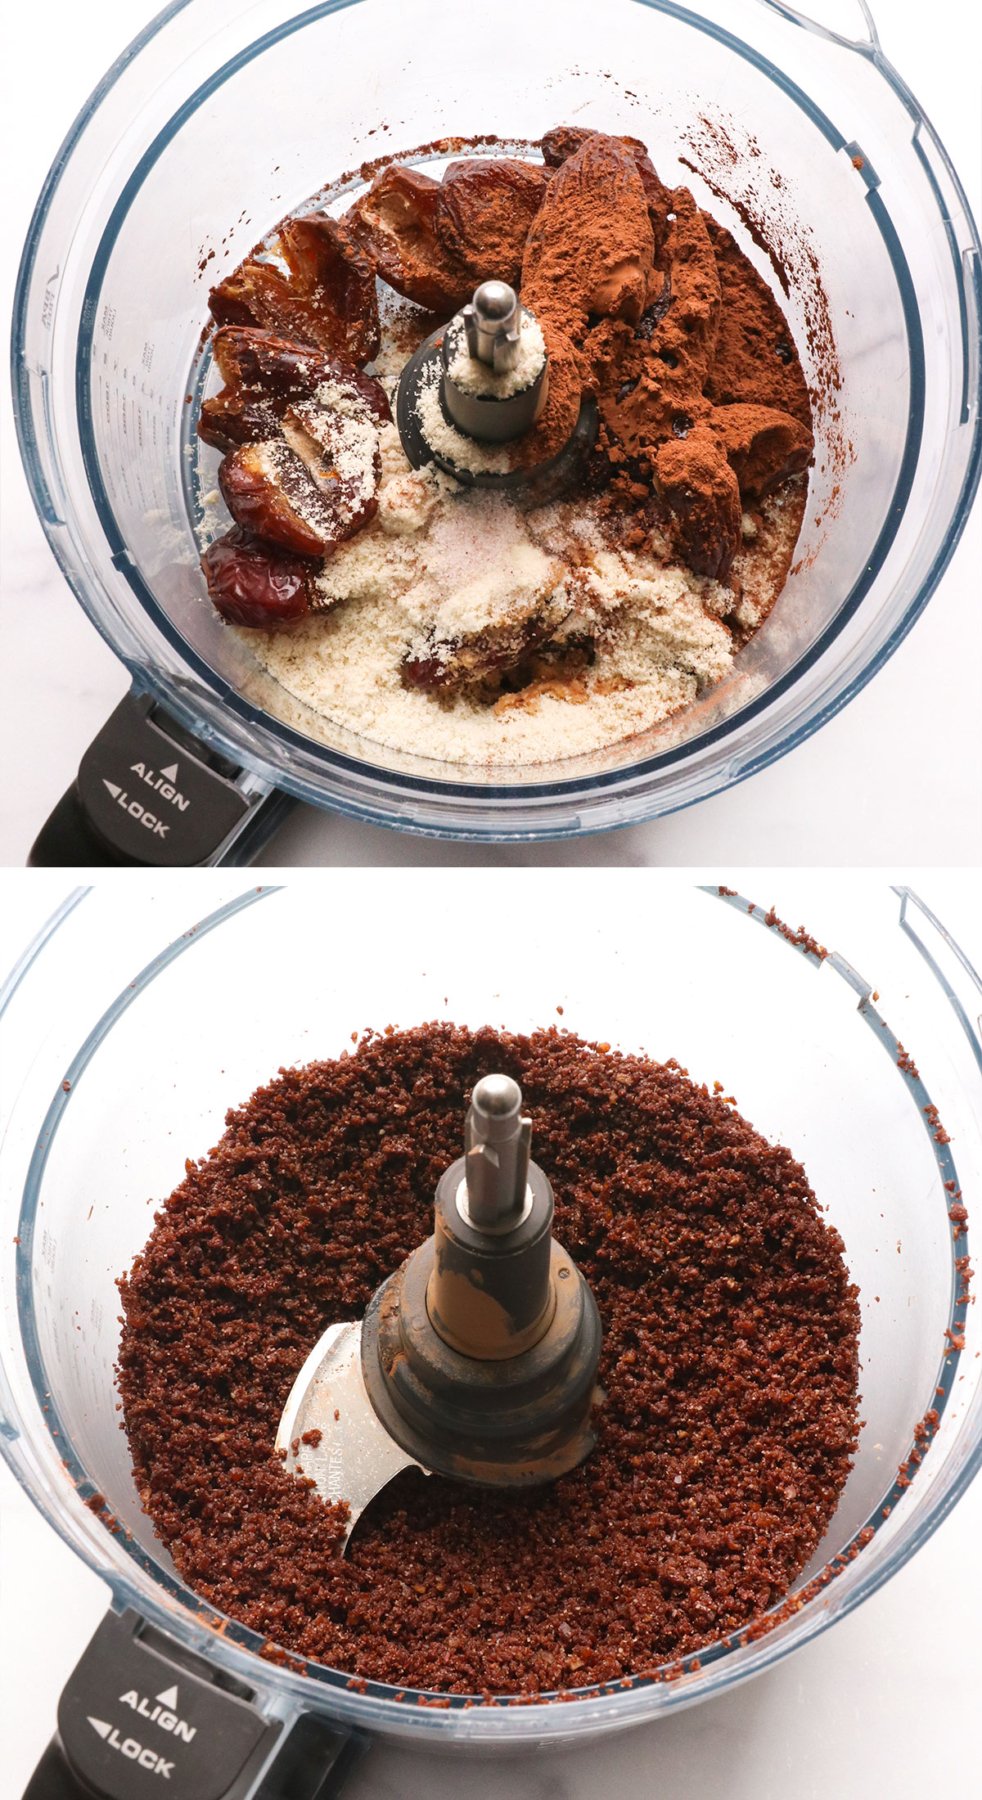
Step 2:
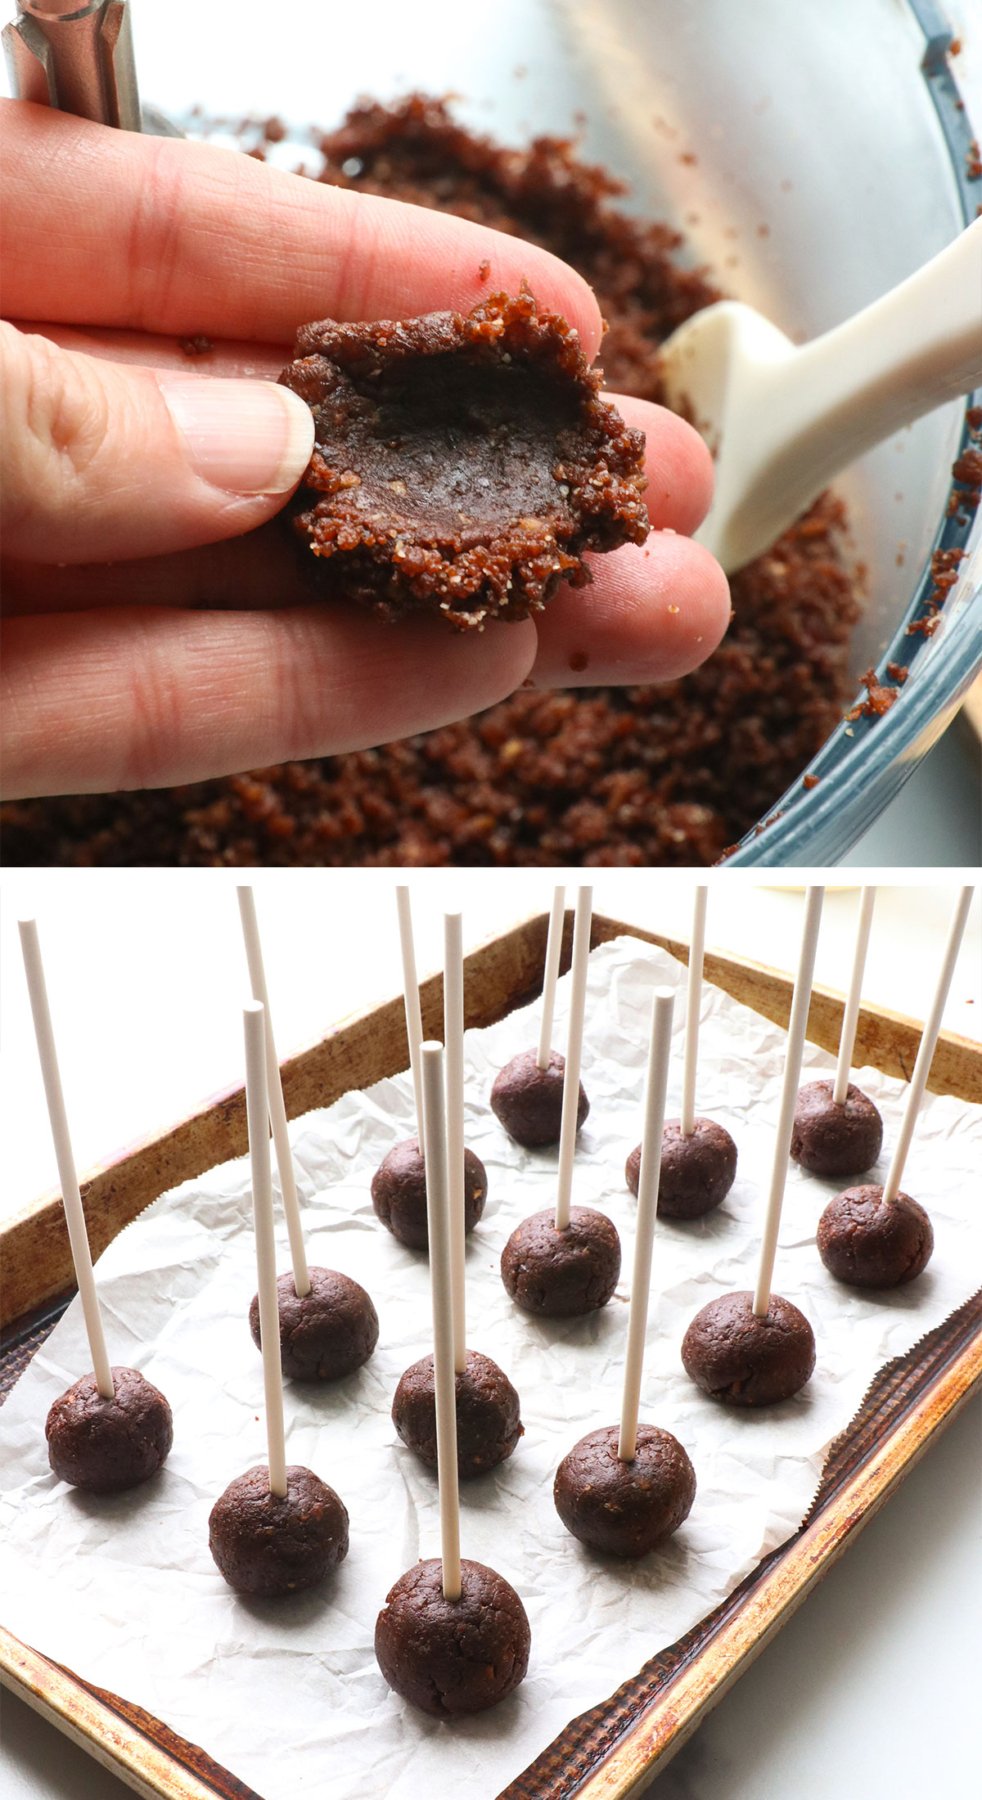
Secure the lid on the food processor and process until the mixture resembles coarse crumbs. Pinch the mixture between your fingers; when it holds its shape, you’ll know it’s ready to roll!
Use a cookie scoop (about 1 1/2 tablespoons) to scoop the dough onto a parchment paper-lined baking sheet. Repeat until you’ve made roughly 12 to 13 cake balls.
Step 3:
Roll the mounds between your hands until they look smooth, then press a cake pop stick into the center of each one. Insert the stick nearly through the whole thing so the ball won’t fall off later.
Place the cake balls in the freezer to firm up for at least 20 minutes. This will make dipping easier.
To melt the chocolate, create a double boiler by filling a small saucepan with an inch of water. Bring the water to a boil on the stovetop, then fit a heat-safe bowl snugly over the top of the pan. Add the white chocolate chips and stir until they look smooth and melted.
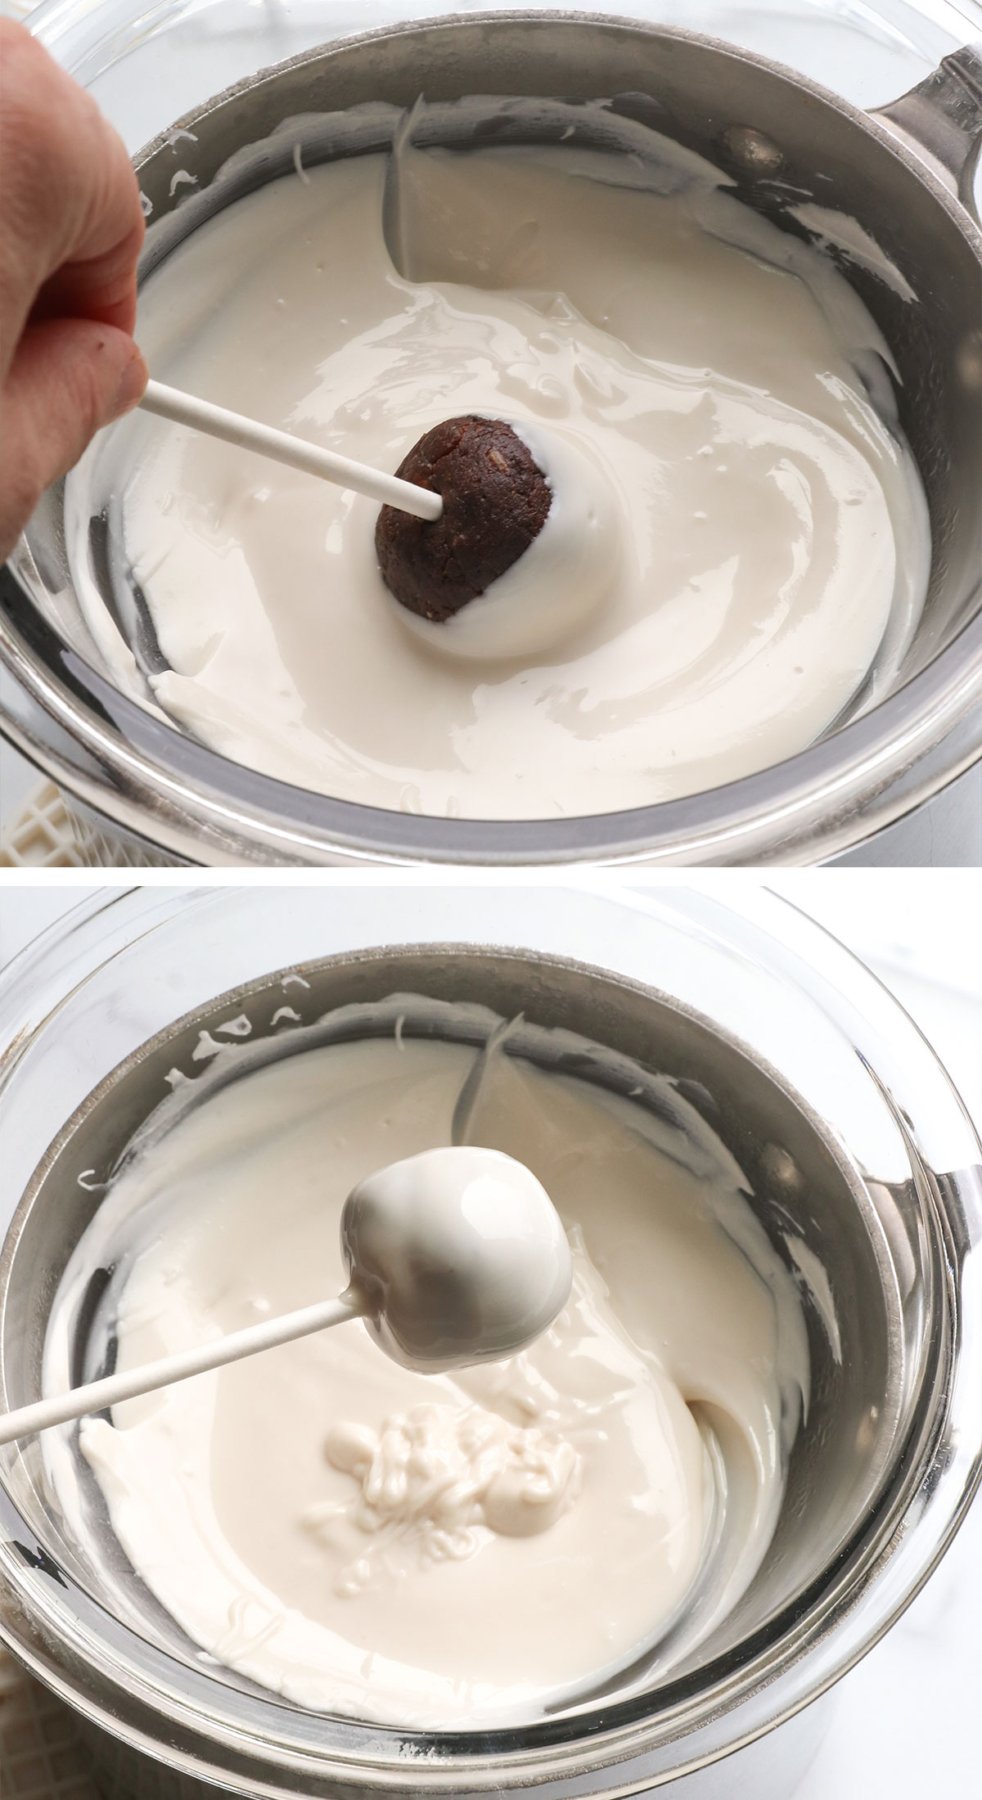
Step 4:
Remove the cake pops from the freezer and carefully dip each one into the melted white chocolate coating. If needed, use a spoon to help drizzle the chocolate, and let any excess coating drip back into the bowl.
Place the cake pop in a cake pop stand or a sturdy cup to keep it upright as the chocolate cools and hardens. If you need to lay it on a plate, that’s okay, too—the side touching the plate will just be flat.
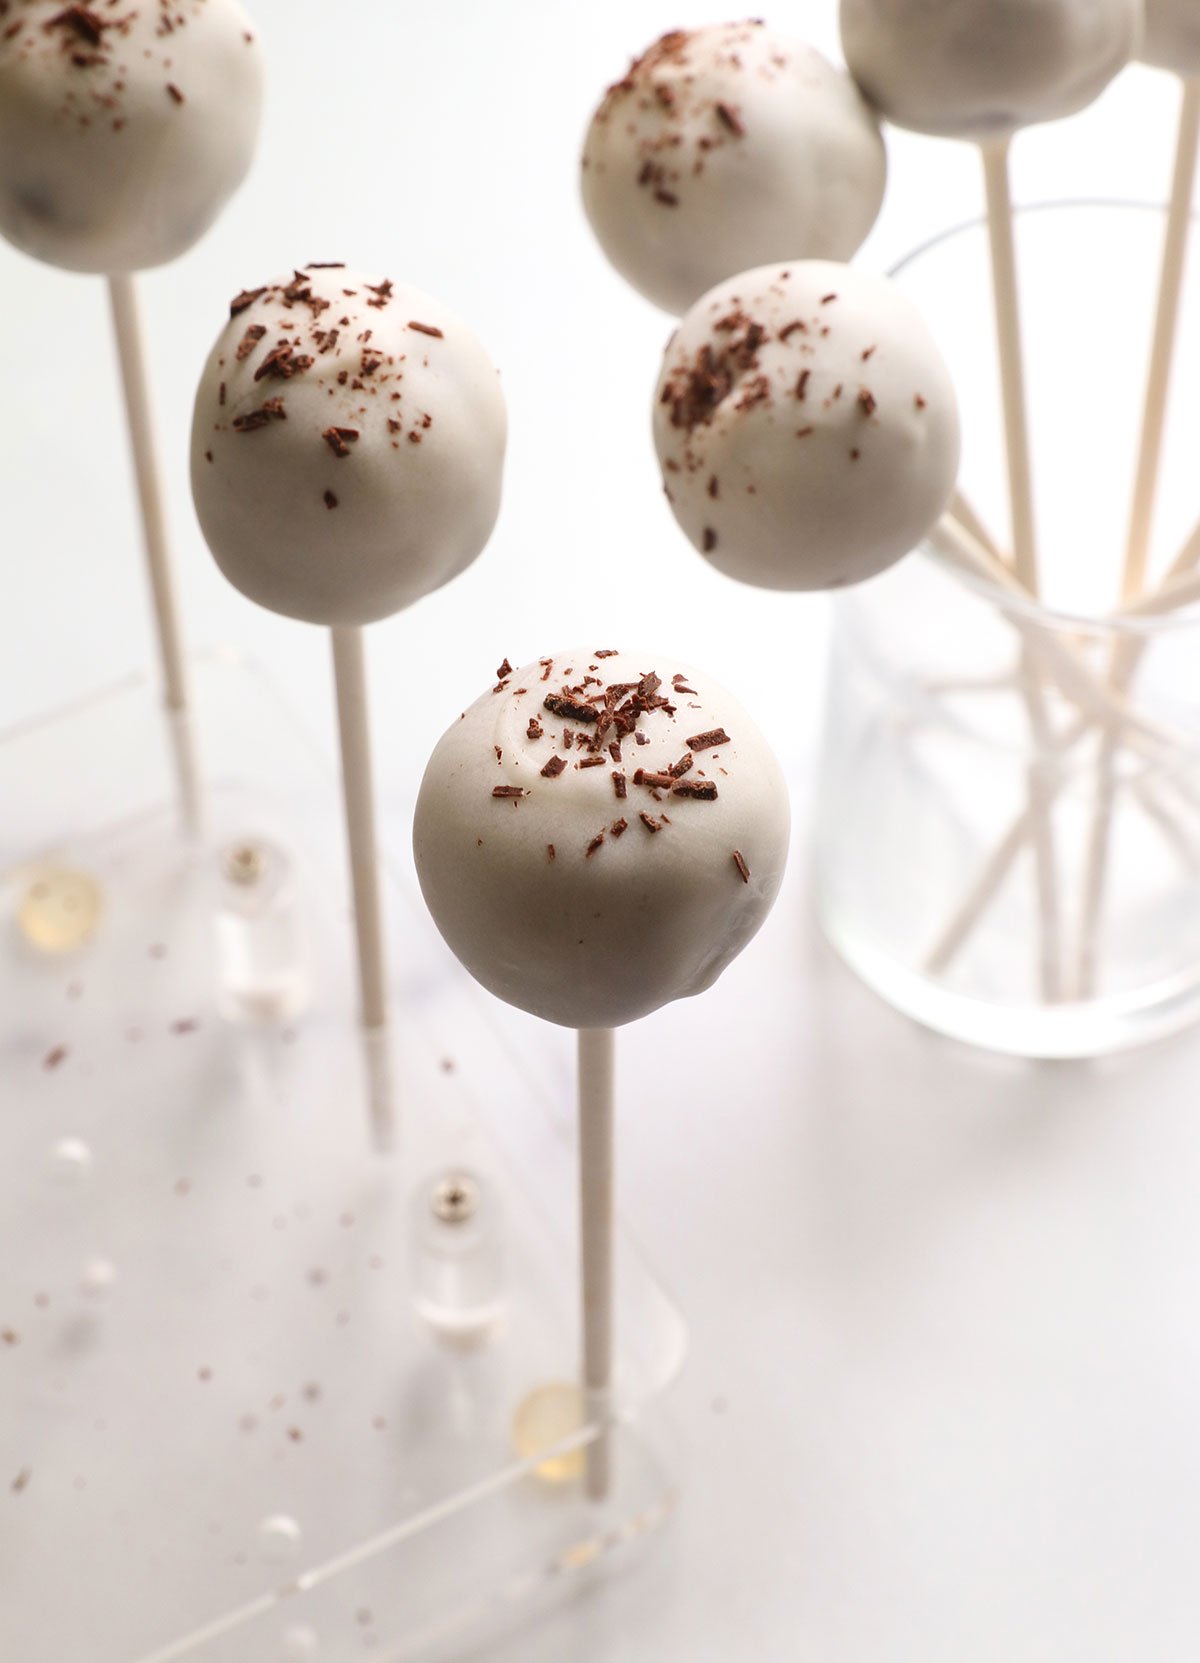
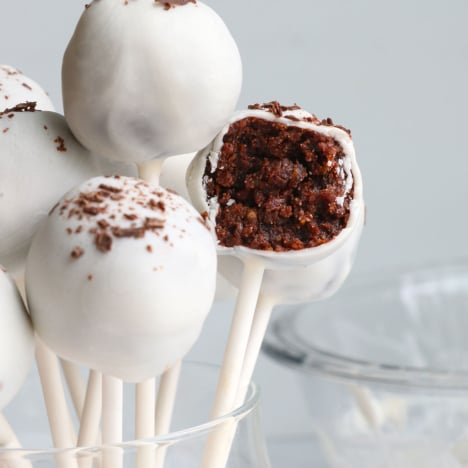
Sprinkle some shaved chocolate on top, if desired. Once the chocolate is firm, these cake pops are ready to enjoy. Serve them at room temperature for the softest texture; they will be more firm when chilled.
Storage Tip
You can store leftover cake pops in an airtight container in the fridge for up to 2 weeks or frozen for up to 3 months. For the best consistency, let them thaw to room temperature before serving again.
Ingredients
- 1 cup Medjool dates , pitted
- ½ cup blanched almond flour
- 3 tablespoons cacao powder , or more to taste
- ½ teaspoon vanilla extract (optional)
- 1 tablespoons melted coconut oil
- ⅛ teaspoon fine sea salt
- ¾ cup white chocolate chips (see notes)
Instructions
- Add the pitted Medjool dates, almond flour, cacao powder, vanilla extract (if using), coconut oil, and salt to the bowl of a large food processor fitted with an S blade. Secure the lid and process until crumbly.
- You'll know the mixture is ready when you press it between your fingers, and it holds its shape. Taste and adjust the flavoring as needed. You can add a tablespoon of cacao powder for more chocolate flavor or add a splash of maple syrup to make them taste sweeter. (This will also make them slightly stickier to work with.)
- Use a tablespoon or cookie scoop to scoop the dough into your hands. Roll them into balls and place them on a small baking sheet lined with parchment paper. Repeat until you've made 12 to 13 balls. Insert a popsicle stick into each ball, then lay them flat on the plan so you can place them in the freezer to chill.
- Next, add the white chocolate chips to a heat-safe bowl. Fill a small saucepan with an inch of water and bring it to a boil on the stovetop. Fit the bowl of chocolate chips snugly over the pan of water, so the steam can gently melt the chocolate. Stir until smooth.
- Remove the cake pops from the freezer and dip them each into the melted white chocolate. (Use a spoon to distribute the melted chocolate, if needed.) Hold the cake pop upside down to let the excess chocolate drip back into the bowl. Sprinkle some shaved dark chocolate on top as a decoration while the white chocolate is still warm. Set the cake pop upright in a glass or cake pop stand until the chocolate firms up. (This process is fast if the cake pops are cold.)
- Repeat until all of the cake pops are coated. Once the chocolate is solid, they are ready to enjoy! They have the best texture when served at room temperature. You can store these at room temperature for up to 5 days, but they will last up to 2 weeks in an airtight container in the fridge. (Or for up to 3 months when stored in the freezer.)
Notes
Nutrition
More Recipes to Try
If you try this cake pop recipe, please leave a comment and star rating below to let me know how you like it.


Could you possibly make the coating with cacao butter (like in your recipe for peppermint fudge),,,so it could be naturally sweetened,,,?