This post may contain affiliate links. Please read my disclosure and privacy policy.
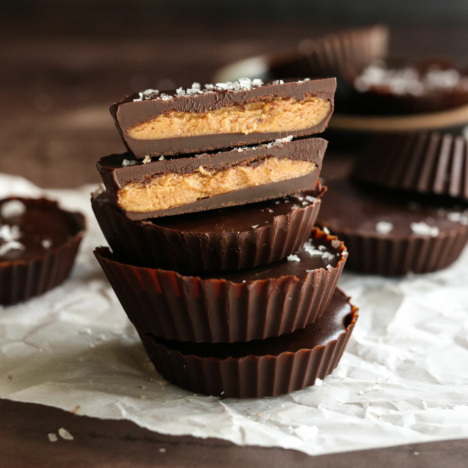
Homemade peanut butter cups are made with just 4 simple ingredients! You can assemble them in only a few minutes, for an easy homemade candy.

Why You’ll Love Them
They are easy to make. Unlike homemade butterfingers, which require some patience, this peanut butter cup recipe has just 3 simple steps. You’ll melt the chocolate, mix together the peanut butter layer, and then assemble them all together! The whole process can be done in just about 20 minutes.
You can control the sugar content. This recipe calls for dark chocolate chips for convenience, but you can decide how sweet the chocolate is. Choose 70% dark chocolate for a lightly sweet peanut butter cup, or try something darker for even less added sugar. You can also make your own chocolate shell using the tips below, for a naturally sweetened version. If you prefer milk chocolate or semi-sweet chocolate chips, you can use those, too.
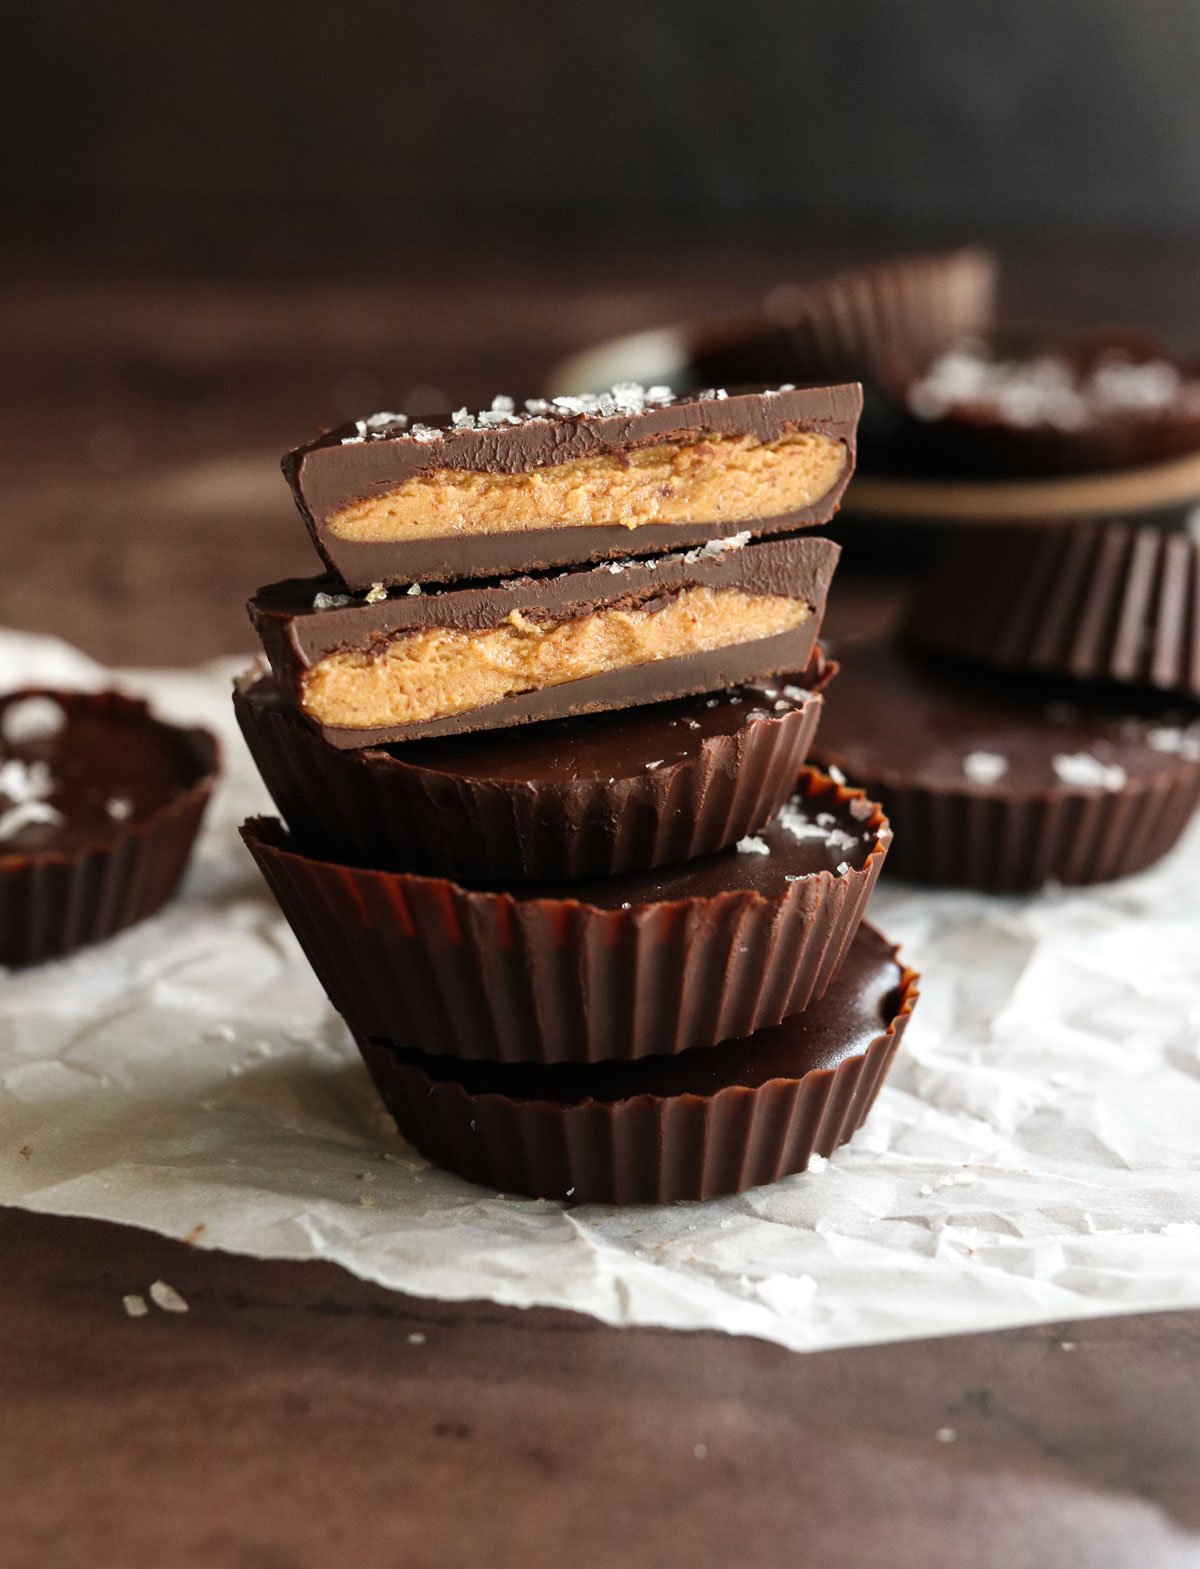
They are delicious. The natural peanut butter in this recipe makes the flavor pop even more than the store-bought variety! Try adding flaky sea salt on top, for a contrast of sweet and salty flavors.
They’re a bite-sized treat. If you love having something easy to grab from the freezer, this is an easy dessert that will keep well for up to 3 months. (Keep them in an airtight container in the freezer for the best flavor.)
Not a fan of peanut butter? You can also make almond butter cups, or use any other nut butter you like, such as cashew butter, or even sunflower seed butter for a nut-free option.
Ingredients You’ll Need
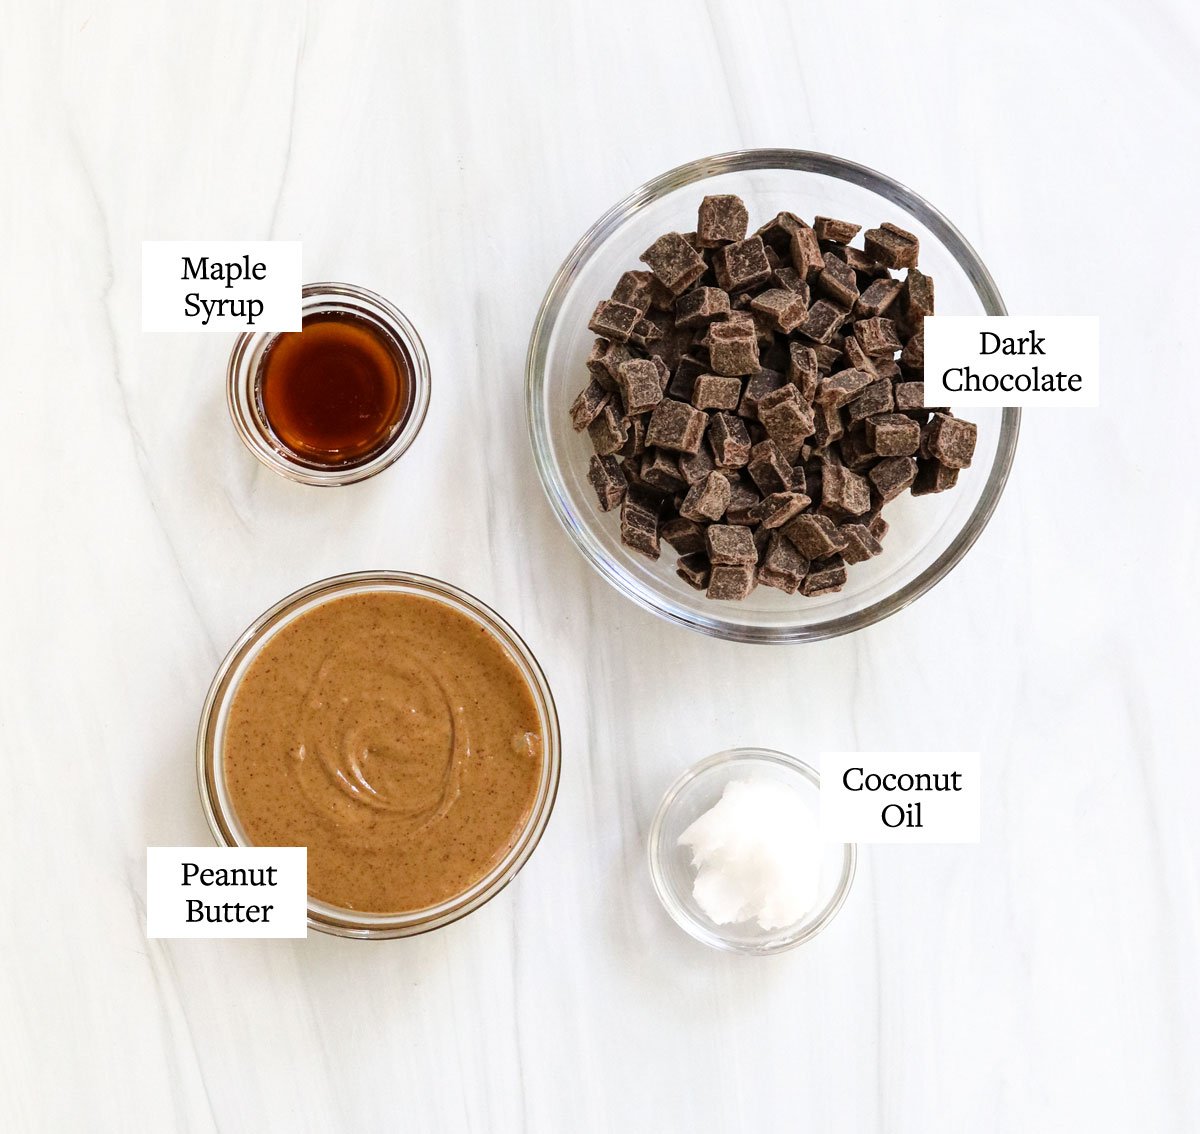
What do you need to make homemade peanut butter cups?
- Chocolate chips
- Peanut butter
- Coconut oil
- Maple syrup
That’s it! Be sure to use refined coconut oil (it will say expeller pressed on the label) if you’d like zero added coconut flavor.
Instead of using powdered sugar, the peanut butter layer is thickened up with a splash of maple syrup. This makes them a little less sweet than Reese’s peanut butter cups, but you may prefer them that way.
Note: If you prefer to make your own chocolate shell, you can skip the chocolate chips and make your own by mixing together a 1/4 cup each of melted coconut oil, cacao powder, and maple syrup. Keep the mixture warm so that it will be easy to pour into layers.
How to Make Peanut Butter Cups
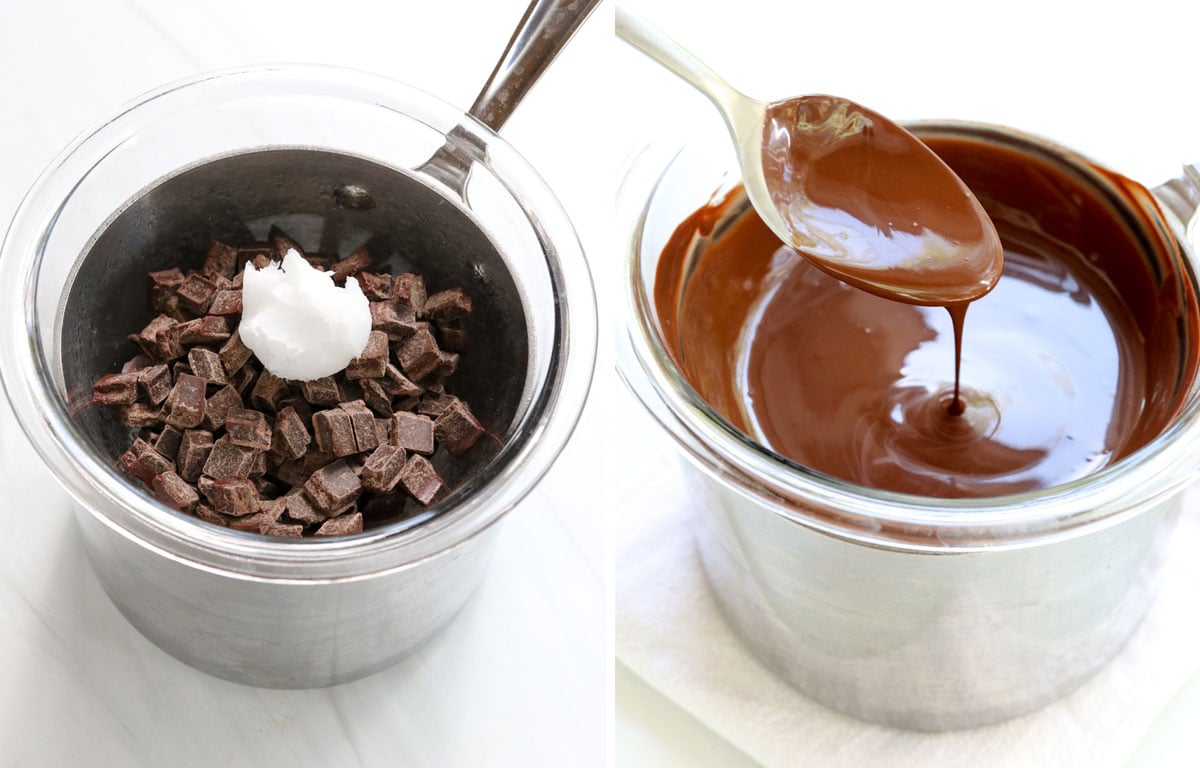
1. Melt the chocolate.
Create a double boiler by filling a small saucepan with 1-inch of water. Bring the water to a boil, then add the chocolate chips and the teaspoon of coconut oil to a bowl that will cover the top of the pot. The steam from the boiling water will gently melt the chocolate. Stir well, until the chocolate is smooth.
Alternatively, you can melt the chocolate in a microwave, stirring after each 30 second interval.
2. Add the first layer of chocolate.
Line a muffin tin with 12 silicone or parchment paper liners, then use a teaspoon to scoop the melted chocolate into the bottom of each one. Tilt the pan so the chocolate will run up the sides of the muffin cups slightly, creating the edges of your peanut butter cups.
Want to save this for later?
Place the pan in the freezer for 5 to 10 minutes, until the chocolate is solid.

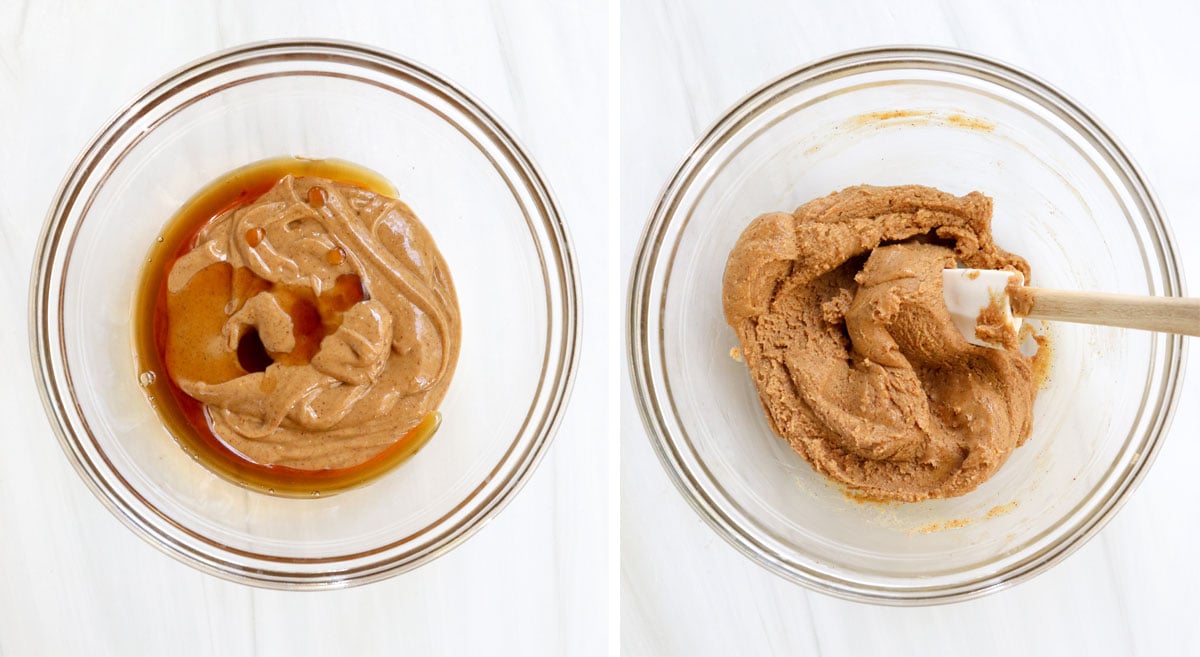
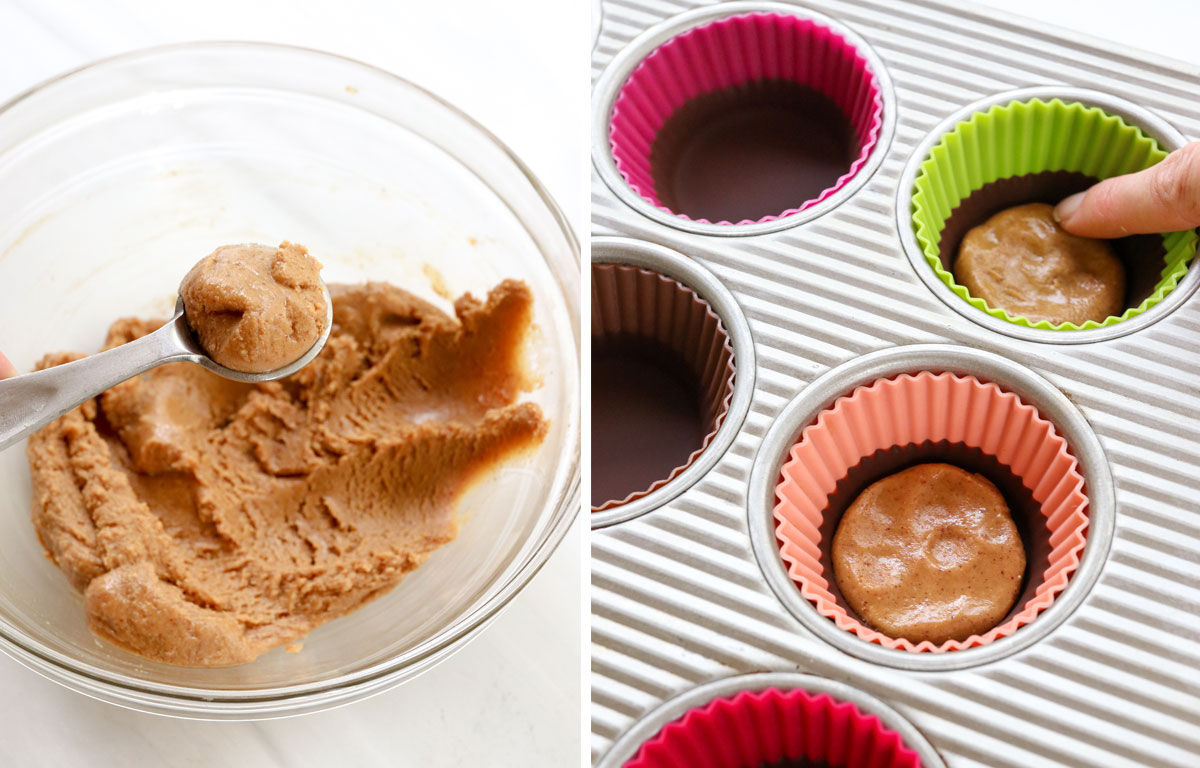
3. Mix the peanut butter filling.
In a small bowl, combine the peanut butter and maple syrup. Mix well, until the peanut butter thickens up, with a play-doh like consistency.
Remove the muffin pan of chocolate from the freezer, and add a slightly heaping teaspoon of the peanut butter mixture into each muffin cup.
Press the peanut butter into a flat layer on top of the chocolate, leaving a little room around the edges for more chocolate. (This will make them more sturdy later.)
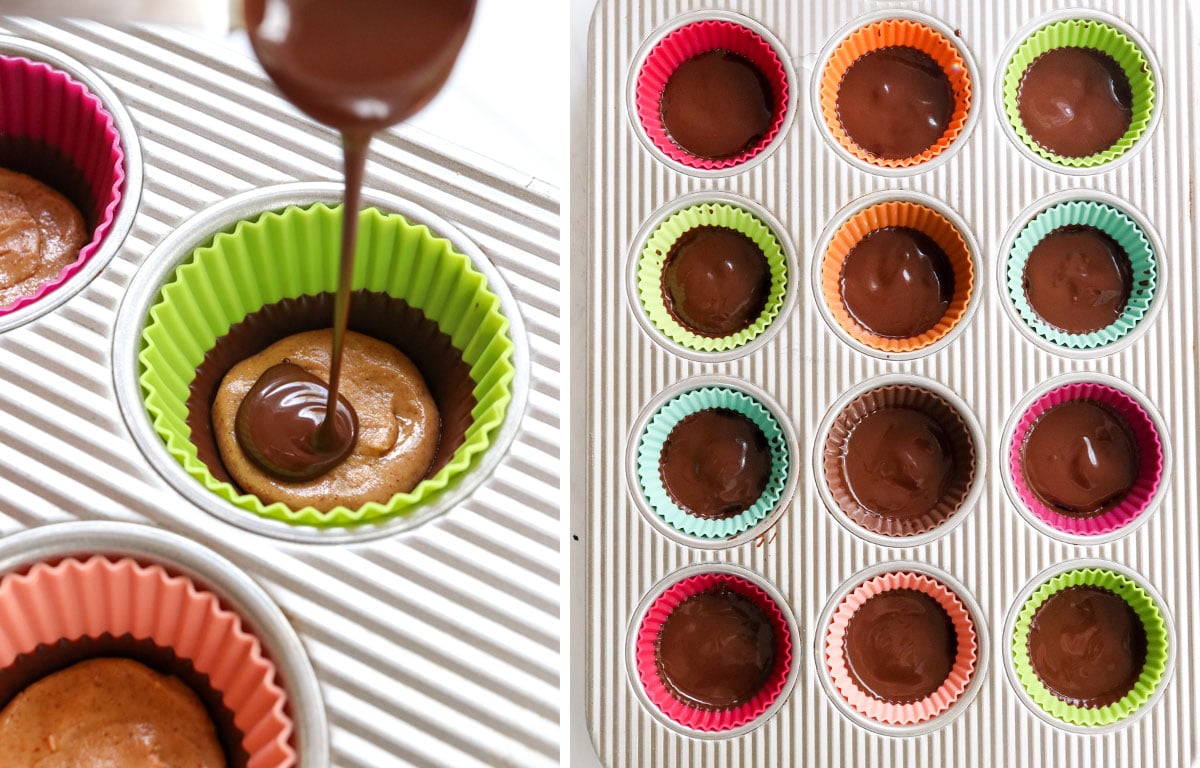
4. Add the final layer.
Once the peanut butter has been pressed into all of the cups, add another teaspoon of melted chocolate on top. Use the back of the spoon to spread it out, until the peanut butter is totally covered, and repeat with the remaining peanut butter cups.
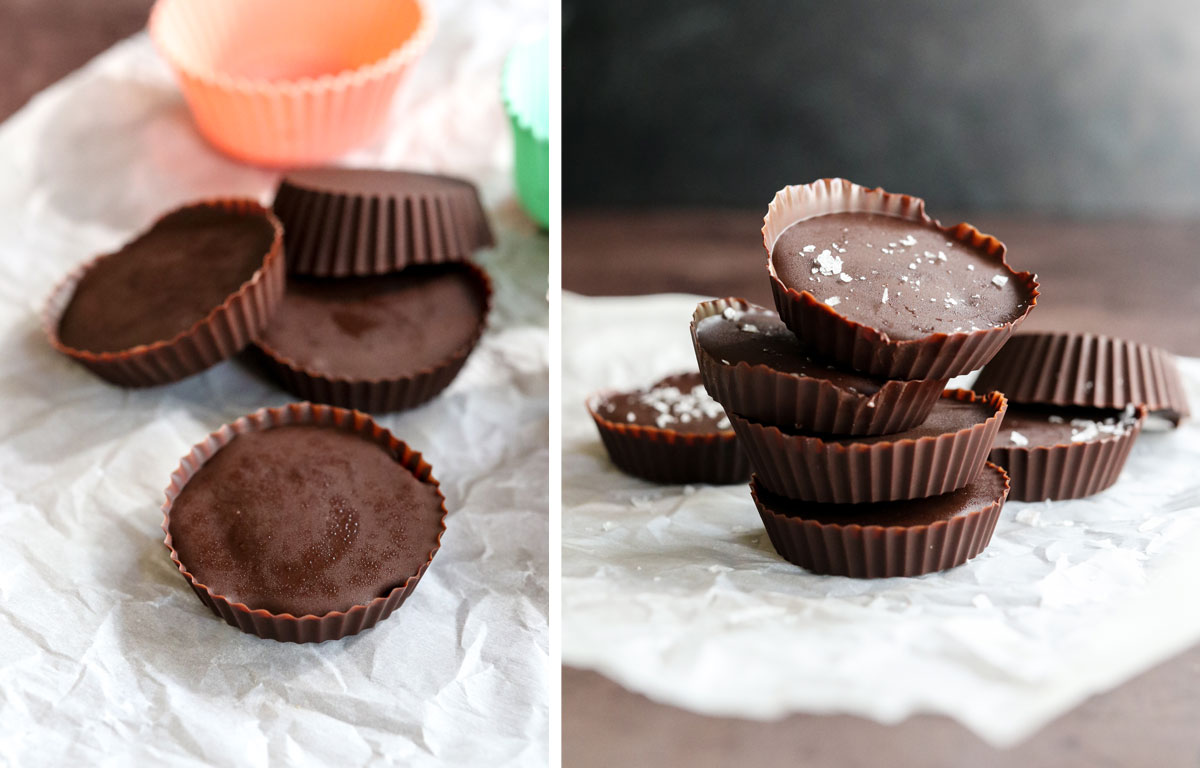
Add a sprinkle of flaky sea salt on top, if you like, then place the muffin pan in the freezer to set until the chocolate is firm. The chocolate will most likely be solid in 10 minutes, but the peanut butter cups will be even sturdier if you leave them in the freezer for an hour, to help the peanut butter layer firm up, too.
Serve these homemade peanut butter cups straight from the fridge or freezer for the best texture. They will melt relatively quickly if you leave them out at room temperature for too long.
Common Questions & Substitutions
How long will these peanut butter cups last? You can store this homemade candy in an airtight container in the fridge for up to 1 month, or in the freezer for up to 3 months.
Are these vegan? If you use dairy-free chocolate chips, this recipe is vegan friendly!
Can I make them mini? If you prefer mini peanut butter cups, use a mini muffin pan instead. You also need mini cupcake liners, to help them easily release from the pan.
Can I use another sweetener? If you don’t need a vegan recipe, you can swap the maple syrup for honey, instead. In that case, you might want to start with just 2 teaspoons of honey, since it has a stronger flavor than maple syrup.
Ingredients
- 1 cup dark chocolate chips (see notes)
- 1 teaspoon coconut oil (expeller pressed for no flavor)
- ½ cup peanut butter
- 1 tablespoon maple syrup
- flaky sea salt (optional topping)
Instructions
- Create a double boiler by adding 1-inch of water to a small saucepan. Bring the water to a boil over high heat, then cover the opening of the pot with a heat-safe bowl. Add in the chocolate chips and coconut oil, and let the steam from the boiling water gently melt the chocolate, stirring often. (Alternatively you can use a microwave to melt the chocolate, stirring after 30 second intervals.)
- When the chocolate is melted, line a 12-cup muffin pan with silicone or parchment paper liners. Add a teaspoon of melted chocolate into the bottom of each liner, then tilt the pan so the chocolate can run up the sides of each cupcake liner, creating an edge for the peanut butter cups. Place the pan on a flat surface in the freezer for 5 minutes, or until the chocolate looks solid.
- While the chocolate is in the freezer, stir together the peanut butter and maple syrup in a small bowl. The maple syrup should make the peanut butter thicker, with almost a play-doh consistency.
- Remove the muffin pan from the freezer, and scoop the peanut butter filling using a heaping teaspoon. Drop the peanut butter filling into each muffin cup, then flatten it out to make the peanut butter layer. Leave a little room around the edges, where chocolate can go to hold the peanut butter layer in the center.
- Add a final teaspoon of melted chocolate to each muffin cup, and use the back of the spoon to spread it out evenly. Add a sprinkle of flaky sea salt on top of each cup, if you'd like. Place the peanut butter cups back in the freezer until the chocolate is firm, then they are ready to serve.
- These homemade peanut butter cups should be served chilled, directly from the fridge or freezer, for the best texture. They will melt if left at room temperature for too long. Store them in an airtight container in the fridge for up to 1 month, or in the freezer for up to 3 months.
Notes
Nutrition
If you try this homemade peanut butter cup recipe, please leave a comment and star rating below letting me know how you like it!


These are delicious and so easy to make
I made these today and they’re amazing! I made 6 big ones as my muffin tin was quite large. I will definitely make them again
So excited to find this recipe again! I will be making a double batch tomorrow. My husband and son love them, too, and we all think these taste better than the store bought originals!
Can I use standard size silicone baking cups for these and would i have to grease them;if I use butter in the cups instead of coconut oil? thank you