
This post may contain affiliate links. Please read my disclosure and privacy policy.
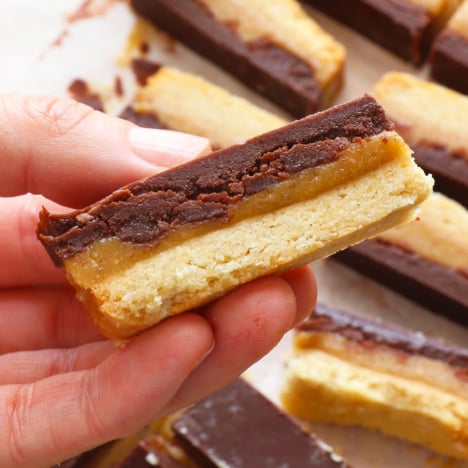
If you’ve ever tried my healthy Snickers bars, you know that a homemade candy bar can taste even better than a store-bought one. That’s why I spent weeks trying to figure out a crispy cookie layer and a naturally sweet caramel layer to recreate Twix bars at home.
I’m pretty confident that you’ll love the results, because this batch disappeared in less than 24 hours in my house. (Especially once I moved them to the freezer– everything is better that way!)
I’ve also kept this recipe as easy as possible, because no one wants to spend their afternoon dunking an entire candy bar in melted chocolate and then cleaning out the excess that doesn’t get used. It’s such a pain.
That’s why this recipe only calls for a quick top layer of homemde chocolate. You’ll thank me once you try it this way, because it’s not only easy, but it’s also perfectly delicious!
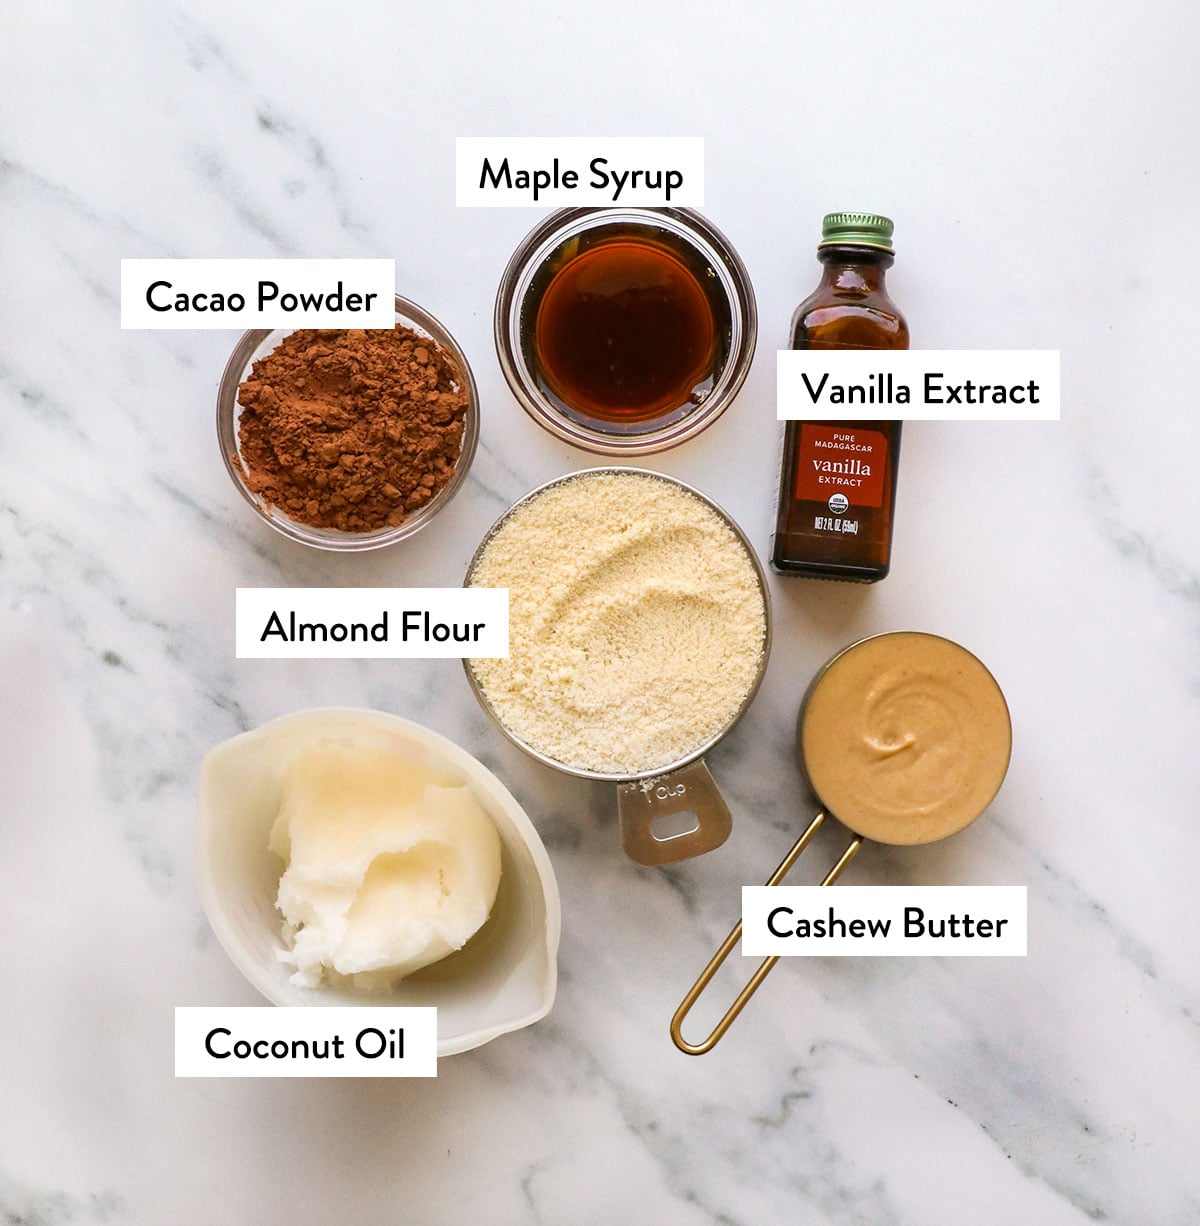
Healthy Twix Bar Ingredients
- Blanched Almond Flour. This gluten-free flour makes the easiest, crispy shortbread for the base. I recommend shopping for blanched almond flour (which has no brown flecks from the almond skins) for the crispiest results.
- Coconut Oil. This ingredient helps thicken the chocolate layer and keeps the shortbread cookie crust dairy-free. If you’d rather use regular butter, that will work here, too. Be sure to buy refined or expeller-pressed coconut oil if you want these bars to have zero coconut flavor. Virgin coconut oil will add a noticeable coconut taste.
- Maple Syrup. This is my favorite natural sweetener because it’s vegan-friendly and easy to mix, since it’s not as thick and sticky as honey. It’s the sweetener in all 3 layers, to keep the ingredient list as streamlined as possible.
- Cashew Butter. When working on the caramel layer, I tried a few different options, but cashew butter was the clear winner when it came to taste-testing. I used the one from Whole Foods 365 brand, which has a runny consistency, but any other brand should work similarly. Or you can make homemade cashew butter in less than 10 minutes if you prefer.
- Cacao Powder. I always keep raw cacao powder in my pantry, but regular cocoa powder should work for this recipe, too. This helps create the topping without relying on chocolate chips, so these bars are 100% refined sugar-free.
How to Make Healthy Twix Bars
Step 1:
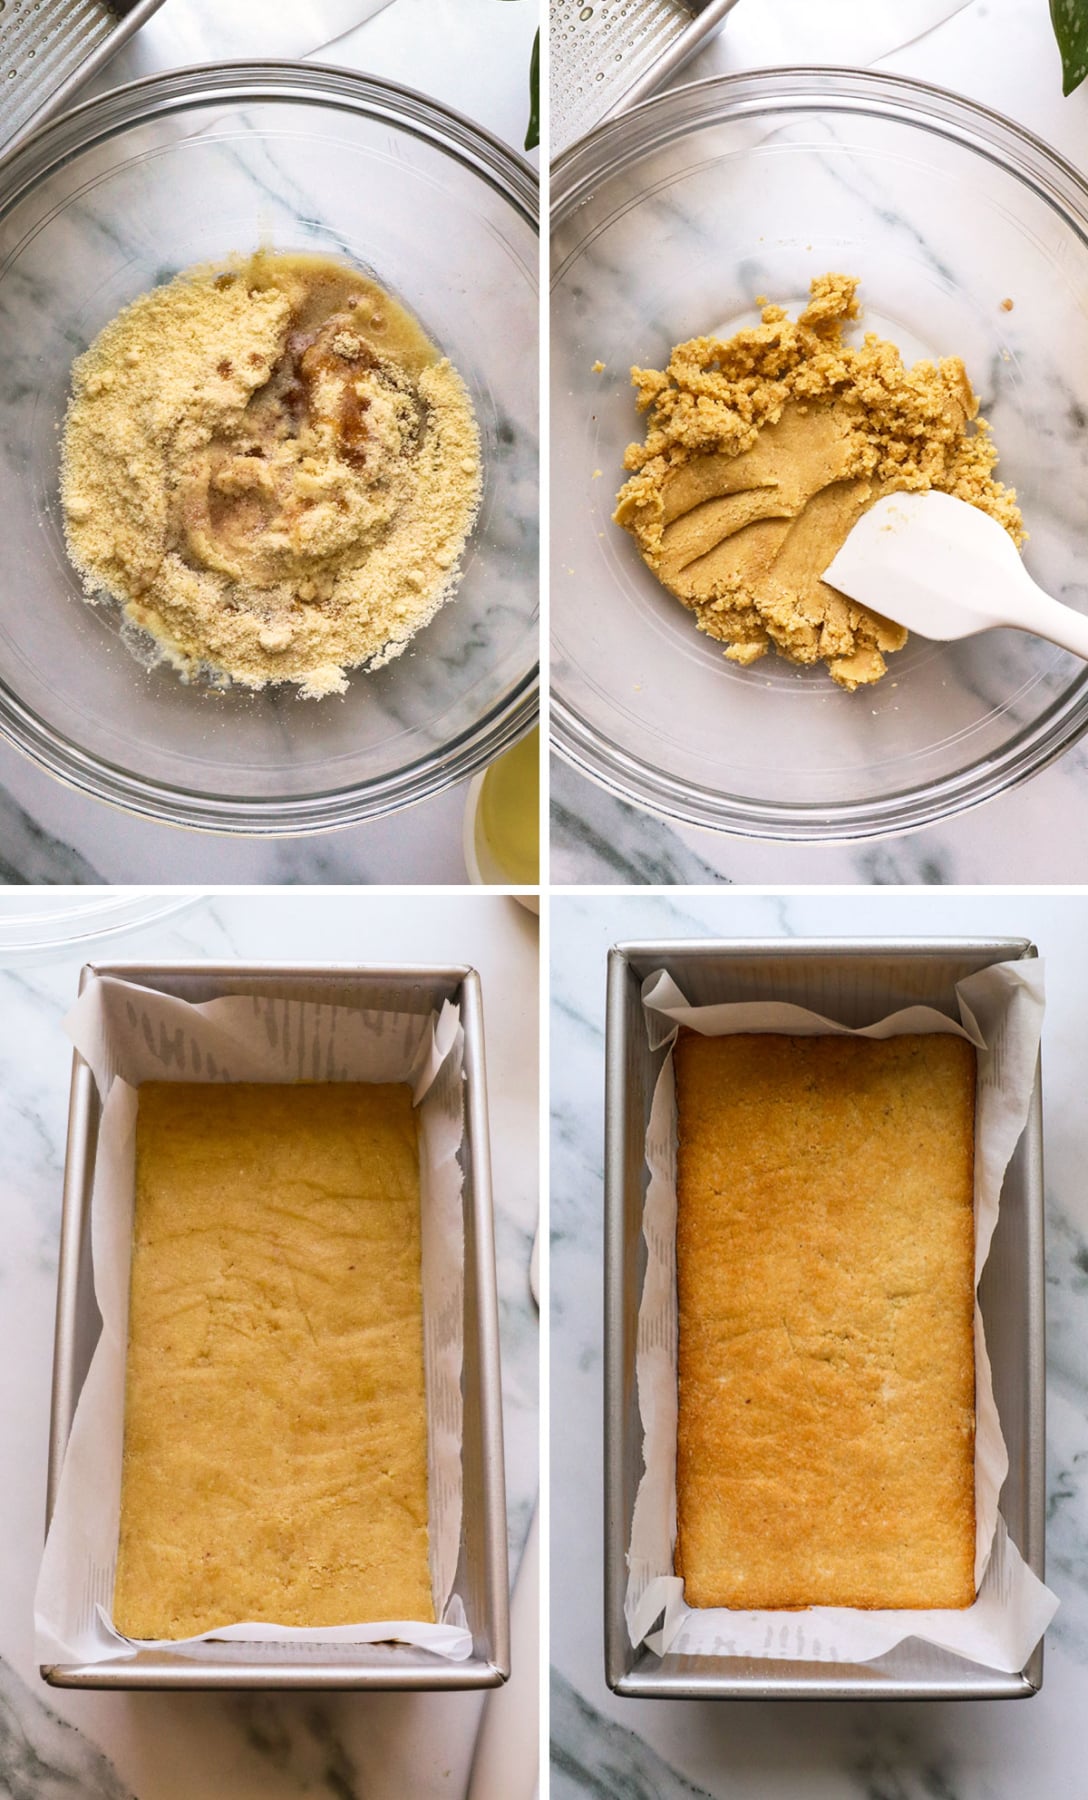
Preheat the oven to 350ºF and lightly grease a 9-by-5-inch loaf pan. Press a piece of parchment paper into the pan. The oil will hold the parchment paper in place, and this setup will make the candy bars super-easy to remove and slice later. (You’ll thank yourself!)
In a large bowl, combine 1 cup of blanched almond flour, 2 tablespoons of maple syrup, 2 tablespoons of melted coconut oil, and 1/8 teaspoon of fine sea salt. Stir well until the mixture sticks together when pressed between your fingers.
It might look like there’s not enough liquid at first, but it should start to stick together if you’re patient and keep mixing. Transfer the mixture to the prepared loaf pan and flatten it evenly into the bottom of the pan. I like to flatten it with a rubber spatula. Bake at 350ºF for 12 to 15 minutes, or until the top looks lightly golden.
Pro Tip: Let this cookie layer cool for at least 20 minutes. If it’s still warm when you add the next layer, it might cause the caramel layer to separate.
Step 2:
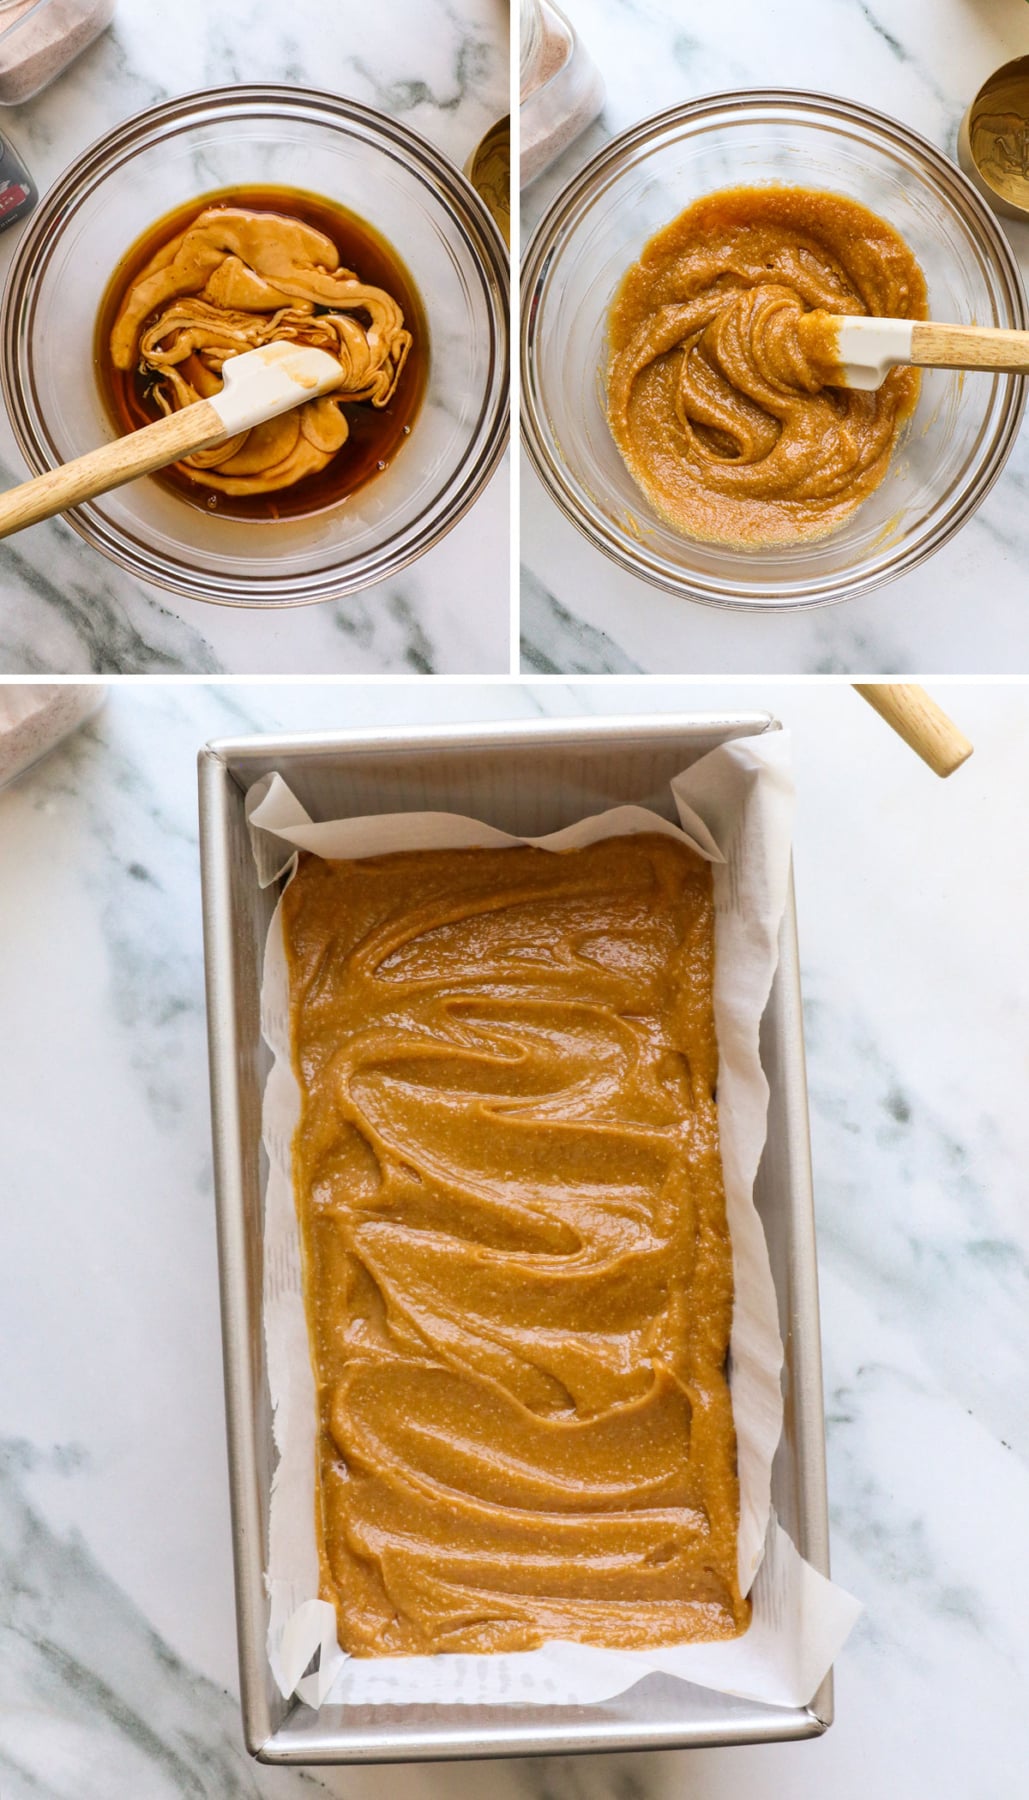
Once the cookie crust has started to cool, you can stir together the next caramel layer. Wipe out the bowl you used for the first layer if you want to save on dishes later.
Add 1/3 cup of creamy cashew butter, 3 tablespoons of maple syrup, 1/2 teaspoon of vanilla extract, and a pinch of salt to the bowl and stir well until it looks smooth and creamy. It should look like caramel!
Once the cookie layer feels cool to the touch, you can spread this evenly over it. Transfer this to a flat shelf in your freezer while you make the next layer.
Note: The cashew butter I tested this recipe with was unsalted. If you’re using a salted cashew butter (or another nut butter), then you probably won’t need to add a pinch of salt.
Step 3:
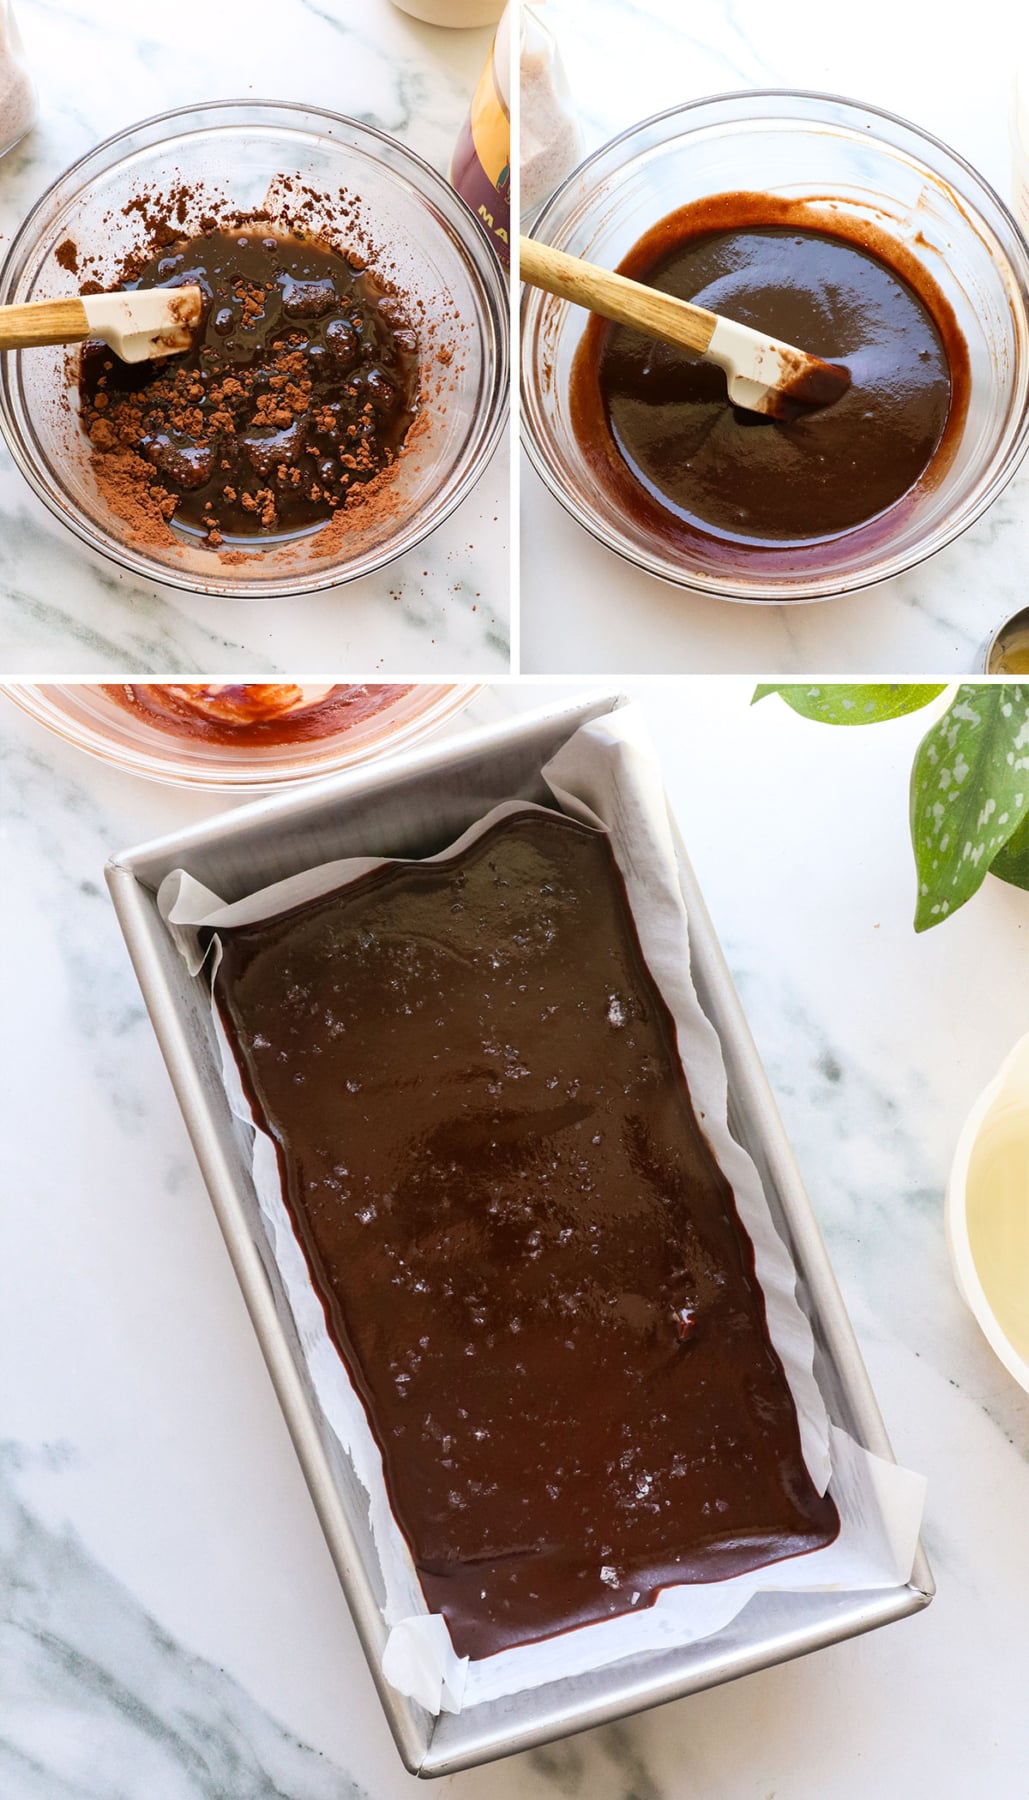
Wipe out the same bowl again, then use it to create the last layer. Add 1/4 cup melted coconut oil, 1/4 cup maple syrup (at room temperature), and 3 tablespoons raw cacao powder to the bowl and stir vigorously. It will look runny at first, then start to emulsify and look like a pourable chocolate.
Remove the pan from the freezer and pour this chocolate layer over the top. Spread it out evenly over the caramel layer. Sprinkle flaky salt over the top if you want a sweet-and-salty treat. (The salt is optional.)
Then return the pan to the freezer to chill until firm. I like to wait at least 1 hour, but you can also leave it overnight!
Serving & Storage Tips
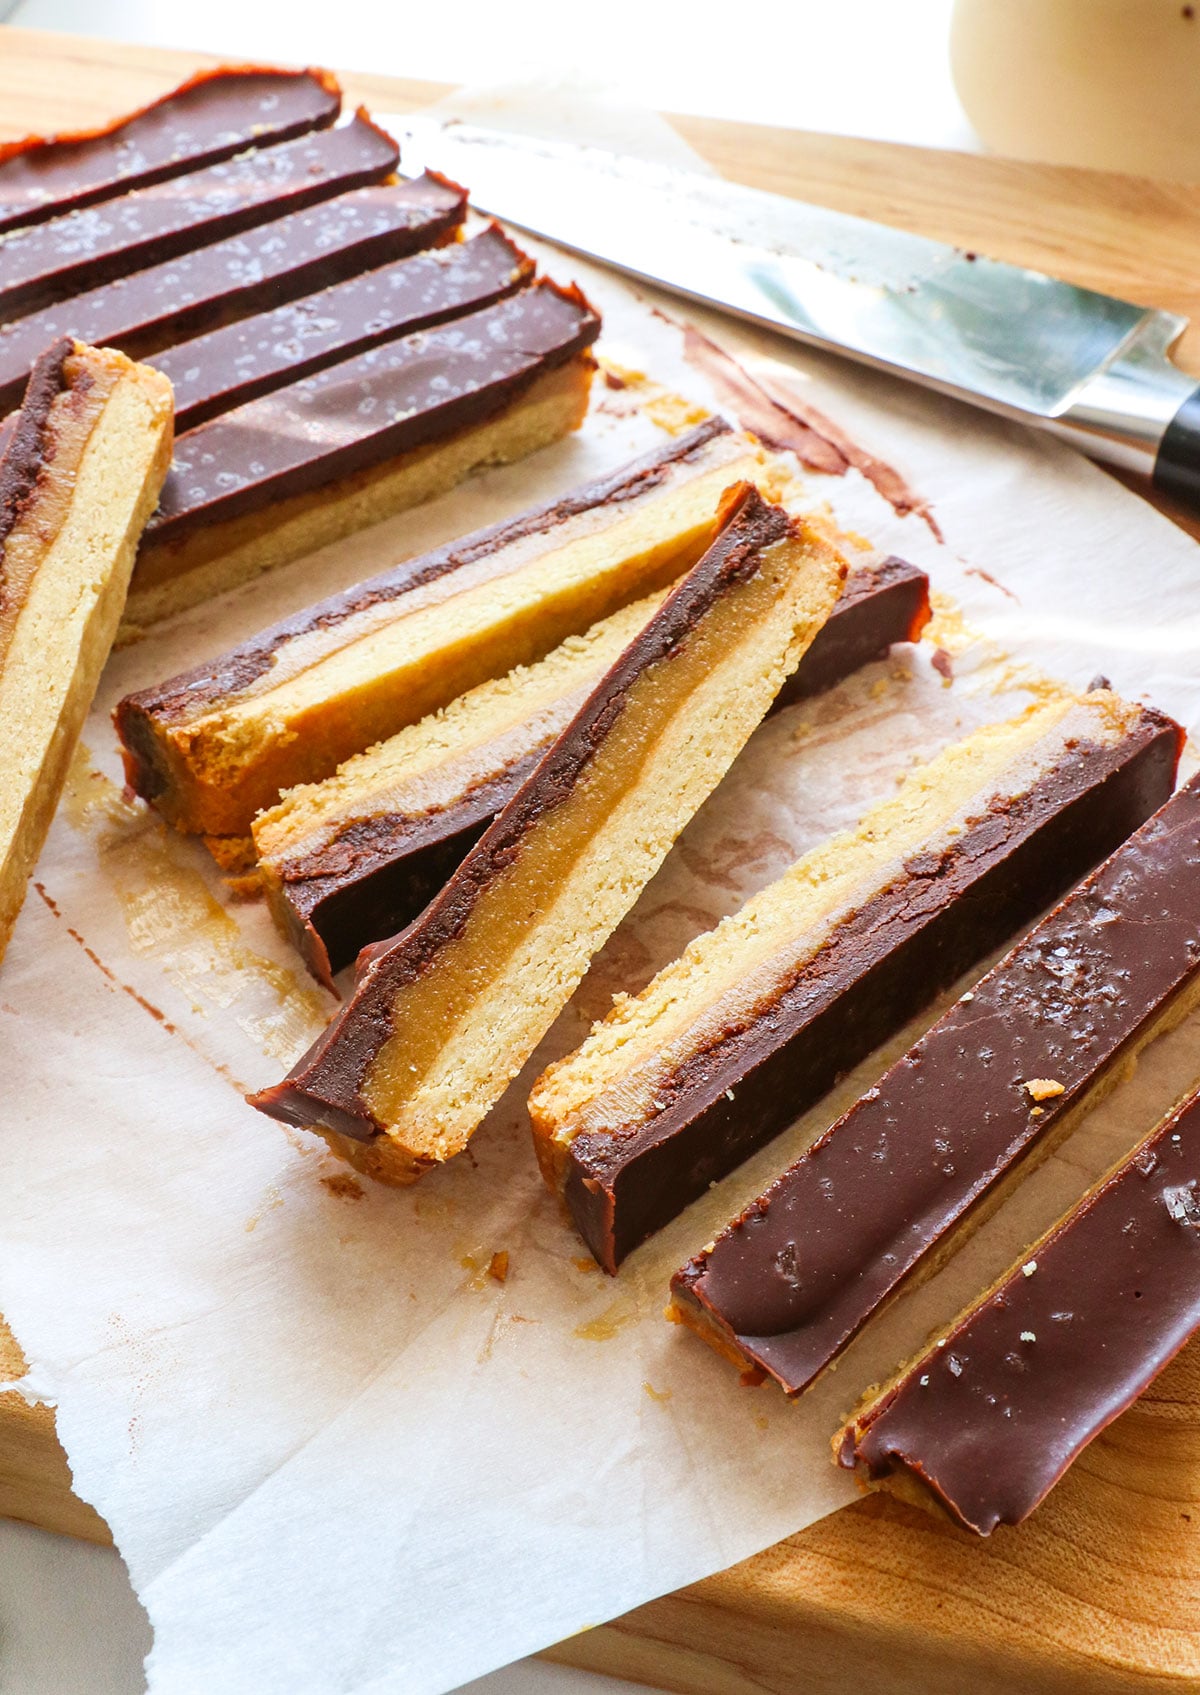
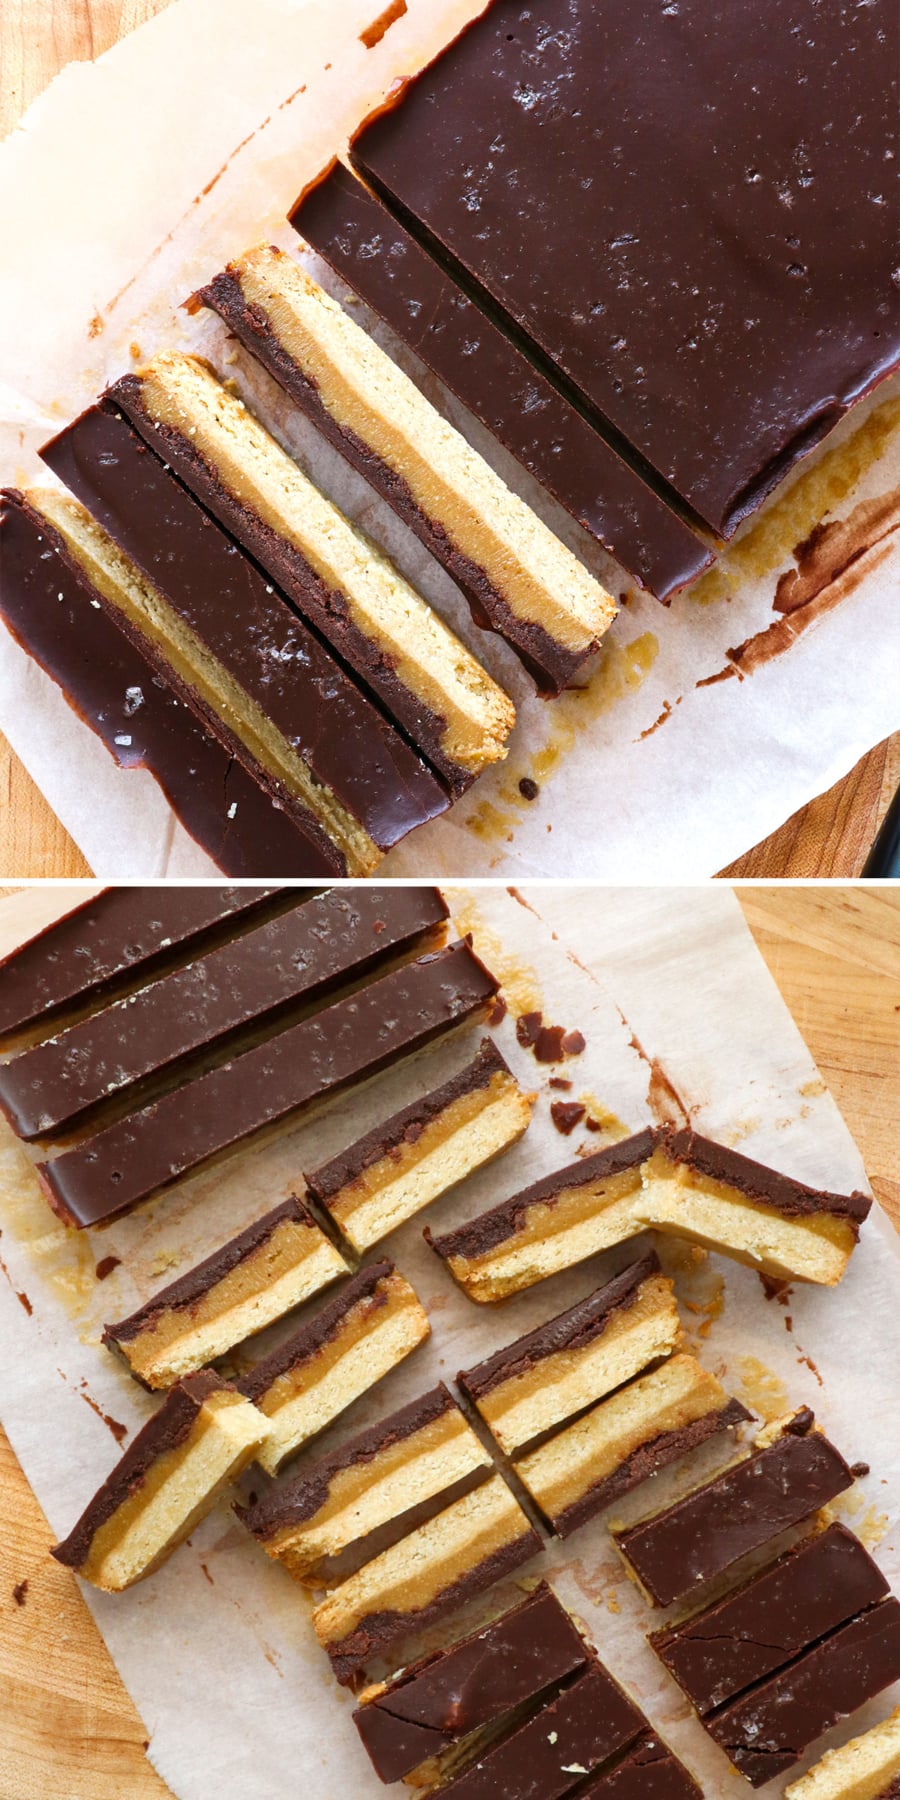
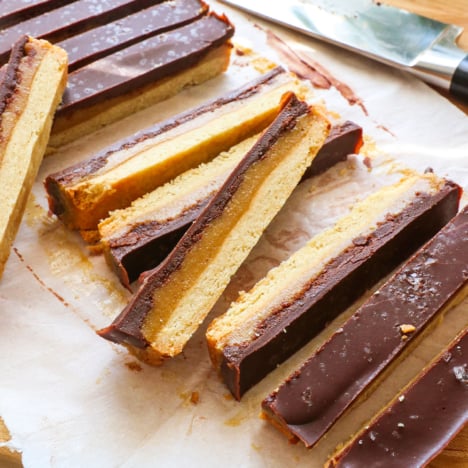
Once the caramel layer is firm, you can slice this into bars. I usually start by slicing 12 bars, then cut them in half to create 24 “fun-size” bars. (See the photo for reference.)
These healthy Twix bars will soften if left at room temperature, so I think they are best when served frozen. From the freezer, the cookie layer stays crispy, and the caramel layer is chewy, like real Twix bars. My whole family prefers them straight from the freezer.
If you serve these from the fridge, everything is softer and less crispy. Still good, but just wanted to point out that the texture will be different. Choose whichever sounds best to you!
Healthy Twix Bars (Gluten-Free)
Ingredients
Crisp Cookie Layer
- 1 cup blanched almond flour
- 2 tablespoons pure maple syrup
- 2 tablespoons melted coconut oil
- ⅛ teaspoon fine sea salt
Caramel Layer
- ⅓ cup cashew butter
- 3 tablespoons maple syrup
- ½ teaspoon vanilla extract
- ⅛ teaspoon fine sea salt
Chocolate Layer
- ¼ cup melted coconut oil
- ¼ cup maple syrup
- 3 tablespoons cacao powder
- flaky sea salt (optional topping)
Instructions
- Preheat the oven to 350ºF and lightly grease a 9-by-5-inch loaf pan. Press a piece of parchment paper into the pan. The oil will hold the parchment paper in place, and this setup will make the candy bars super-easy to remove and slice later. (You'll thank yourself later!)To prepare the cookie layer, combine the almond flour, maple syrup, melted coconut oil, and salt in a large bowl. Stir well until the mixture sticks together when pressed between your fingers. Be patient; this can take a minute or so. Transfer the mixture to the prepared loaf pan and flatten it evenly into the bottom of the pan. I like to flatten it with a rubber spatula. Bake at 350ºF for 12 to 15 minutes, or until the top looks lightly golden.
- To make the caramel layer, add the cashew butter, maple syrup, vanilla extract, and salt to a bowl. (I use the same bowl I used for step 1.) Stir well until it looks smooth and creamy. It should look like caramel! Once the cookie layer feels cool to the touch, you can spread this evenly over it. Transfer this to a flat shelf in your freezer while you make the next layer.
- Wipe out the same bowl again, then use it to create the last layer. Add the melted coconut oil, maple syrup (at room temperature), and raw cacao powder to the bowl and stir vigorously. It will look runny at first, then start to emulsify and look like a pourable chocolate. Remove the pan from the freezer and pour this chocolate layer over the top. Spread it out evenly over the caramel layer. Sprinkle flaky salt over the top if you want a sweet-and-salty treat. (The salt is optional.)Then return the pan to the freezer to chill until firm. I like to wait at least 1 hour, but you can also leave it overnight! Once the caramel layer is firm, you can slice this into bars. I usually start by slicing 12 bars, but then I like to cut them in half to create 24 "fun-size" bars. Store & serve directly from the freezer for the best texture.
Notes
Nutrition
More Healthy Candy Recipes to Try
If you try this recipe, please leave a comment and star rating below to let me know how you like it.







Wow😍😍😍😍😍
These are so good & very similar to the real thing!!! You have a talent for nailing ALL your desserts!!!! Thank u so much for sharing!!!!
I first made these with peanut butter as I didn’t have cashew butter and they were good. But purchased cashew butter and they were outstanding. Thanks again
I was looking for your original version of these from like 10 year ago or more lol. Do you still have that somewhere? This is the only one that showed up when I googled it. It had cashew butter and coconut flour as the “cookie” layer and dates as the caramel layer. I’ve made it so many times but still can’t remember the actual measurements. Thank you! Ill try this one too
Hi Megan! Yes, I still have the old one saved, just in case. But I hope you try this new version, too! (It’s easier and tastes a little more authentic, I think.)
Here’s the old no-bake version:
FOR THE COOKIE LAYER:
1/2 cup raw cashew butter
1 tablespoon raw honey
1 tablespoon coconut
flour
pinch of salt
FOR THE CARAMEL FILLING:
3/4 cup soft Medjool
dates (about 9 dates)
2 tablespoons nut butter
(cashew butter)
pinch of salt
1/4 cup water
FOR THE CHOCOLATE
COATING:
3/4 cup dark chocolate
chips
1 teaspoon coconut oil
1. To prepare the cookie layer, combine the cashew butter,
honey, coconut flour and salt in a bowl, and mix well until
a thick batter is formed. Transfer the batter to a baking
sheet lined with parchment paper, and use your hands to
form a rectangular shape about 1/2-inch thick. Place the
pan in the freezer to set while you prepare the caramel
filling.
2. In a high-speed blender, combine the caramel filling
ingredients and blend until well combined. You may need
to stop and scrape down the blender a couple of times,
to make sure everything is blended evenly. Remove the
cookie layer from the freezer, and top with the caramel
filling.
3. Place the caramel topped cookie layer back in the freezer
to firm up for at least 20 minutes.
4. To prepare the chocolate coating, combine the dark
chocolate chips and coconut oil in an oven-safe bowl,
and melt at 350F for about 5 minutes. (Alternatively, you
could use a microwave if you prefer.) Remove the
caramel topped cookie from the freezer, and use a large
knife to cut the cookie layer into 10 thin bars.
5. Use a spoon or spatula to spread the melted chocolate
over the top, sides and bottoms of each bar, then return
the chocolate coated bars to the parchment lined pan to
set. Once all of the bars have been coated, place the pan
back in the freezer for at least 20 minutes before serving.
6. Because these bars aren’t baked, the texture will be best
when served directly from the freezer. Store in a sealed
container in the freezer for up to month or more, if they
last that long.
Thank you, Megan! I’ll save this 🧡
These are delicious, I didn’t have cashew butter. So mixed peanut and almond butter. Easy to make and great flavour