This post may contain affiliate links. Please read my disclosure and privacy policy.

I never thought I’d have a recipe like this one on my website, because I never believed I could add protein powder to a peanut butter cup and still *actually* enjoy the flavor. I’m not interested in dessert recipes that taste like protein powder. No, thank you.
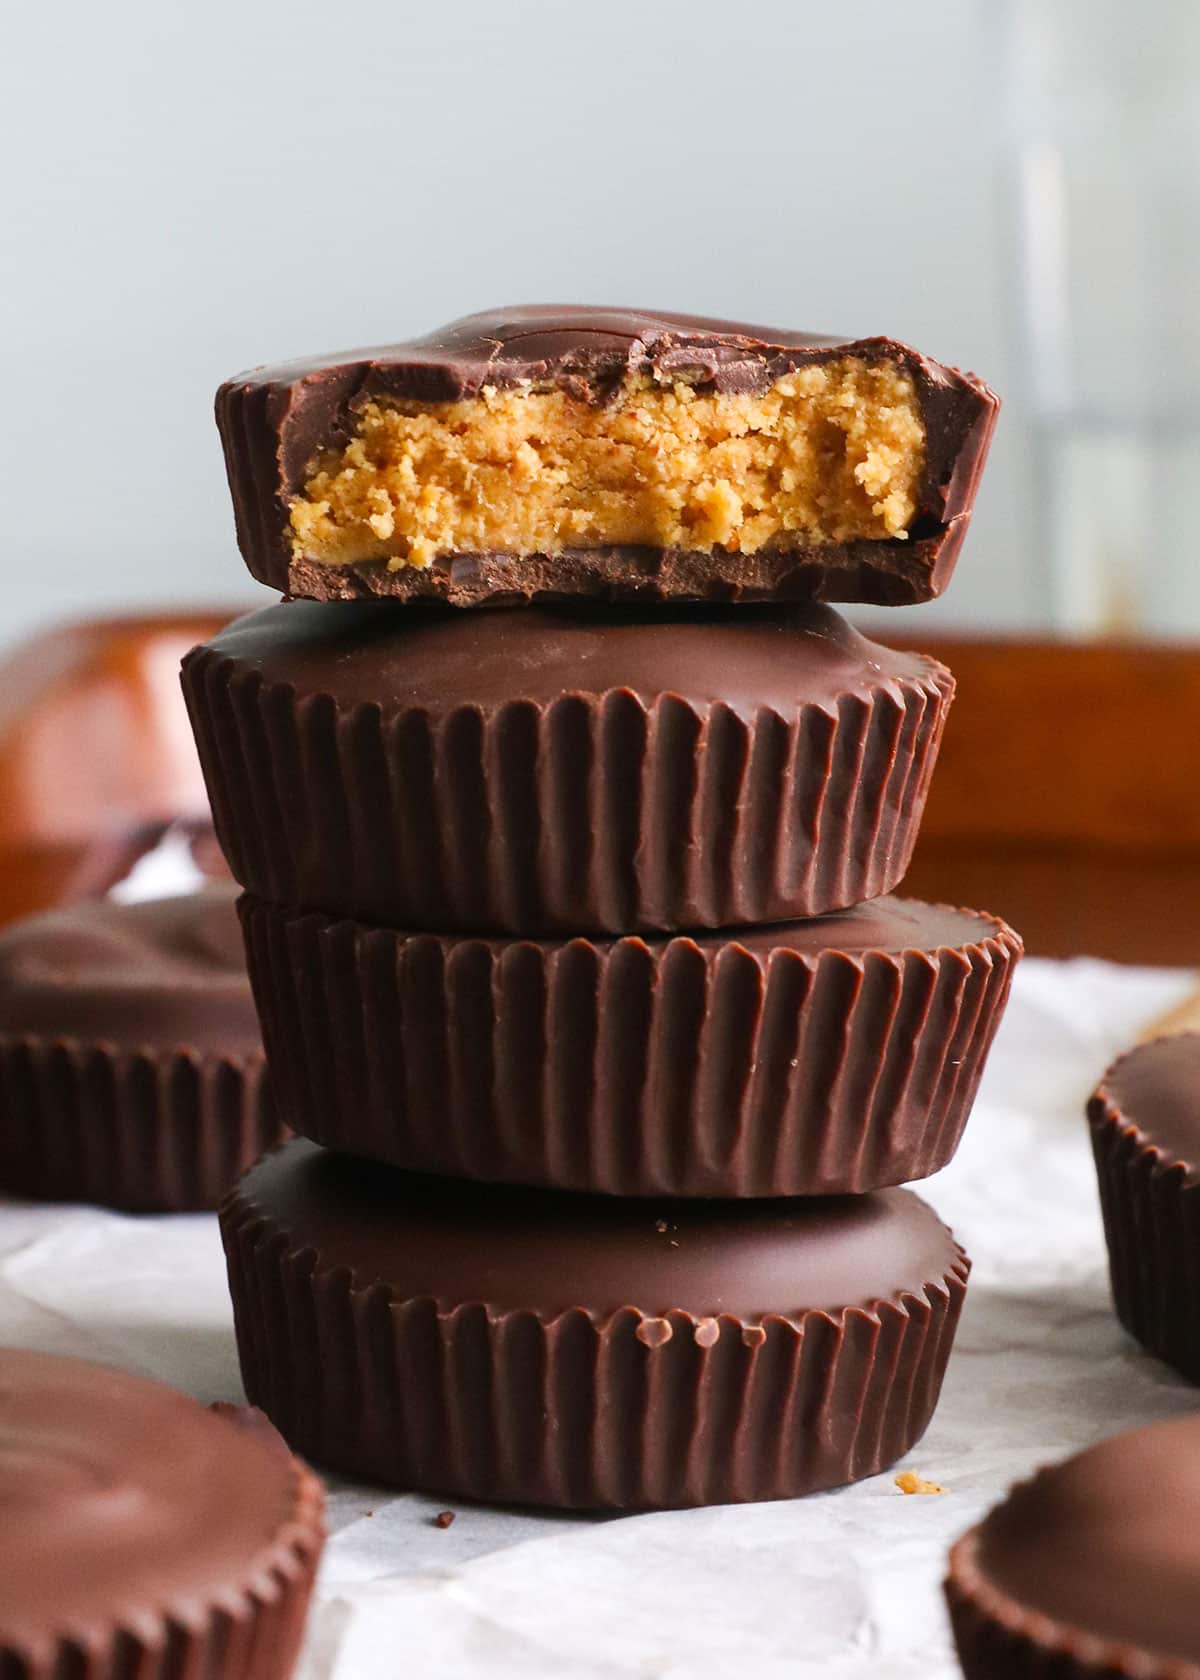
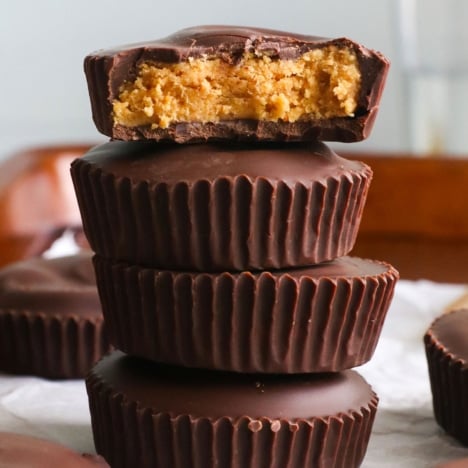
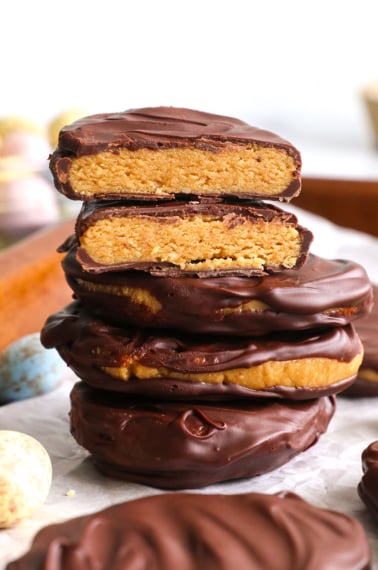
That’s why I’m so excited to show you how to make these protein peanut butter cups. They have 9 grams of protein per cup, and don’t taste like protein powder at all. (Seriously!)
The key is using the right type of protein powder. I tried using a plant-based one for my first trial (Garden of Life brand), and literally had to spit it out after taste-testing. So, follow the ingredients closely if you want to have delicious results on your first try.
⭐⭐⭐⭐⭐ Featured Review
“These are so yummy!! Better than Reese’s and love knowing that these are healthier for you. My young kids also love them. Will be making these on repeat!” – Rachel
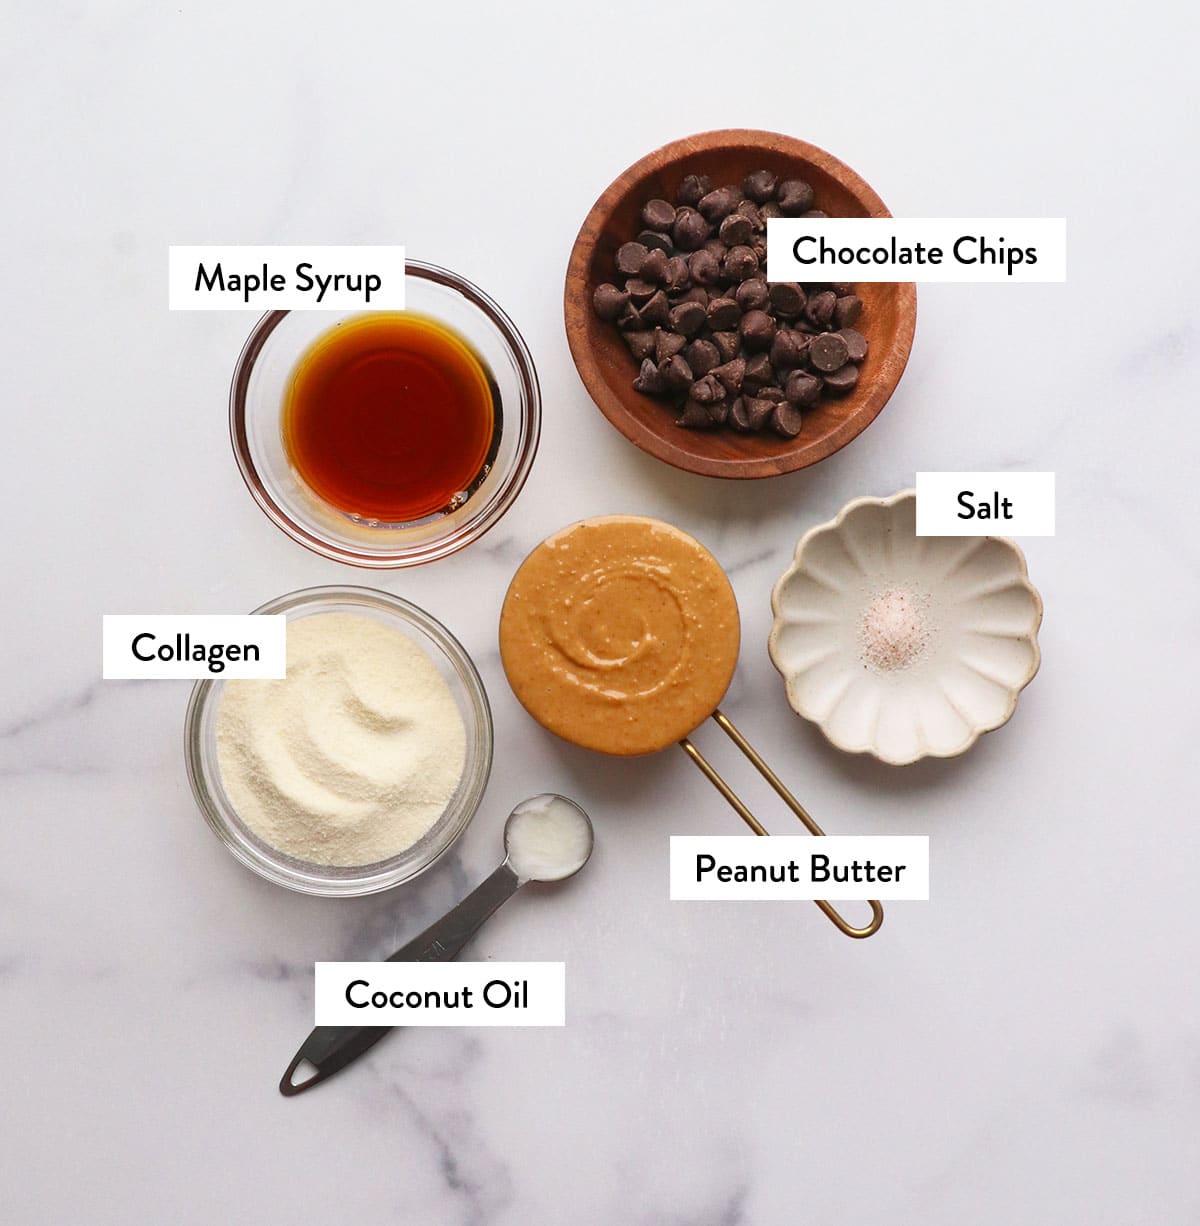
Protein PB Cup Ingredients
- Peanut Butter. Use all-natural creamy peanut butter for the best peanut butter flavor. This means you’ll have to stir well when you first open the jar. If you prefer a crunchy texture, I’m sure crunchy peanut butter would work, too. Use sunflower seed butter for a nut-free treat.
- Collagen Peptides. I use unsweetened collagen peptides to thicken the peanut butter center and add protein to each cup. If you want to experiment with another protein powder, keep in mind that flavor and texture can vary dramatically with different powders. When I tried using a plant-based protein powder, just 1 tablespoon was too much flavor-wise.
- Maple Syrup. This natural sweetener adds the perfect amount of sweetness to the peanut butter center.
- Salt. When making a sweet treat, don’t omit the salt. It helps make the flavor irresistible.
- Chocolate Chips. The coating is easiest to make with melted chocolate chips and a teaspoon of coconut oil to thin the texture. Use semi-sweet chocolate for a sweeter flavor, or use darker chocolate if you prefer less sugar.
How to Make Protein Peanut Butter Cups
Step 1:
Line a muffin tin with 9 paper or silicone muffin liners. Combine the chocolate chips and coconut oil in a heat-safe bowl that fits snugly over a small saucepan. Add an inch of water to the saucepan and bring it to a boil on the stovetop.
Once the water is boiling, place the heat-safe bowl filled with chocolate chips over the top of the pan. Stir until the steam gently melts the chocolate; the coconut oil will dissolve, thinning the texture and making it pourable.
Note: Alternatively, you can use the microwave to melt the chocolate in 30-second intervals. The chocolate won’t melt quite as evenly with this method, and it won’t stay melted as long as it does when you keep the bowl over the pan of hot water. The double-boiler method mentioned above is preferred.
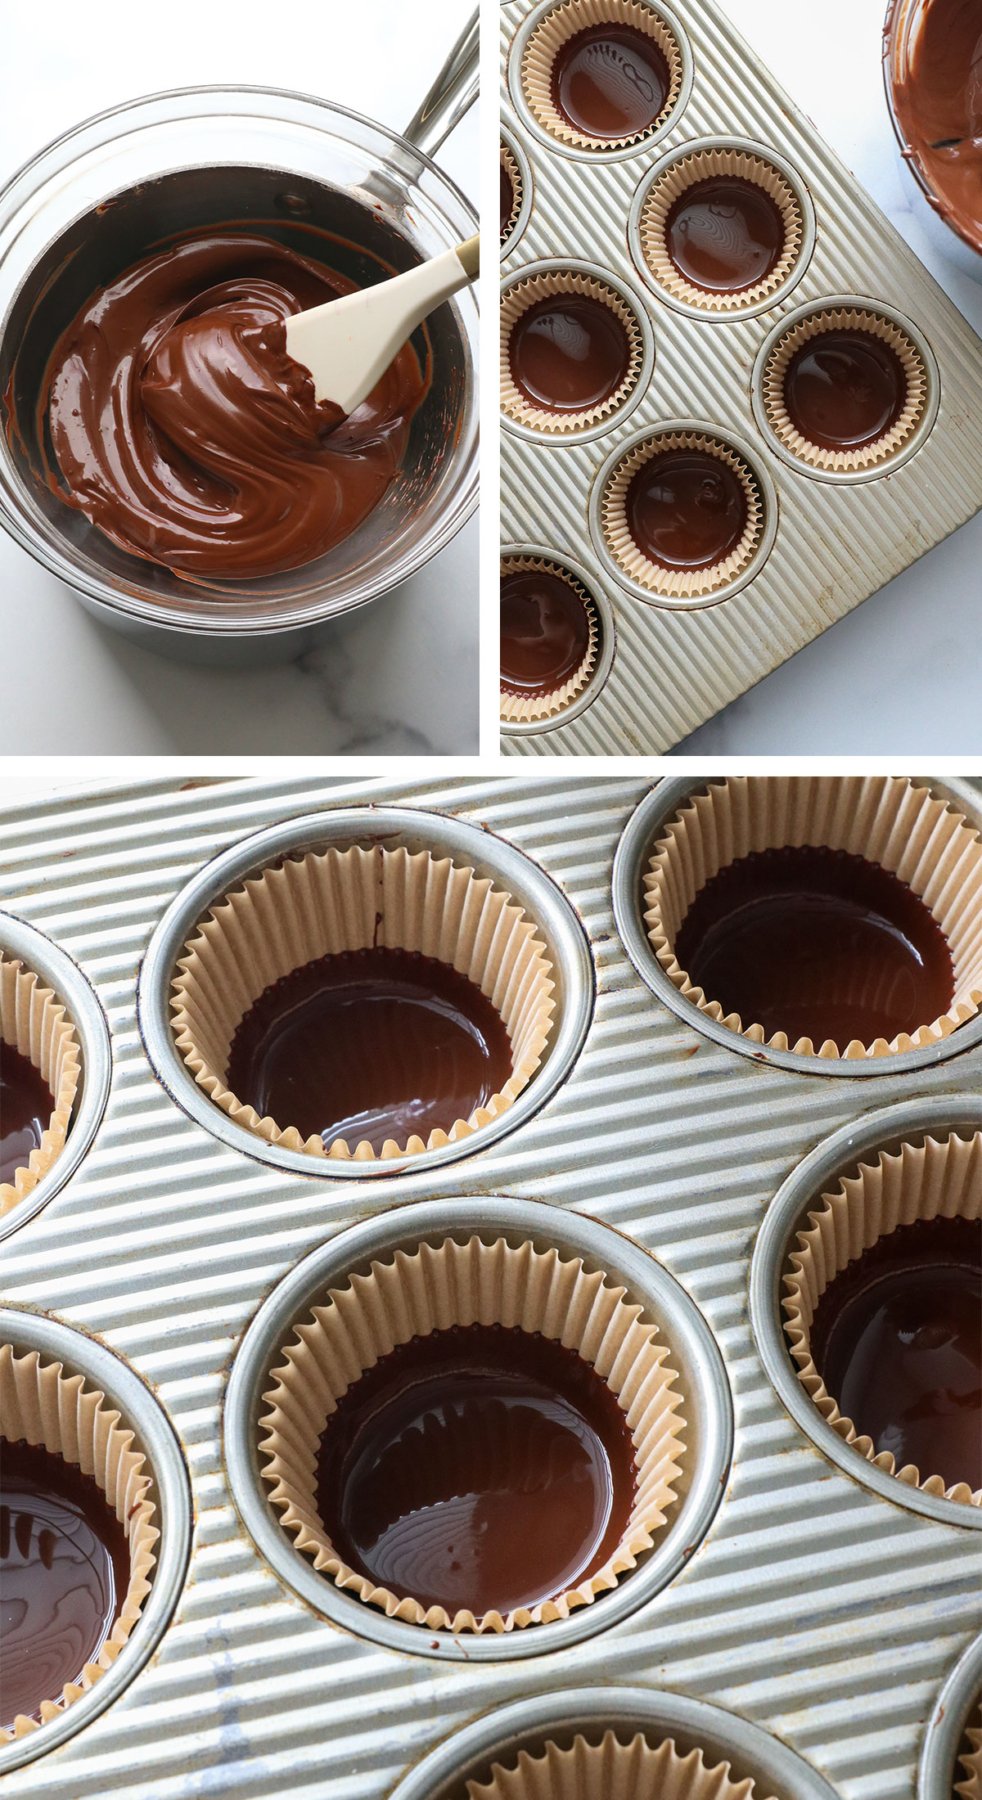
Step 2:
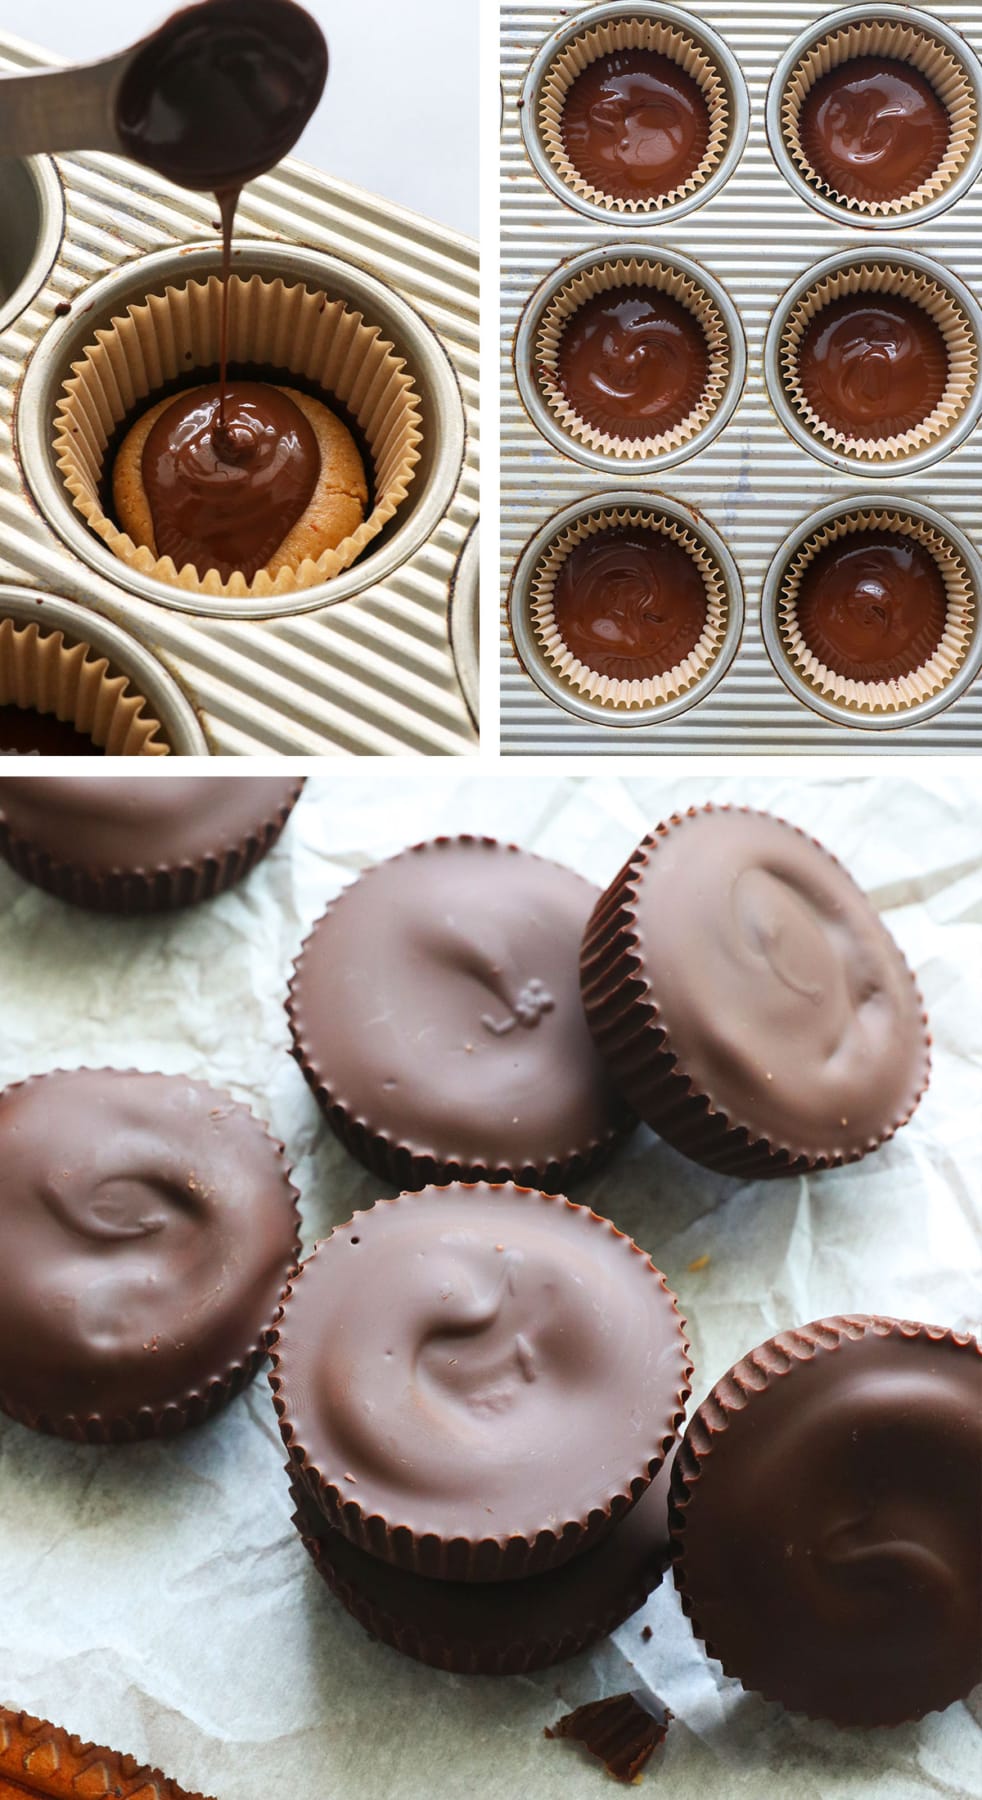
Add 2 teaspoons of melted chocolate to each muffin liner. Then, tilt the pan to swirl the chocolate around the lower edges of each cup. Place the pan in the freezer for 10 minutes to let the chocolate set.
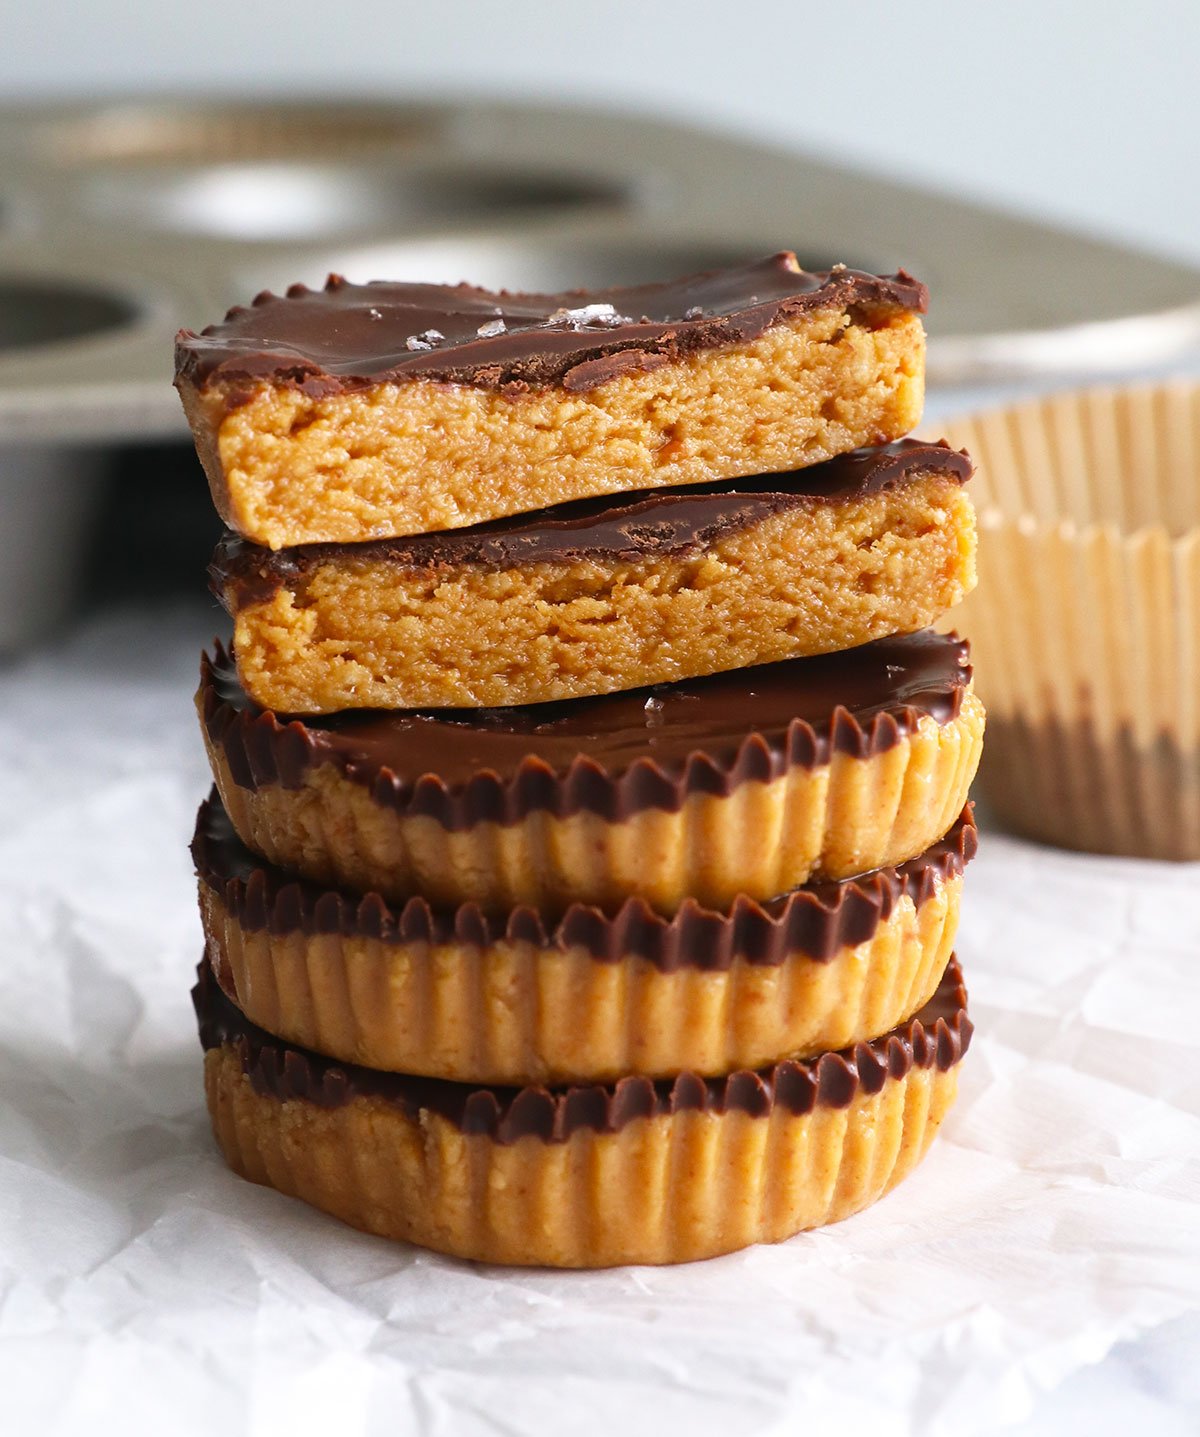
Meanwhile, add the all-natural peanut butter, collagen, maple syrup, and salt to a medium bowl. Stir until the mixture resembles moist cookie dough. (You should be able to roll it into a ball, almost like Play-Doh.)
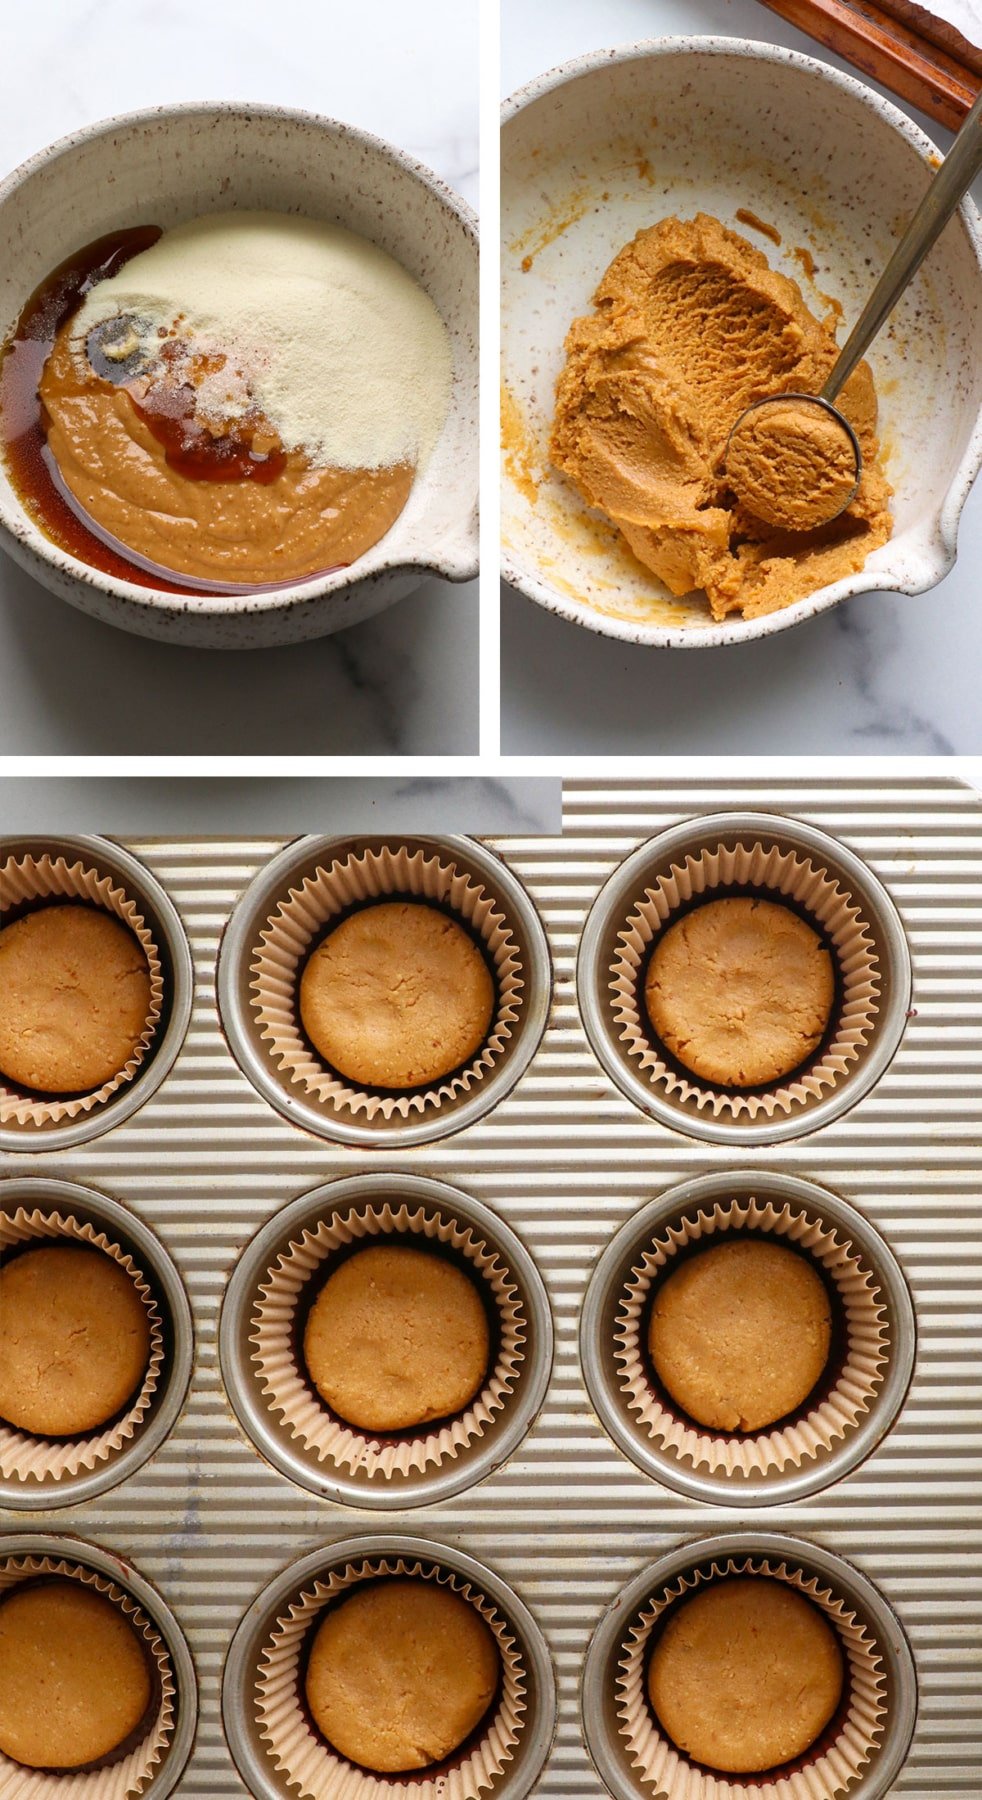
Step 3:
Remove the pan from the freezer and add a tablespoon of the peanut butter mixture to the center of each cup. Flatten the peanut butter layer slightly, leaving some room around the edges of each muffin cup so the chocolate can coat them.
Once you’ve used all of the peanut butter mixture, add 2 more teaspoons of melted chocolate to the top of each cup. It should totally coat the top and edges of each muffin cup.
Sprinkle flaky sea salt on top, if you like.
Step 4:
Return the muffin pan to the freezer until the chocolate is firm. Then these are ready to enjoy! Because coconut oil has been added to the chocolate, these treats could melt at room temperature.
Store them in an airtight container in the refrigerator for up to a month and enjoy them chilled for the best texture. (They will not last a month before you eat them all… we’re lucky if they last 3 days!)
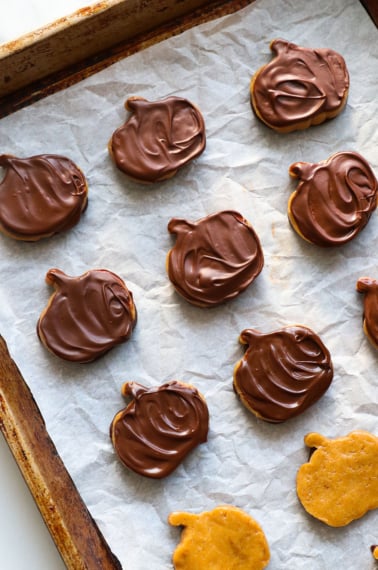
Lower-Calorie Option
You can use less chocolate and therefore lower the calories by adding it only to the top of each peanut butter cup. (Skipping the bottom and sides.) See the photo below to picture what that looks like!
Protein Peanut Butter Cups (That Taste Good!)
Ingredients
- ½ cup peanut butter
- ¼ cup collagen peptides
- 2 tablespoons maple syrup
- ⅛ teaspoon fine sea salt
- 1 cup dark chocolate chips (see notes)
- 2 teaspoons coconut oil
- flaky sea salt (optional)
Instructions
- Line a standard muffin pan with 9 parchment paper liners. To melt the chocolate, add an inch of water to a small saucepan and bring it to a boil on the stove top. In a heat-safe bowl that will fit snugly over the top of the saucepan, add the chocolate chips and coconut oil. The steam from underneath the bowl will gently melt the chocolate; stir occasionally until smooth. The coconut oil will thin the consistency so it's easier to pour.
- Add 2 teaspoons of melted chocolate to each muffin liner. Then gently tilt the pan on all sides, so the chocolate starts to coat the lower edges of each muffin cup. (This will help create nice edges, but is optional.) Place the pan on a flat shelf in your freezer while you work on the next step.
- In a medium bowl, combine the peanut butter, collagen, maple syrup, and salt. Stir well, until the dough looks uniform. Then, remove the pan from the freezer and scoop about a tablespoon of peanut butter into the center of each muffin cup.
- Gently flatten the top of each peanut butter mound with your fingers, so it will be easier to cover in chocolate. It's ideal if the peanut butter doesn't go all the way to the edges of the muffin cups, so chocolate can fill-in the sides. Pour 2 teaspoons of the melted chocolate mixture on top, spreading it around evenly with the back of a spoon. Sprinkle flaky sea salt on top, if you like.
- Place the pan in the freezer to firm up. Once they are firm (about 10 minutes or so), they are ready to enjoy. Transfer to an airtight container to preserve their flavor and store them in the fridge for up to 1 month. Serve chilled for the best texture; these can melt in your hands if they warm up too much.
Video
Notes
Dairy-Free Note: This recipe is dairy-free when you use allergy-friendly chocolate chips, such as Enjoy Life brand.
Nutrition
More Recipes to Try
- Protein Brownies
- Easy Protein Balls
- Cottage Cheese Ice Cream
- Banana Snack Cake (Fruit-Sweetened!)
If you try these peanut butter protein cups, please leave a comment and star rating below letting me know how you like them.


The best peanut butter cups! These are so delicious and easy to make. The only tweak for me is melting about 1/4 cup more chocolate chips to make sure I have enough to cover the peanut butter filing with 2 teaspoons of chocolate.
These are so yummy!! Better than Reese’s and love knowing that these are healthier for you. My young kids also love them. Will be making these on repeat!
So easy! So good! We have a hard time only eating one! I’ll be using a mini muffin tin next go-round. Hopefully they’ll last a bit longer that way.😁
Would it be hard to add the sodium level to your recipes? I’m a dialysis patient and need that information.
Going to make your granola bars today. I hope my substitutions won’t mess up the recipes. They look good for snacks on dialysis days!
Hi! Sodium is included in the nutrition information at the bottom of my printable recipe card, but I’m not 100% sure how accurate it is. The nutrition calculator pulls from generic ingredients online, so you’ll have more accurate numbers if you look at the ingredients in your kitchen.
Hi Megan!
I’m a big fan of all your recipes, they are simple, easy and delicious, big thanks!
For the peanut butter cups, can you replace the collagen with gelatin powder?
thanks!!
Karin
I haven’t tried that yet, but I would imagine that gelatin powder might work similarly. Let me know if you experiment with it!
These are the best thing ever! Even my husband who does not eat GF/DF and almost never eats treats, except Reese’s, absolutely loves these. We finished them in a day and I’m dying to make more. Next time I may try to make them in a mini muffin pan so I don’t eat them all so quickly. LOVE LOVE LOVE! These 100% taste like candy and don’t taste at all like protein powder/collagen. Thanks again, Megan, for another great recipe!
Another delicious recipe the whole family enjoy! Thank you x
Can you use prorein powder instead of collagen?
I think it will be a big experiment if you want to try it. I don’t recommend using Garden of Life’s unsweetened plant protein powder. I tried 1 tablespoon of that instead of collagen and the flavor was terrible. So maybe try a half batch so you don’t waste too many ingredients trying something different? I’d love to hear how it goes for you.
Can you omit the collagen?
Yes, but I would swap it for almond flour to achieve a similar texture in the center.