This post may contain affiliate links. Please read my disclosure and privacy policy.
If you’ve already tried making ice cream with Greek yogurt, you might have been disappointed. Some other recipes I’ve tried online call for too little sweetener (so it tastes sour), artificial protein powders (no thank you), or fat-free yogurt, which leaves you with an icy result.
That’s why I spent weeks testing this Greek yogurt ice cream recipe. I wanted it to taste like cheesecake, with a creamy texture that’s actually satisfying. It doesn’t taste like you’re eating “healthy ice cream” at all.
If you have a Ninja Creami machine at home, I make this recipe in it most often. But you can also use a regular ice cream machine if you prefer!

Greek Yogurt Ice Cream Ingredients
- Greek Yogurt. It’s best to use full-fat Greek yogurt for the creamiest results. Even though I say “full fat,” yogurt generally doesn’t have a very high fat content compared to other dairy products. The one I bought has 3.5% milk fat, but 4% milk fat is also great! (In comparison, heavy cream used in regular ice cream has a minimum of 36% milk fat.)
- Maple Syrup. This is my preferred natural sweetener because it dissolves instantly when mixed with yogurt. You won’t need to break out a blender or deal with uneven mixing. (Honey would likely be harder to stir in smoothly, but you can try that, too.)
- Vanilla Extract. This feels like a necessary addition for ice cream, but you can leave it out if it’s not already in your pantry. The maple syrup already adds some background flavor, too.
- Collagen Peptides. This is optional, but it adds protein and extra creaminess. I add one scoop of unflavored collagen to this recipe, which adds 18 grams of protein, but you can’t taste it all once it’s frozen. (Omit if you need a vegetarian recipe; plant-based protein powder would not be the same.)

How to Make Greek Yogurt Ice Cream
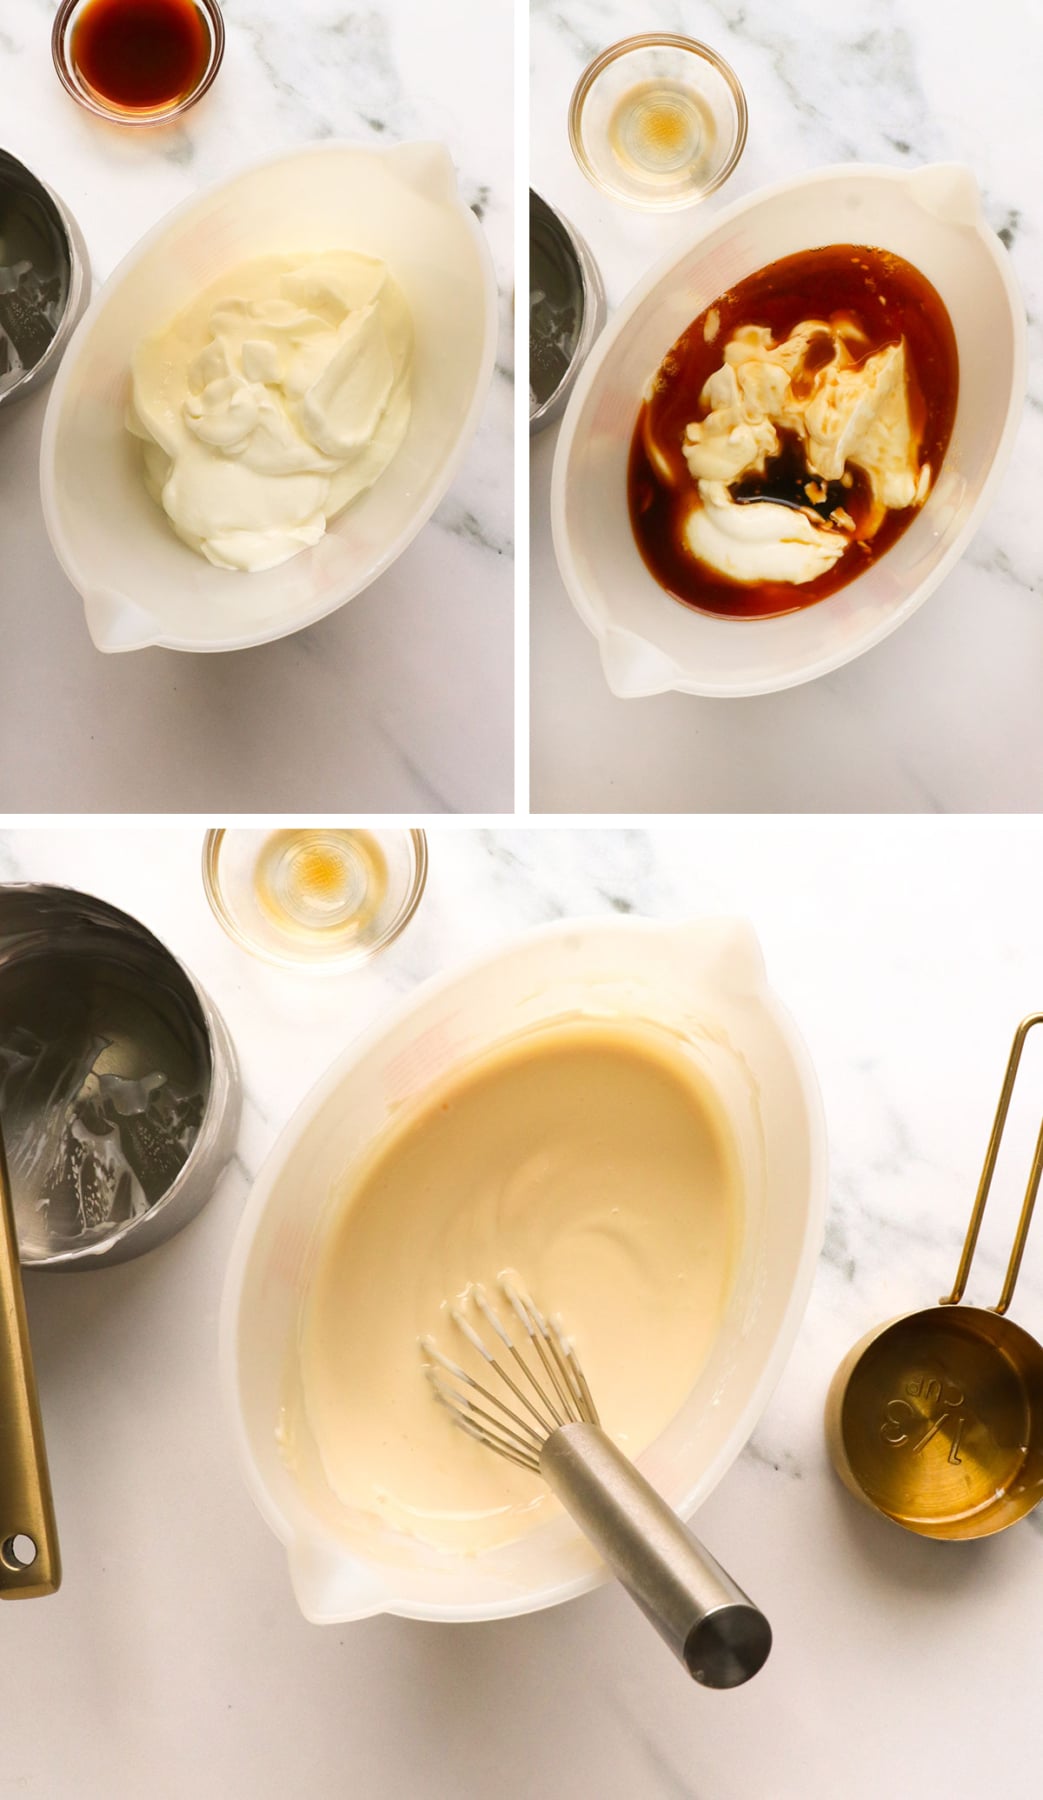
Step 1:
In a large measuring cup or bowl, combine 1.5 cups of plain Greek yogurt, 1/3 cup maple syrup, 2 teaspoons of vanilla extract, and a scoop of unflavored collagen peptides. The peptides are optional, but they add 18 grams of protein to the batch, plus a little extra creaminess. (Omit if you need a vegetarian recipe.)
Use a whisk to mix everything together until you see no clumps. It should look like slightly runny yogurt.
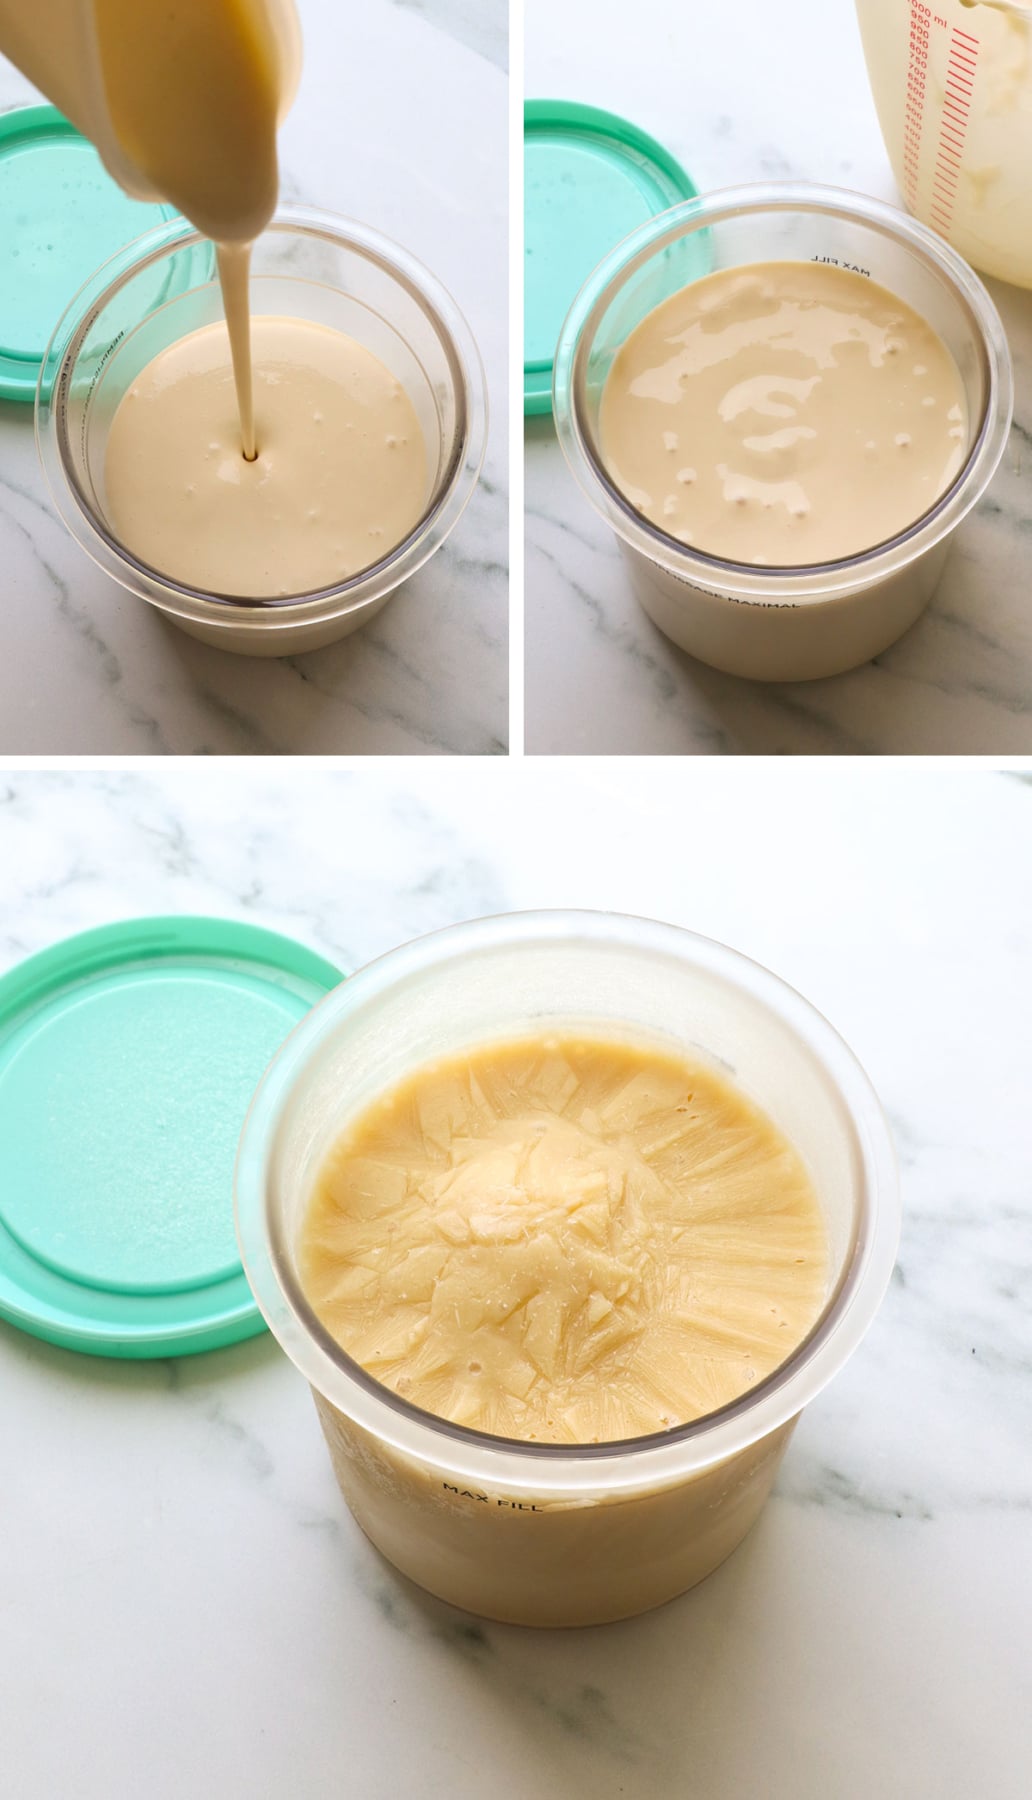
Step 2:
Want to save this for later?
Pour the mixture into your ice cream maker of choice. You can use a traditional ice cream maker as long as the bowl has been frozen for at least 24 hours. Process for 30 minutes or until the mixture is thick and creamy.
Or, pour the mixture into the pint container of the Ninja Creami and freeze it on a flat shelf overnight. The next day, the ice cream will be ready to process.
Step 3:
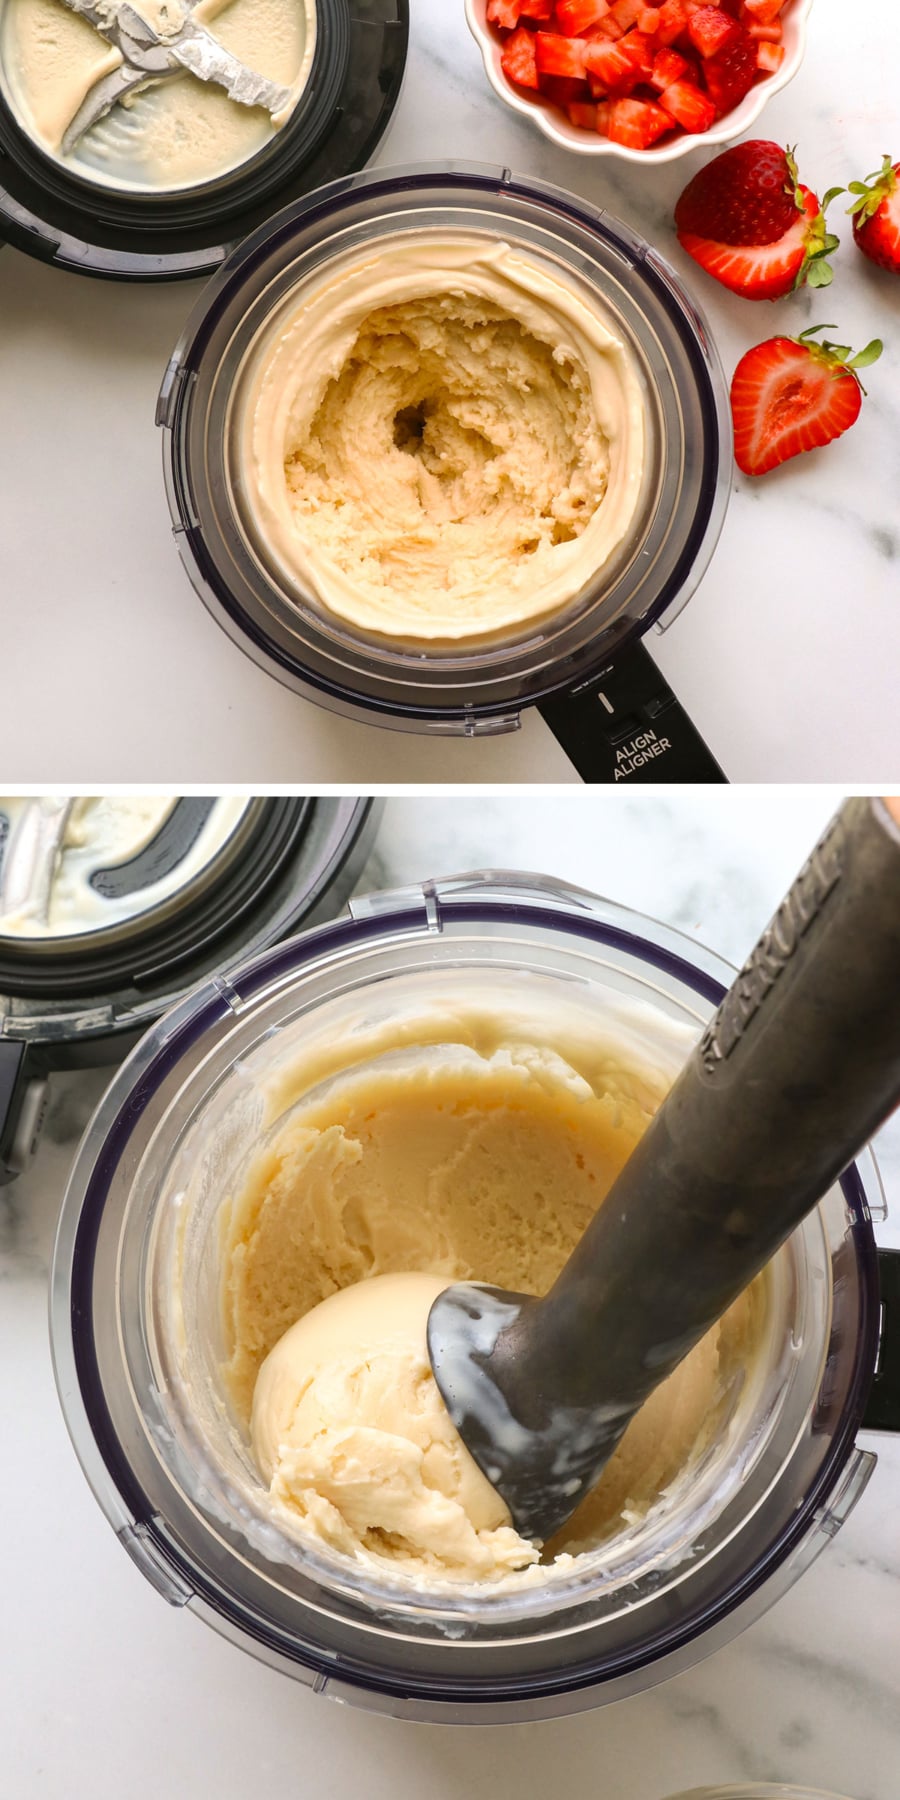
If you’re using the Ninja Creami machine, remove the lid after the mixture has been frozen for 24 hours. Secure it into your machine, then run the “lite ice cream” setting. When it’s done, remove the lid and check on the creaminess and texture.
My ice cream was ready to scoop right away after this setting. However, if yours looks chalky or crumbly, secure the lid again and select a re-spin cycle. When it’s complete, the ice cream should be creamy.
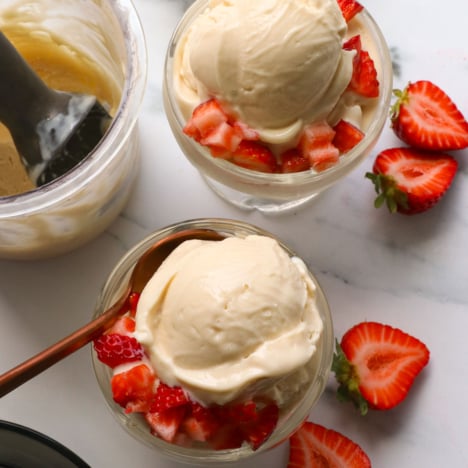
Serve this right away for the best texture and flavor. I think this tastes 100% better with freshly chopped strawberries on top. It truly tastes like strawberry cheesecake!
Storage Tip: Leftovers can be stored in an airtight container in the freezer for up to a month. To serve again, you can process it in the Ninja Creami again, or simply let it thaw on the counter for about 15 minutes. It becomes soft and scoopable again as it thaws slightly.

Greek Yogurt Ice Cream (High Protein!)
Ingredients
- 1.5 cups Greek Yogurt
- ⅓ cup maple syrup
- 2 teaspoons vanilla extract
- 1 scoop collagen peptides (~20 grams; optional)
Instructions
- In a large bowl or measuring cup, combine the yogurt, maple syrup, vanilla extract, and collagen peptides (if using). Use a whisk to mix well until the mixture looks smooth. It should have the consistency of runny yogurt.
- Pour the mixture into the pint container of your Ninja Creami and secure the lid. Place this on a flat shelf in the freezer to freeze for 24 hours. If you'd rather use a regular ice cream maker, pour this into the frozen bowl and process until it's thick and creamy, about 30 minutes.
- To process this in the Ninja Creami, remove the lid and secure the frozen pint in the machine. Process using the "lite ice cream" setting. When it's done, remove the lid and check on the texture. It might be ready to serve right away. If it's not, return it to the machine and run a re-spin cycle. When that's done, it should be perfect.
- Enjoy this ice cream right away, topped with freshly chopped strawberries. It tastes amazing with fresh fruit! Leftovers can be stored in an airtight container in the freezer for up to a month. Let it thaw on the counter for 15 minutes, or until it's scoopable again to reserve.
Notes
Nutrition
More Recipes to Try
- Greek Yogurt Ranch Dressing
- Protein Chia Seed Pudding (with Greek yogurt)
- Lemon Chia Pudding
- Chia Seed Smoothie with Fruit
If you try this recipe, please leave a comment and star rating below to let me know how you like it.


Creamy and delicious! I used a regular ice cream maker and it turned out great!
This was insanely good, I didn’t have collagen so omitted it but added strawberries and dark chocolate as a mix in in the ninja creami and it turned out so good! There were no leftovers 😝