
This post may contain affiliate links. Please read my disclosure and privacy policy.

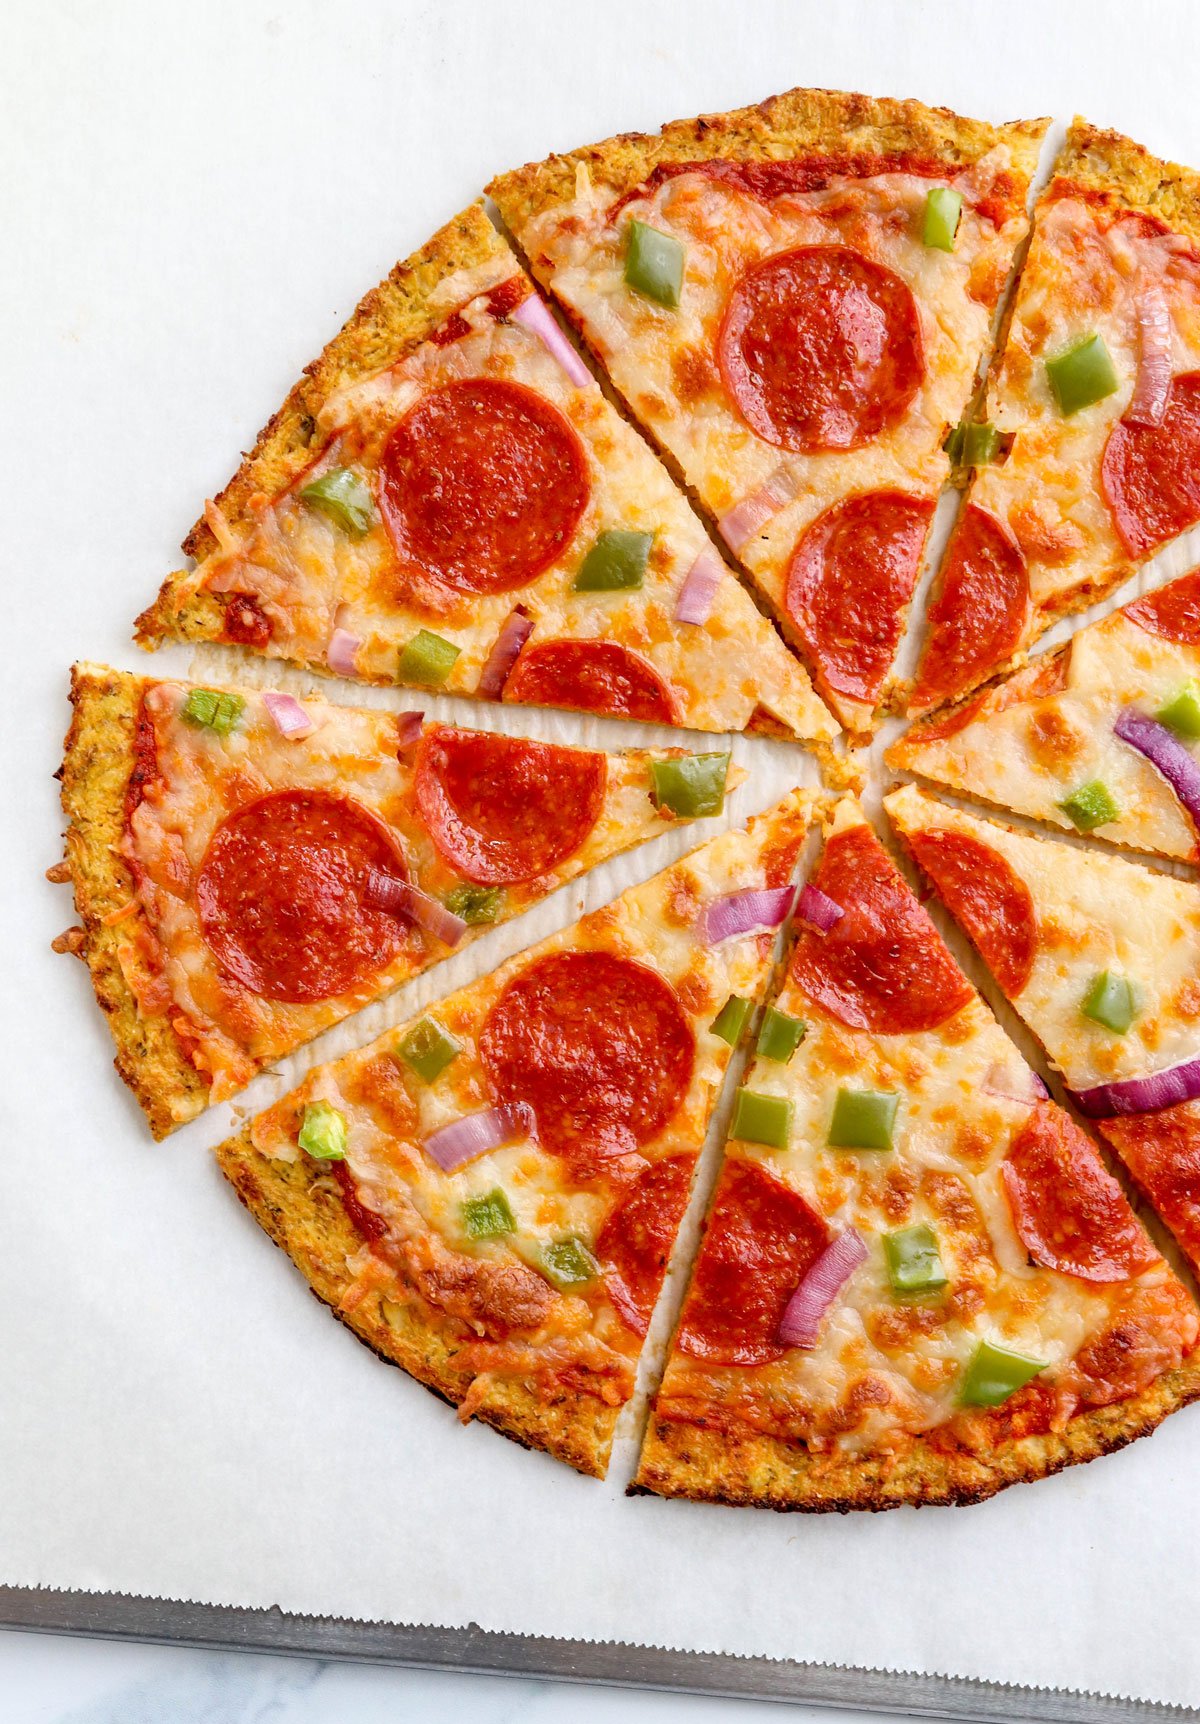
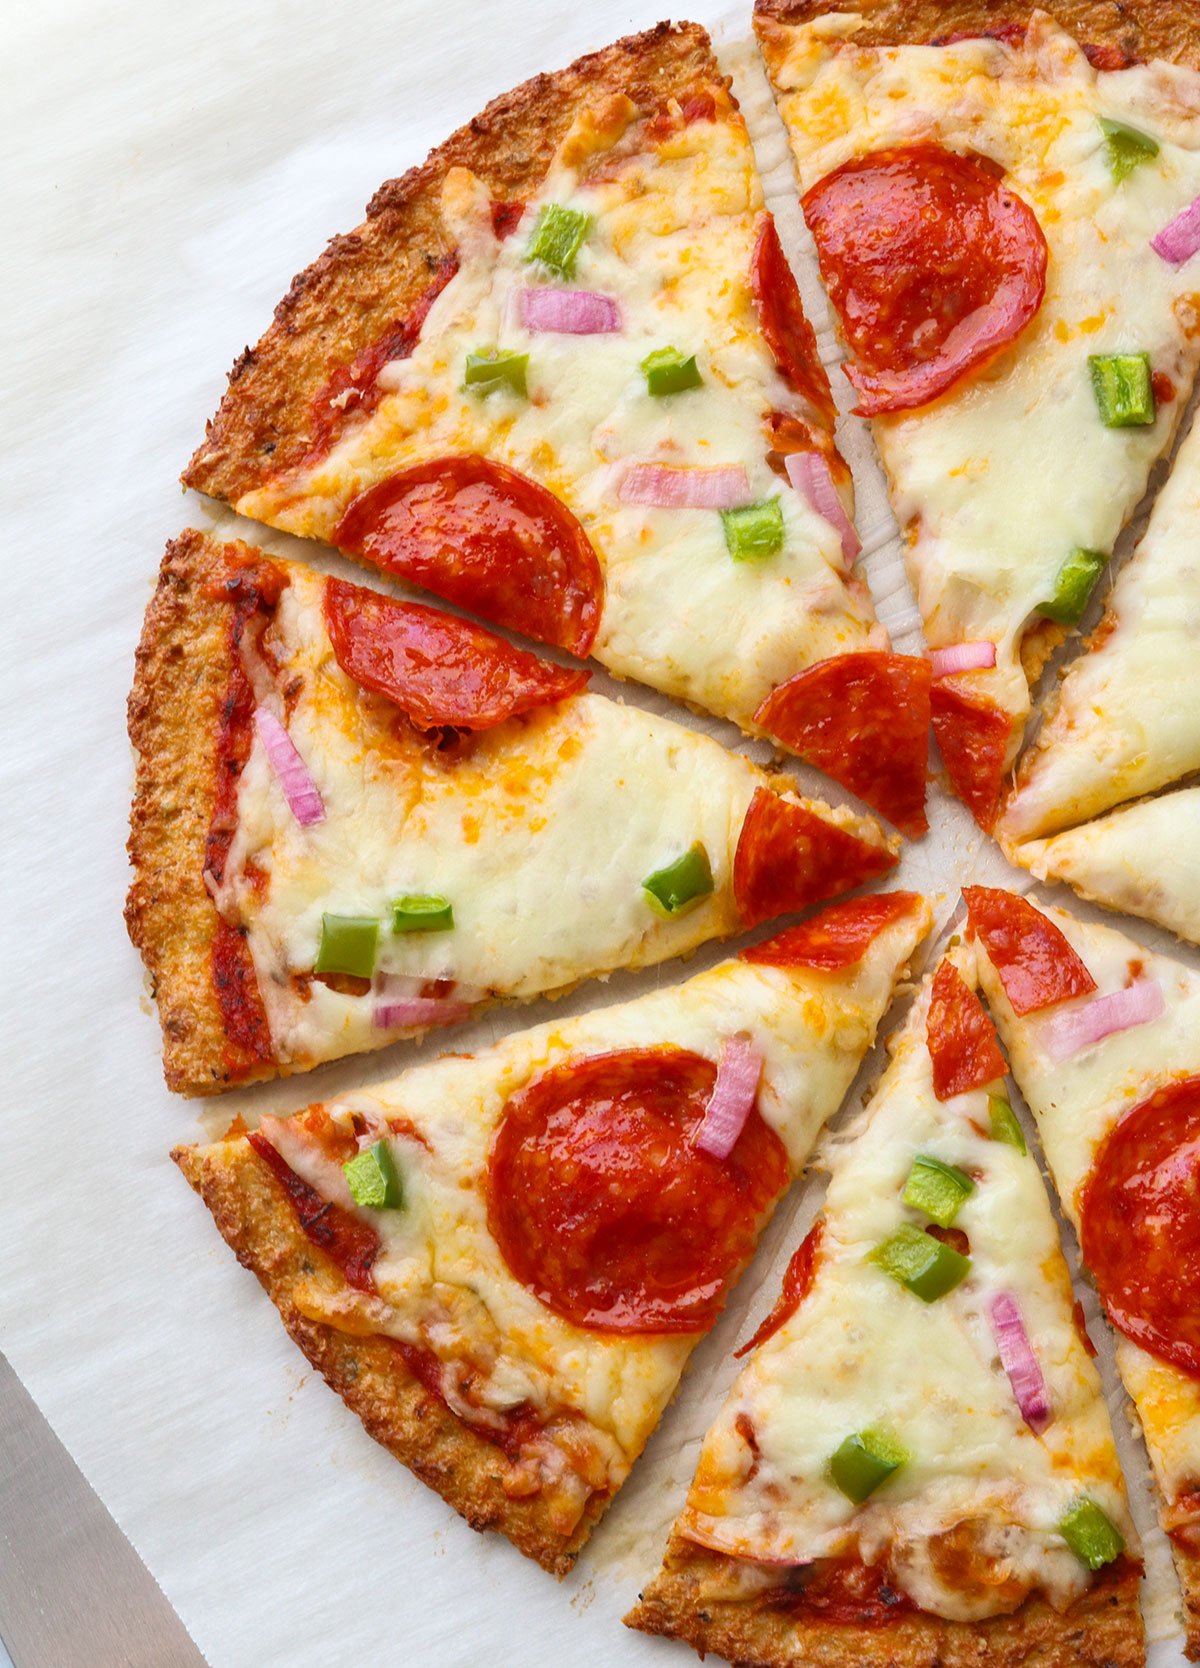
This Cauliflower Pizza Crust recipe is a delicious way to enjoy your next pizza night! It’s naturally gluten-free and grain-free, plus you’ll get extra veggies in each bite.
I originally posted this recipe back in 2011, when I learned the secret to making a cauliflower pizza crust that isn’t soggy. (You need to squeeze out the moisture from the cooked cauliflower before making your crust mixture!)
Now that we’ve been making this pizza crust for over a decade, I’ve learned some time-saving tricks, like using frozen cauliflower to skip the cooking process. Sometimes you can even find frozen riced cauliflower, which will let you skip using the food processor, too.
Be sure to read all the tips below if you’d like to make a frozen pizza crust that you can use in the future, or if you need to make any substitutions.
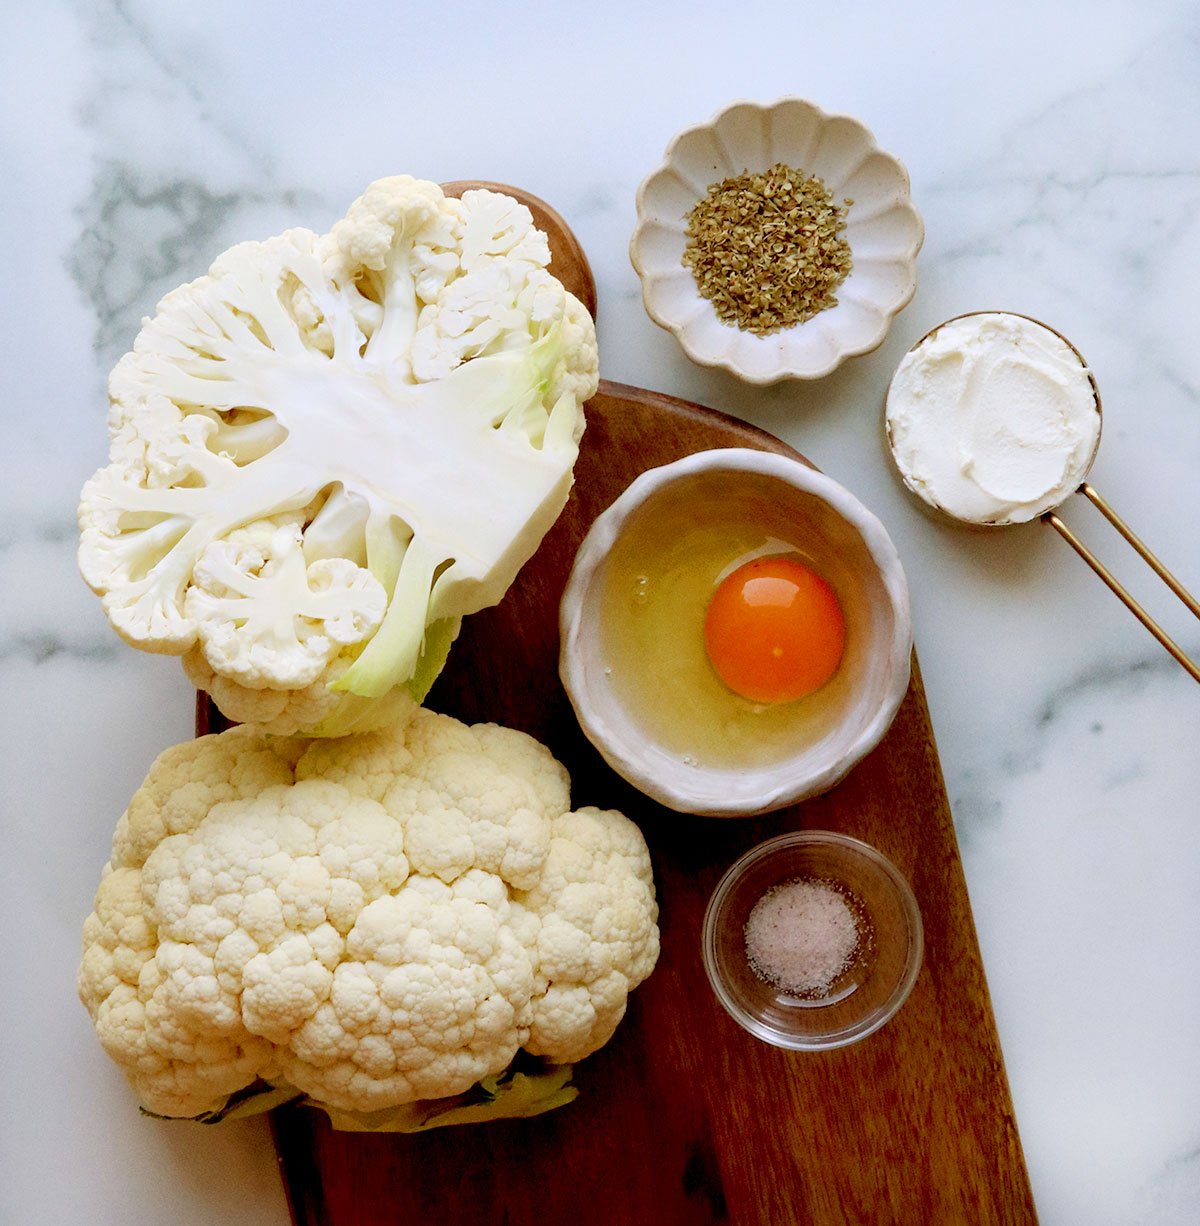
Ingredients You’ll Need
Fresh or frozen cauliflower is the base of this recipe, without using any extra flour for filler. As a result, this recipe is low-carb and keto-friendly.
The egg and cheese act as a binder and hold the crust together. Soft goat cheese (chevre) gives the crust an amazing, non-greasy texture and you can’t taste it at all. However, you can also use grated Parmesan cheese or your favorite shredded cheese to create a crust that will hold together.
Adding oregano helps add an Italian flavor you’ll love, and you can also add a pinch of garlic powder if you’d like.
Need an egg-free recipe?
Try my Vegan Cauliflower Pizza Crust recipe, which is made without eggs or cheese.
How to Make Cauliflower Pizza Crust
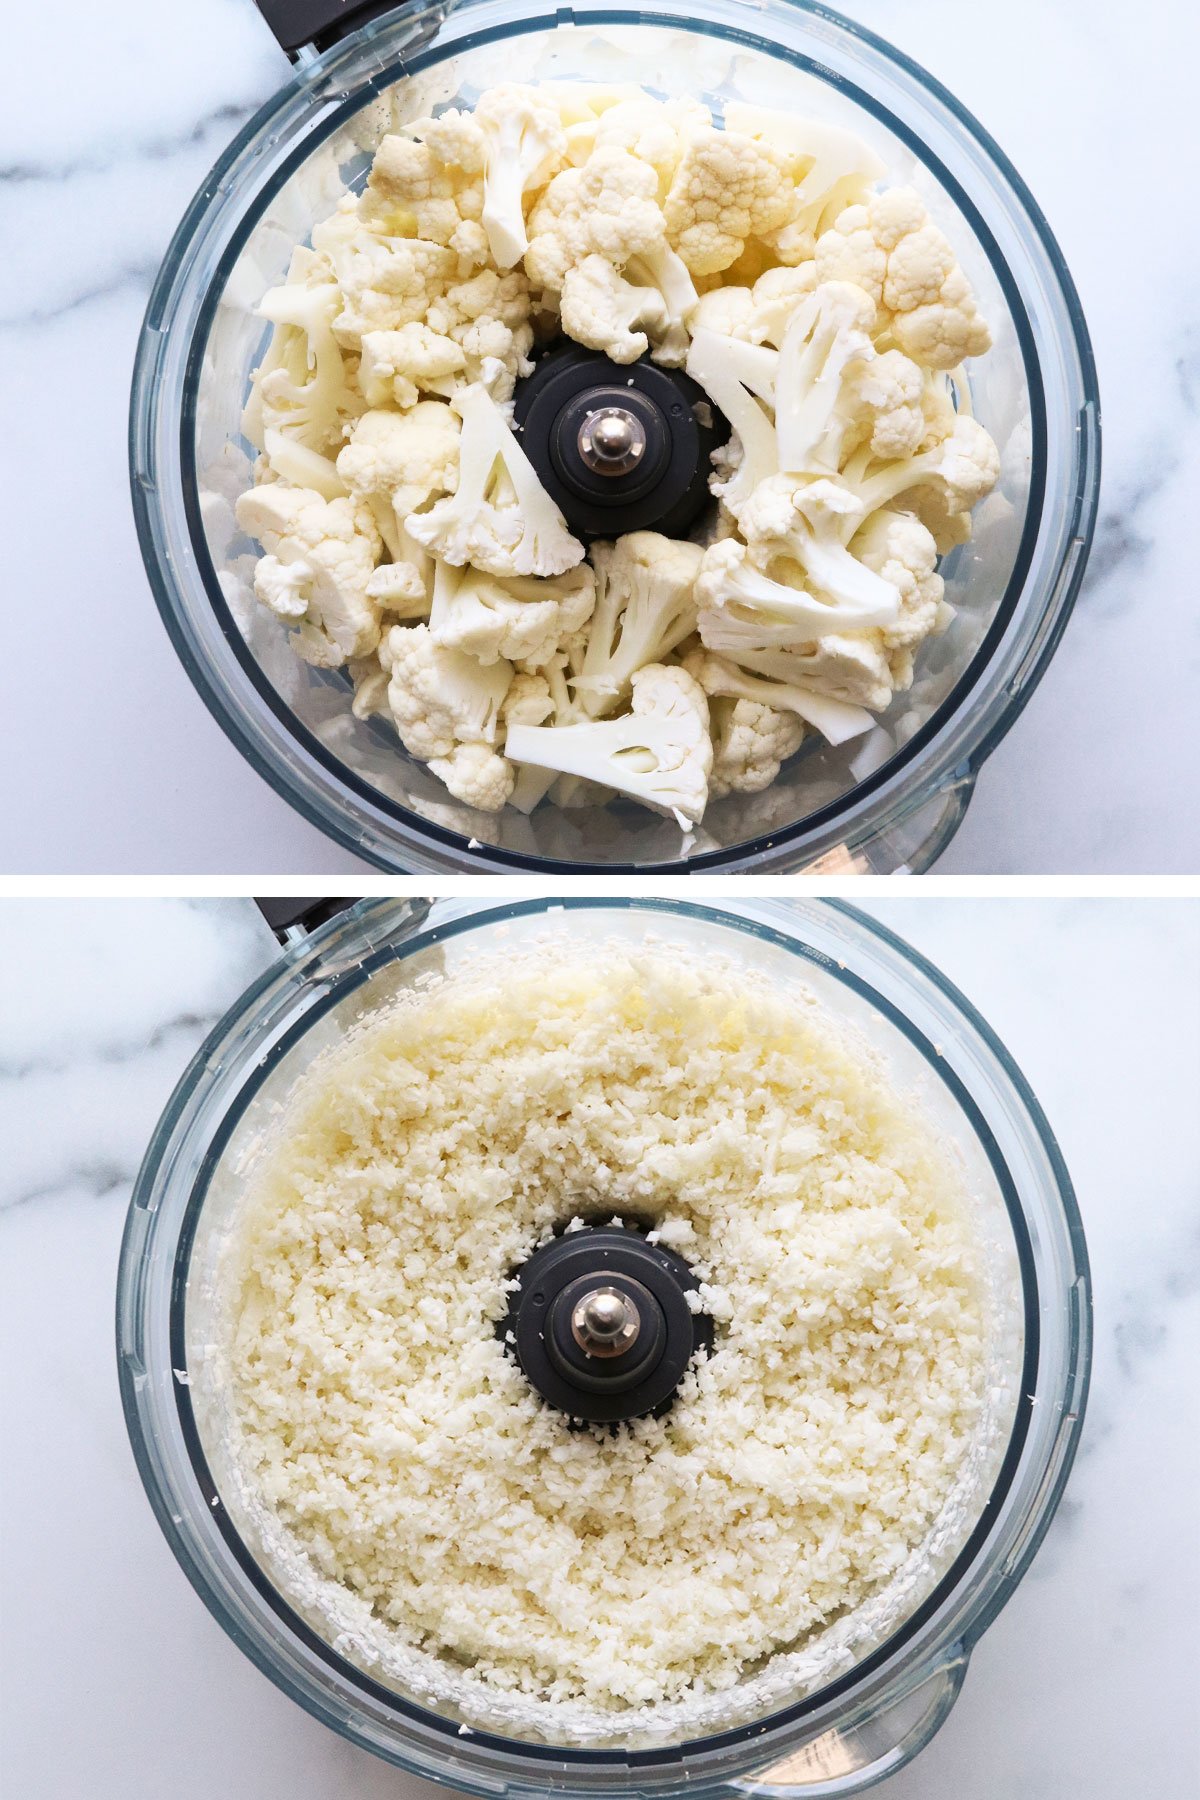
Preheat the oven to 400ºF and line a large baking sheet with parchment paper. If you’re using fresh cauliflower, place the cauliflower florets in a food processor fitted with an S-blade. (Mine is a 12-cup size.)
Briefly pulse the florets until they have a rice-like texture.
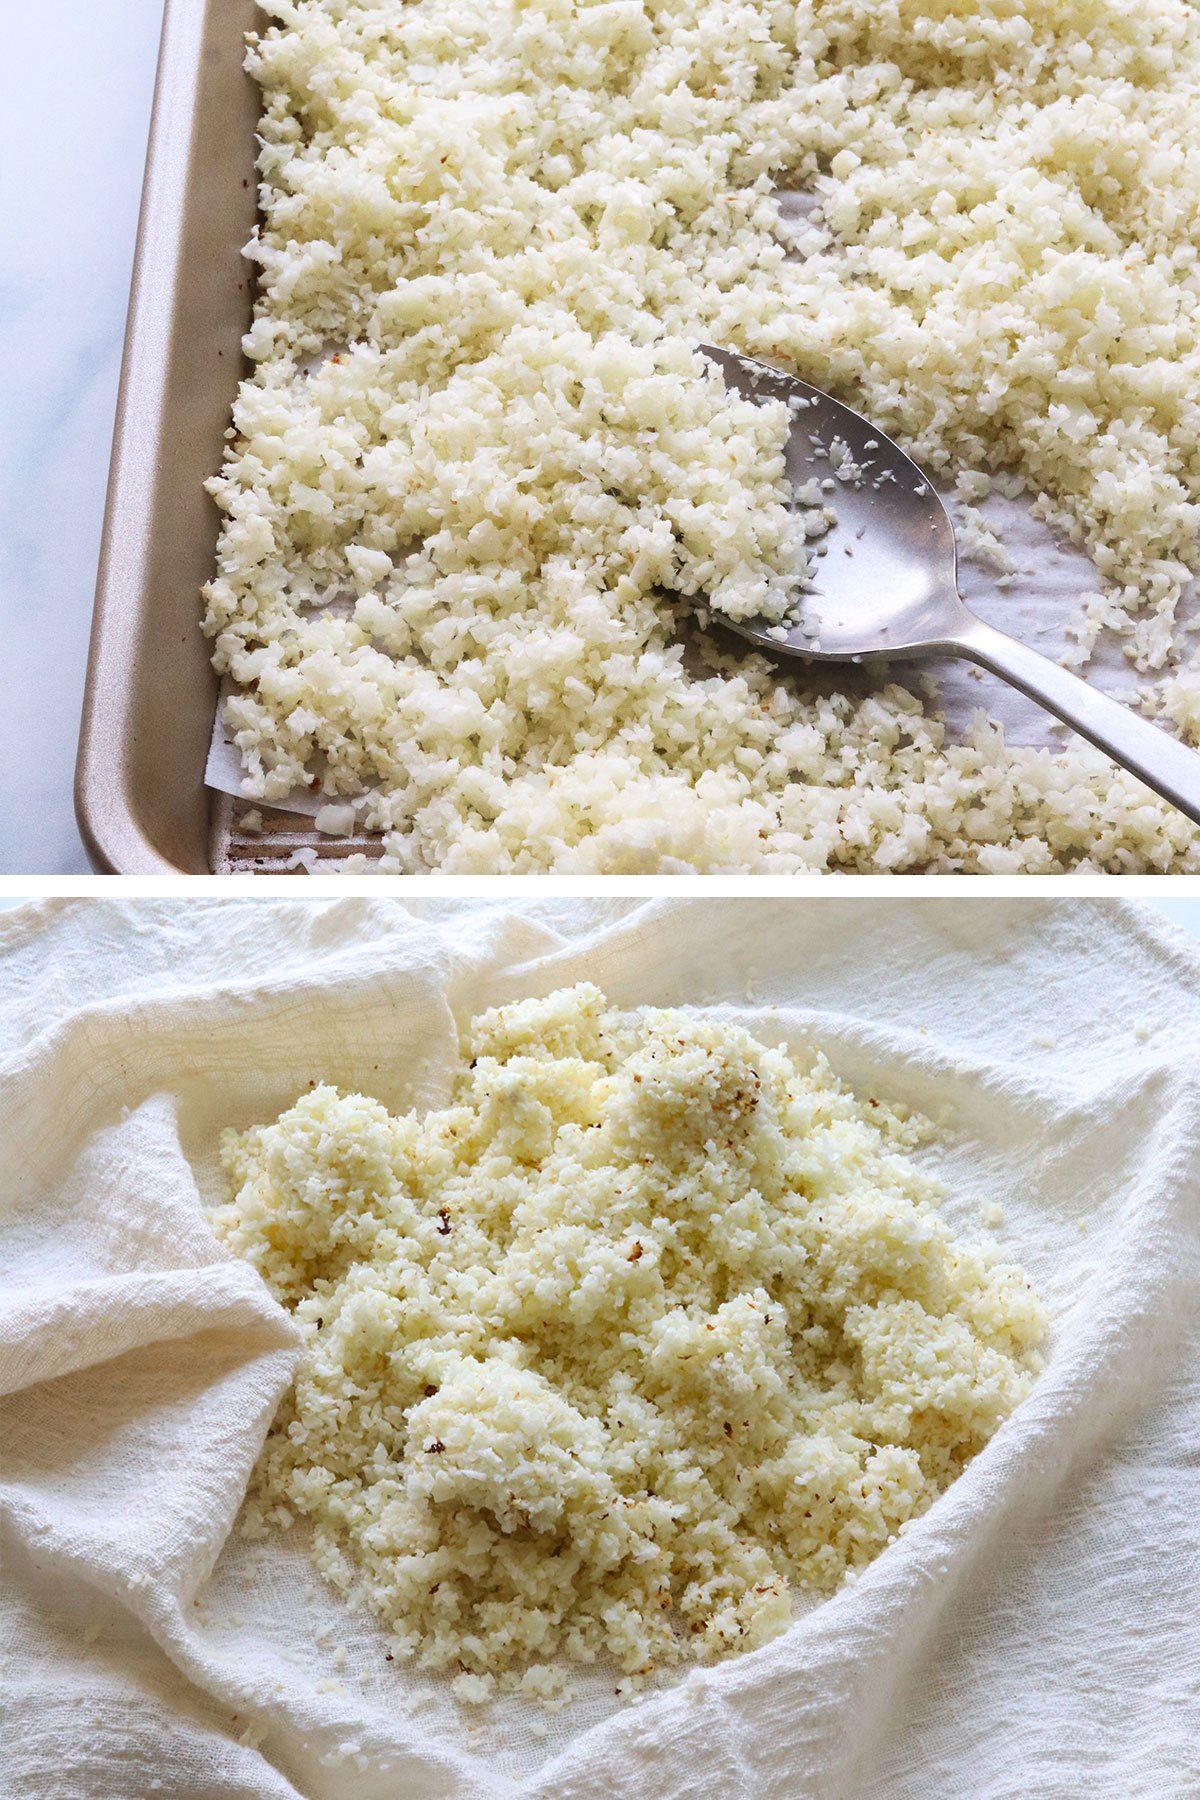
Transfer the cauliflower rice to the prepared baking sheet and spread it out into an even layer. Place it in the oven to soften and cook for 15 minutes.
Alternatively, you can place the cauliflower in a covered microwave-safe bowl and cook for 4 to 5 minutes on high to steam it. Or, you can cook it in a large skillet with a 1/4 cup of water for 8 to 10 minutes, until it has softened and the water has evaporated.
Once the cauliflower has cooked, let it cool for 10 minutes, or until you can safely handle it without burning yourself.
Time-Saving Tip
If you buy frozen cauliflower florets, you can simply let them thaw overnight in the fridge before making this crust. They will have a tender texture so you can skip the cooking step altogether! Simply pulse them in a food processor and then wring out the moisture as directed.

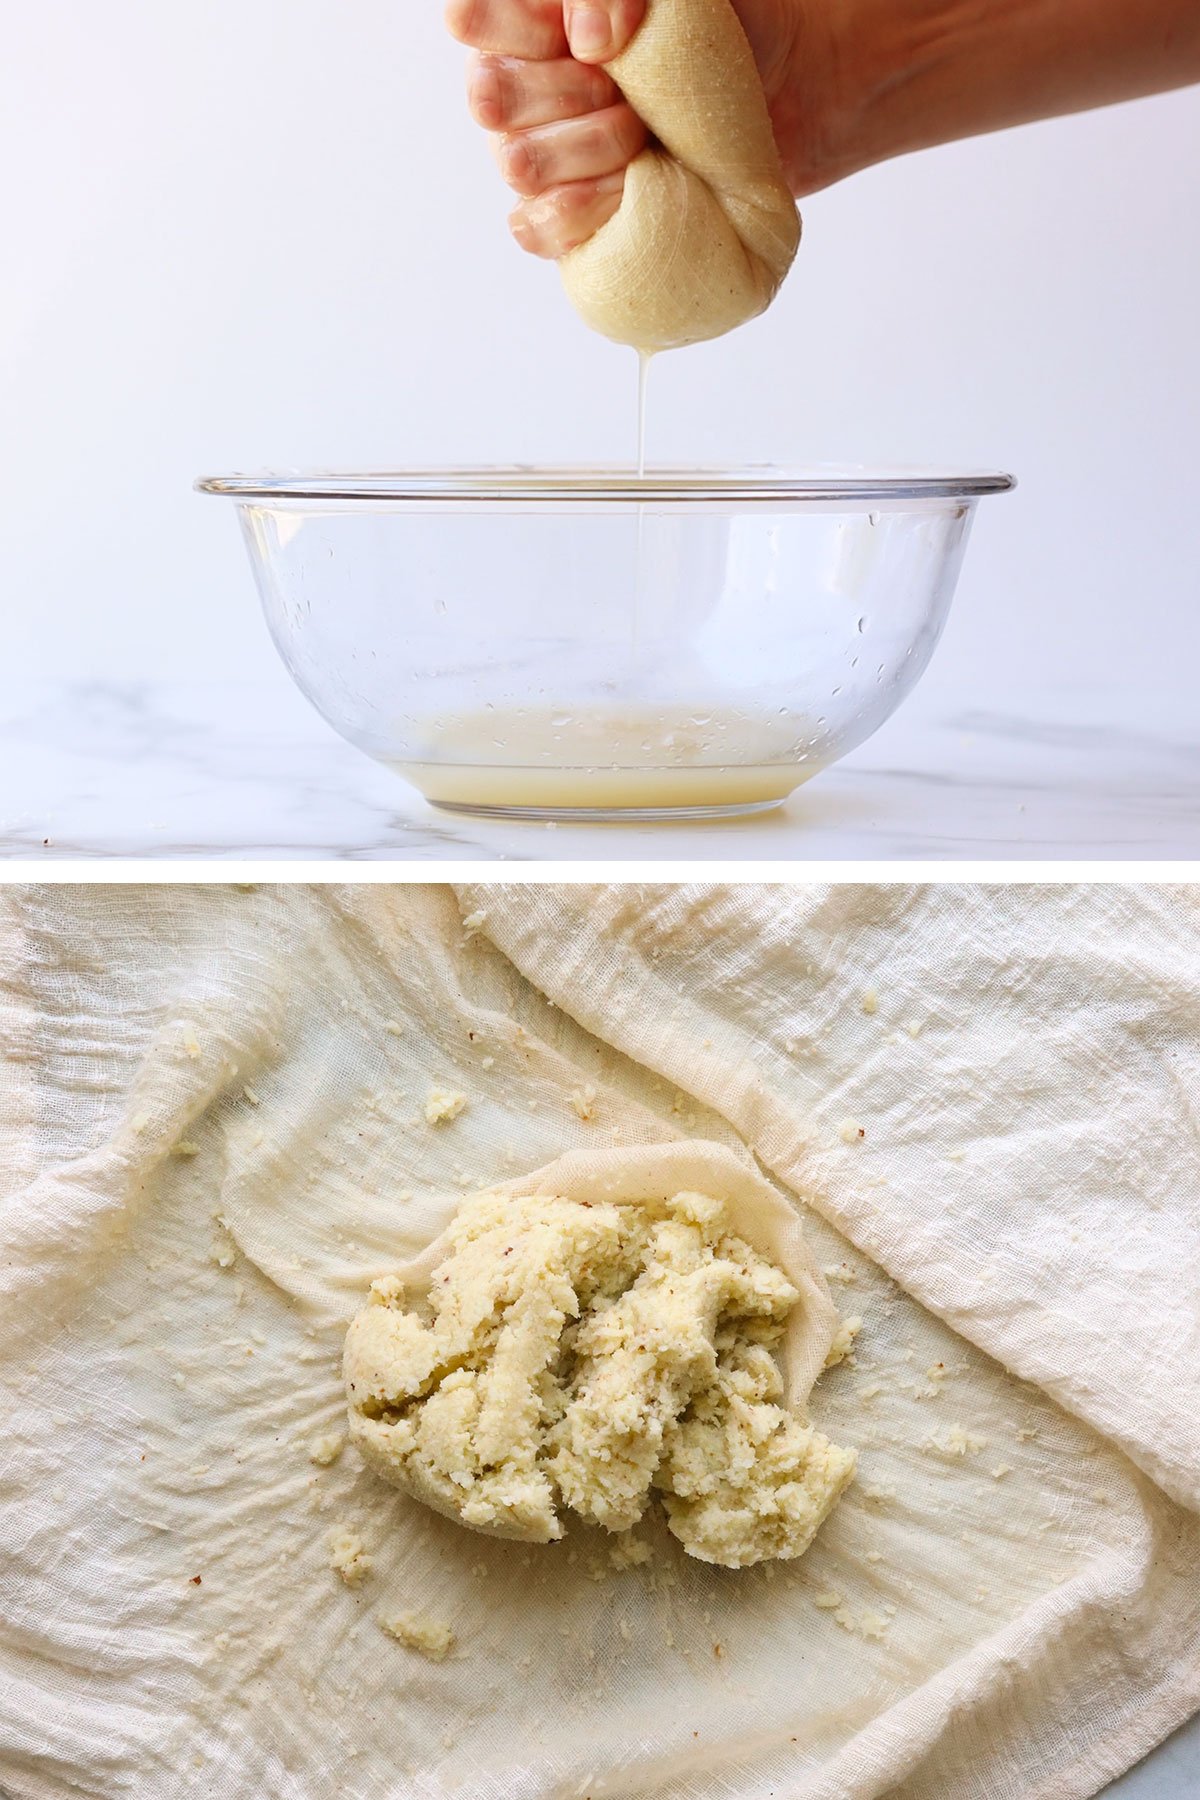
Transfer the riced cauliflower to the center of a clean dish towel. Arrange the towel filled with cauliflower over a small bowl, then squeeze as much liquid as you can out of the cooked cauliflower.
It might not feel like there’s excess moisture at first, but you may be surprised by how much liquid is released! (There should be at least 3 to 4 tablespoons of liquid in the bowl.)
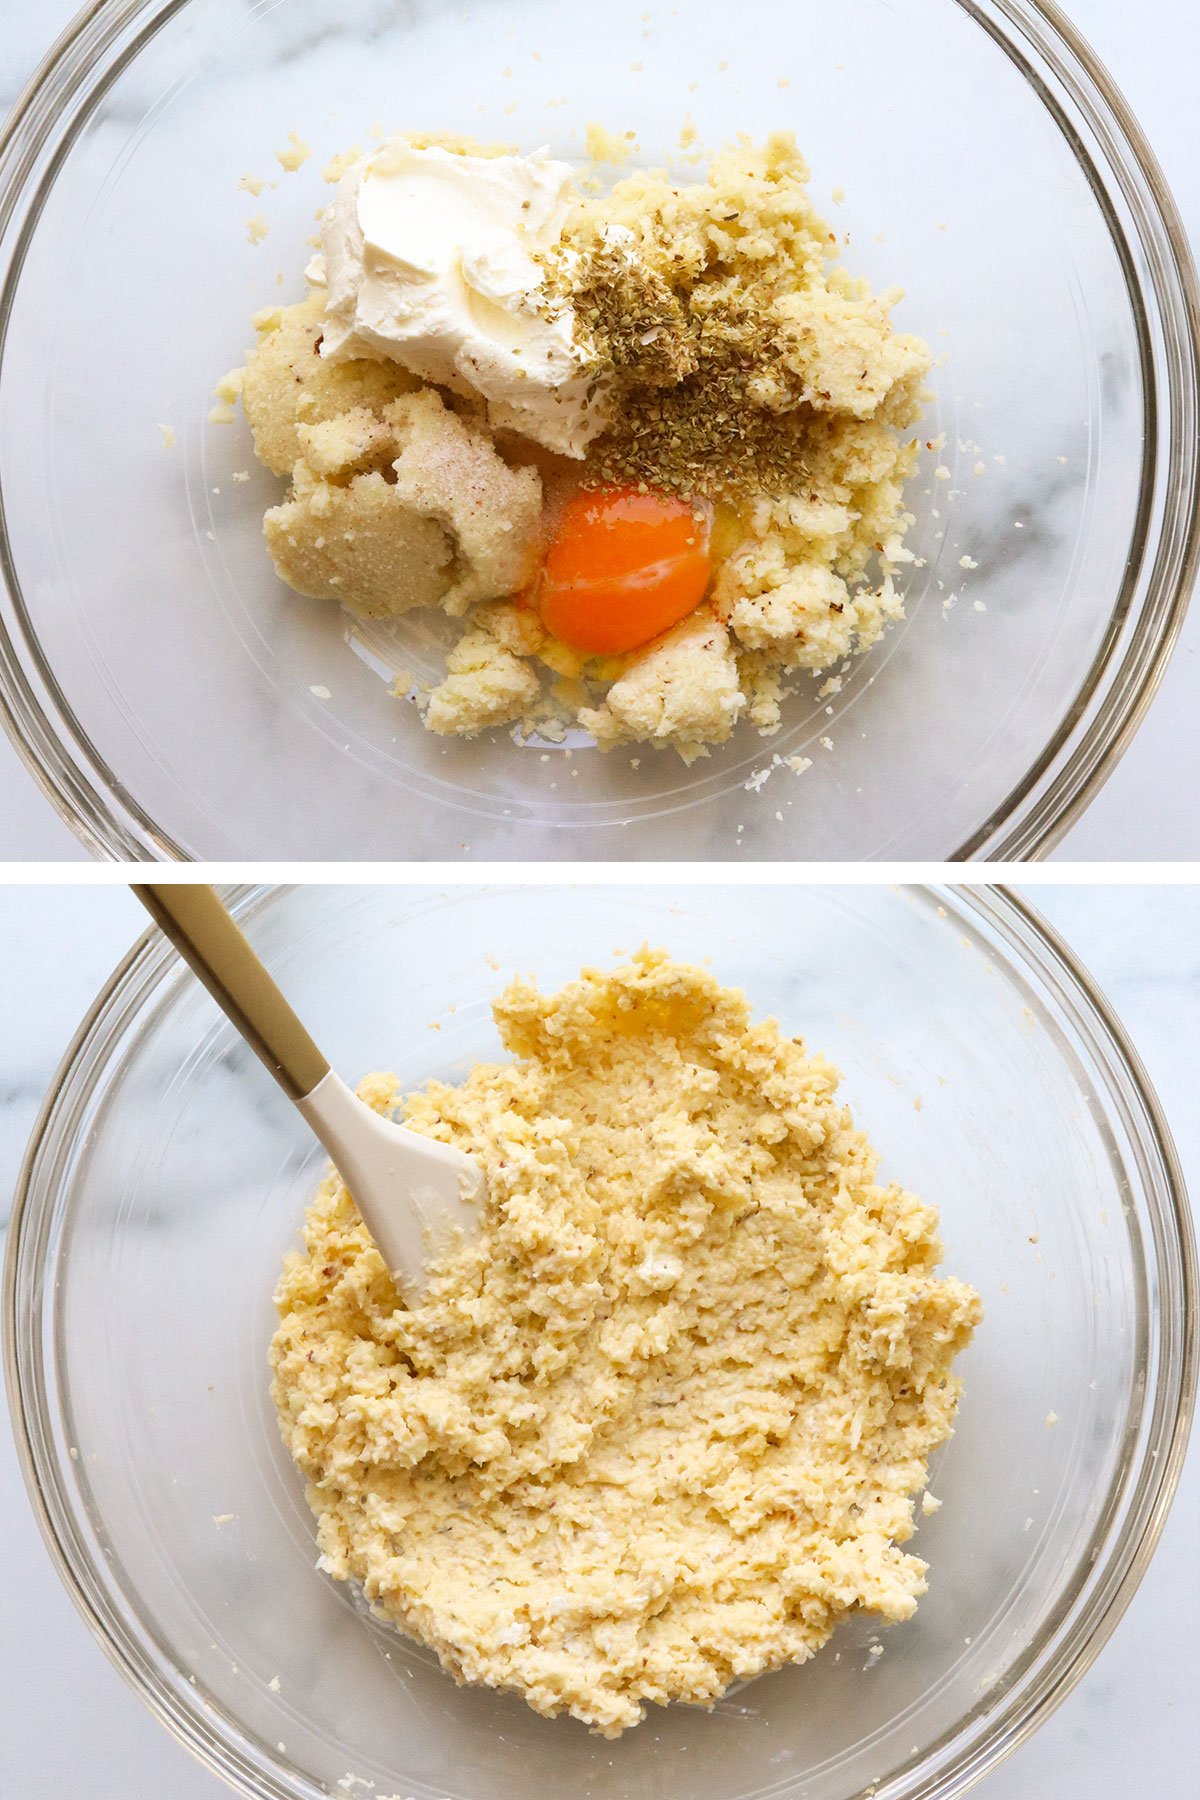
Place the cauliflower rice that you just squeezed into a large bowl, then add in the egg, cheese, oregano, salt, and a pinch of black pepper, if desired.
Use a spatula to stir well, until the cauliflower mixture looks relatively uniform.
Arrange a fresh piece of parchment paper, if needed, on the large baking sheet, then place the cauliflower mixture in the center of the pan.
Use your hands to gently press the cauliflower pizza dough into the shape of a round pizza crust, about 10 to 12 inches wide. It will be thin, but there shouldn’t be any holes in the crust.
Tip
Get your hands wet if you find that the crust is sticking to your fingers; wet hands help prevent sticking!
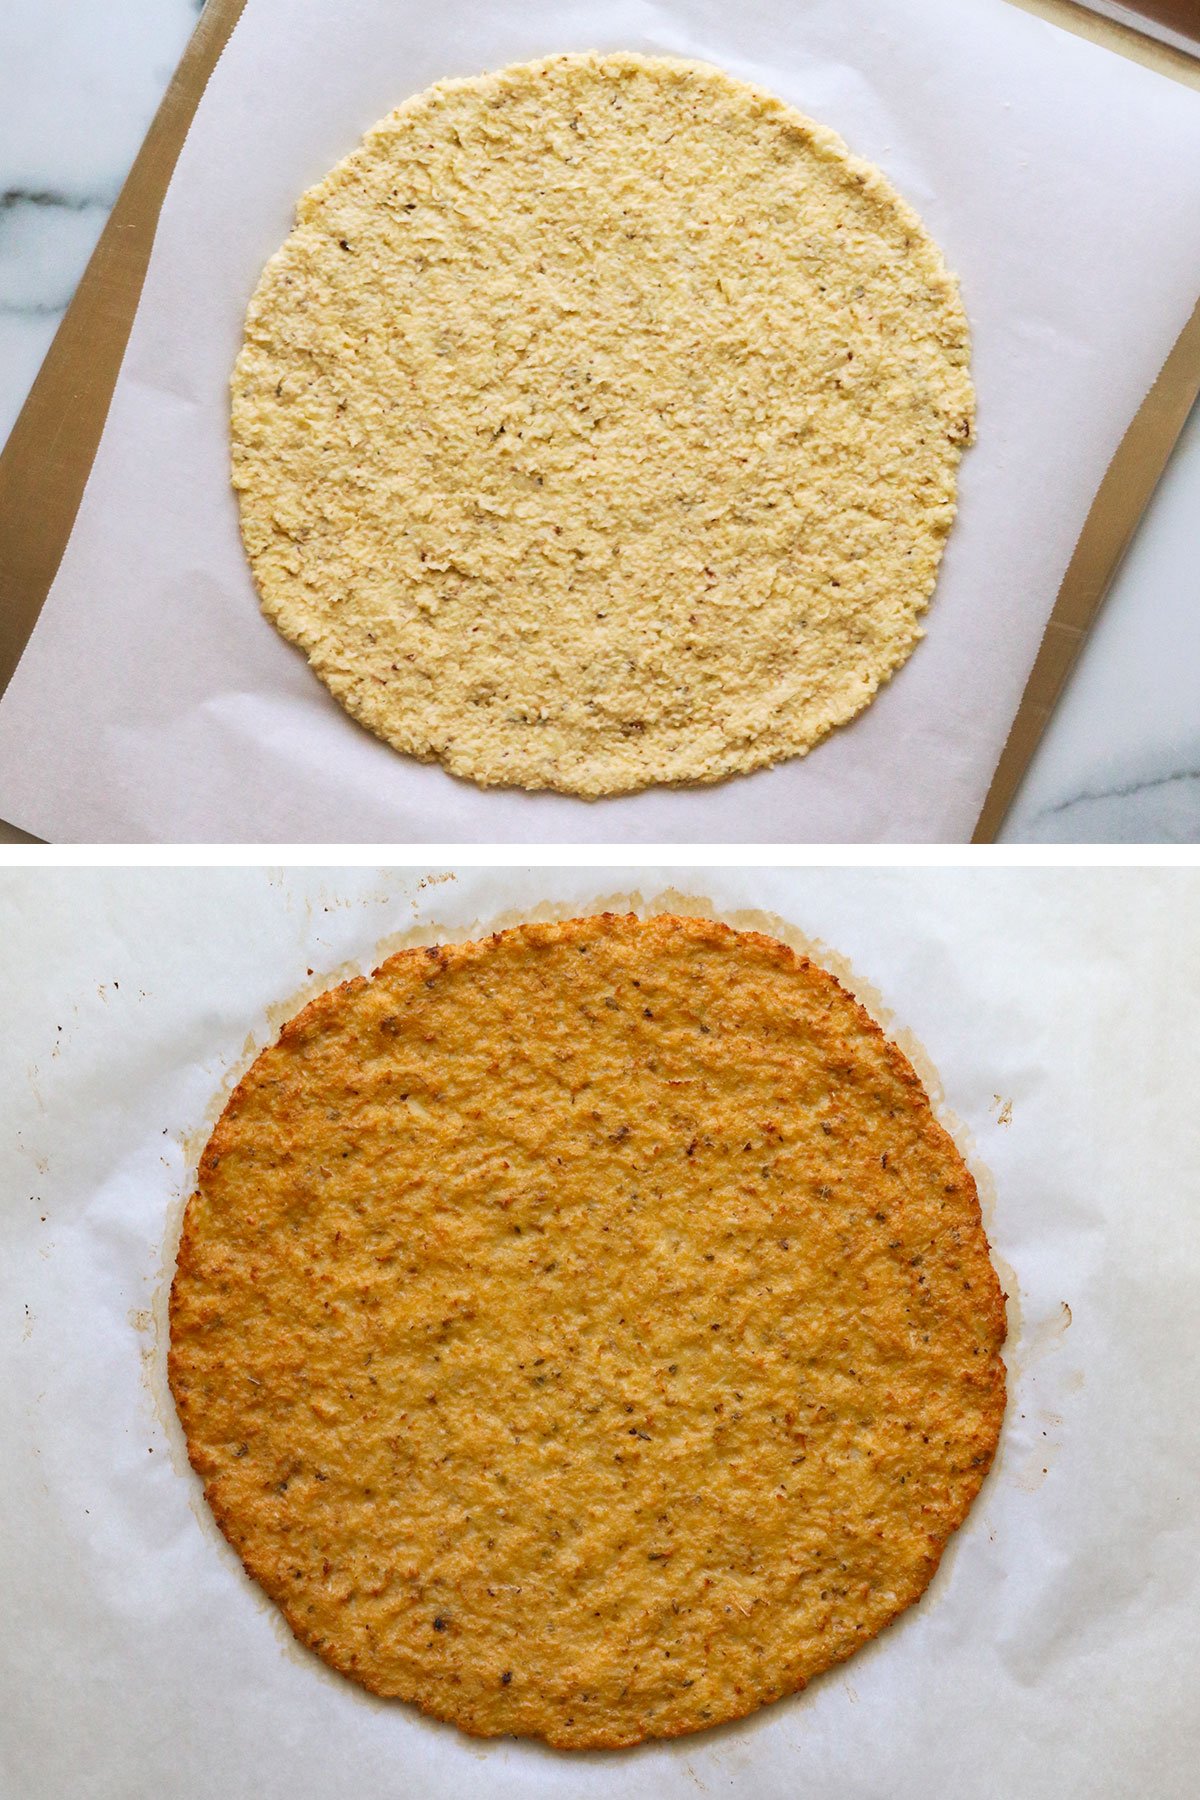
Place the cauliflower crust in the oven to bake at 350ºF for 30 minutes, or until the crust looks golden. Then it’s ready for toppings!
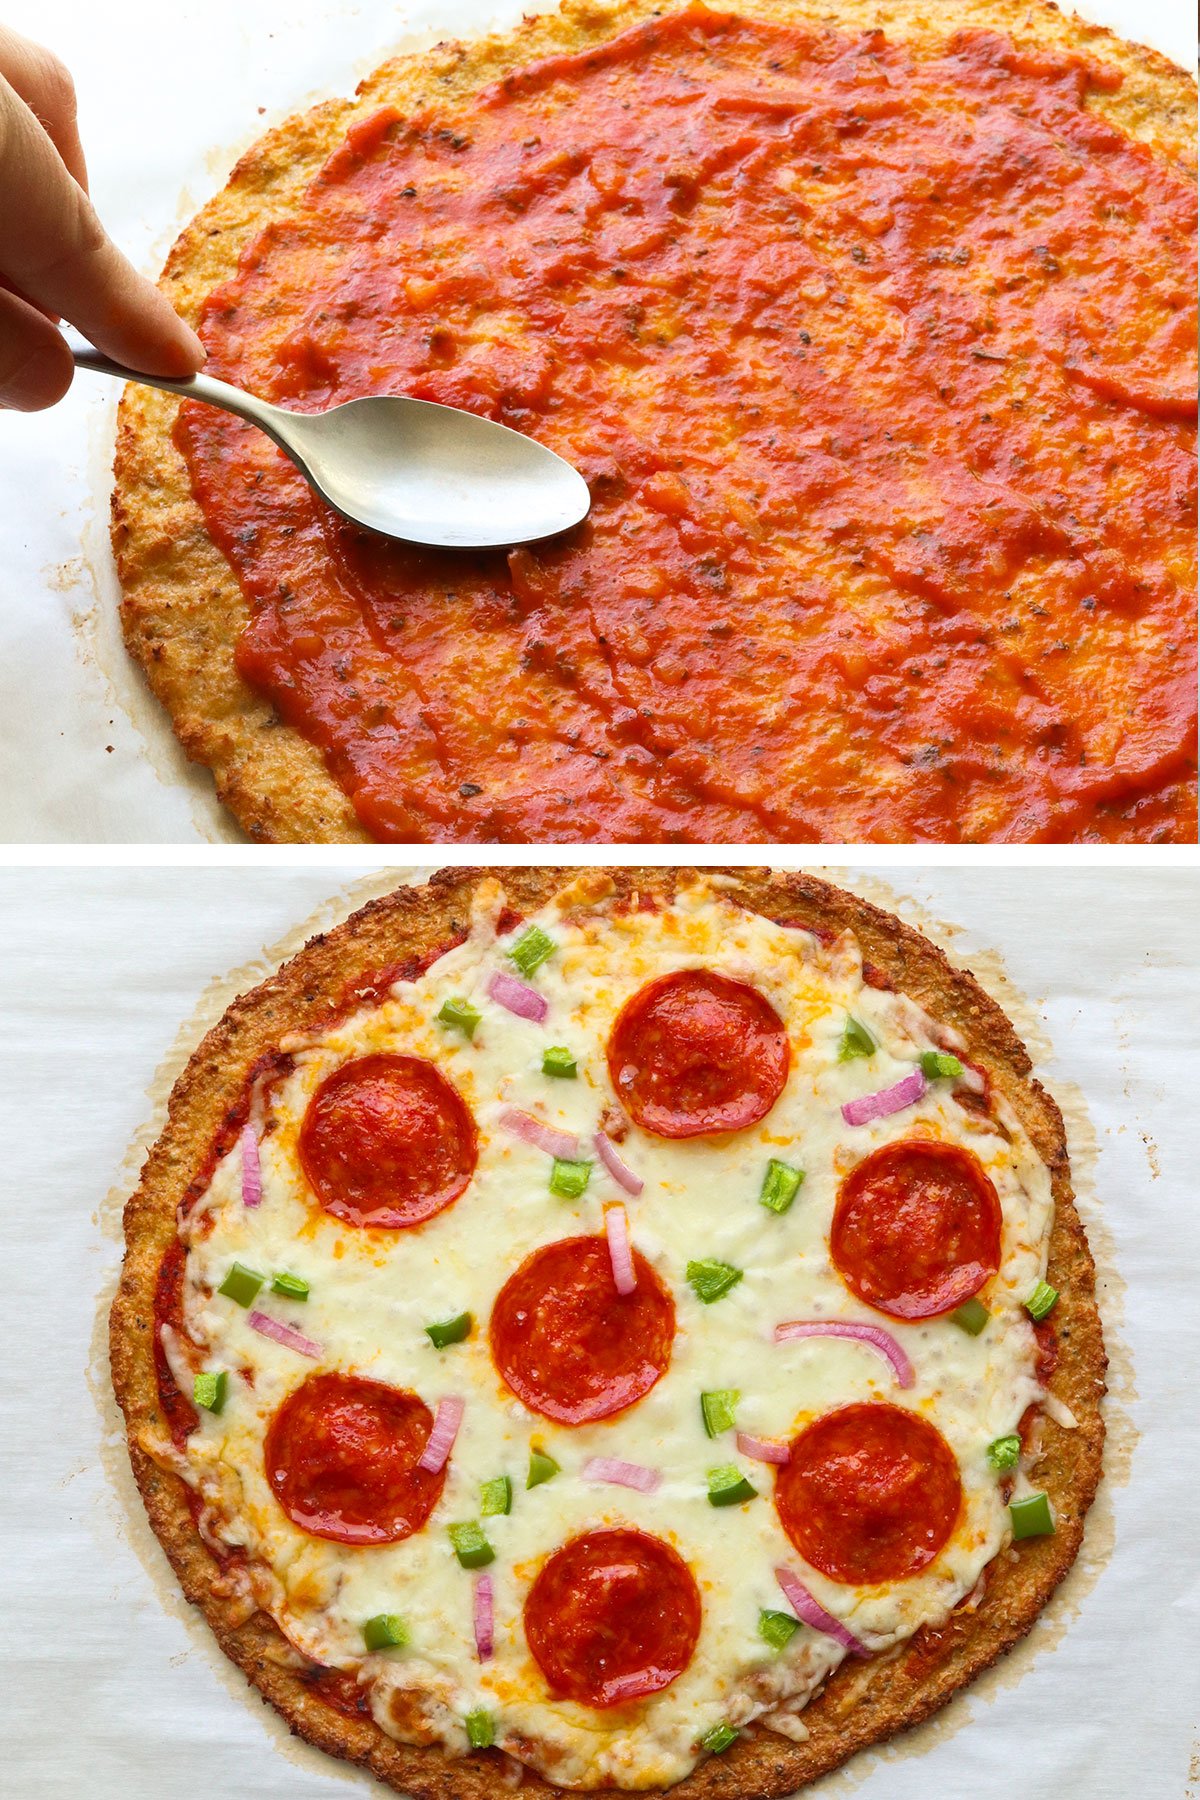
Add a thin layer of pizza sauce, mozzarella cheese, and any toppings you love, like pepperoni, mushrooms, onions, fresh basil, or olives.
Return the pizza to the oven to bake until the cheese has melted, about 10 more minutes.
You can turn on the broiler and watch closely if you want the cheese to turn golden even faster.
Let the pizza cool for 5 minutes, then cut into slices. Because you took the time to remove excess moisture, the crust should be easy to pick up with your hands!
Leftover pizza slices can be stored in an airtight container in the fridge for up to 5 days. Or you can freeze them for up to 3 months.
Looking for more low-carb dinner ideas? Try Cauliflower Fried Rice, Zucchini Lasagna, or Chicken Vegetable Soup for more options.

Ingredients
- 1 pound cauliflower florets (or thawed from frozen; see notes)
- 1 large egg , beaten
- ⅓ cup soft goat cheese (or grated Parmesan)
- 1 teaspoon dried oregano
- ¼ teaspoon salt
Instructions
- Preheat the oven to 400ºF. If the cauliflower isn't already riced, add the cauliflower florets into a food processor and pulse briefly, until it has a rice-like texture. Line a large baking sheet with parchment paper, then spread the cauliflower rice out in a single layer. Bake for 15 minutes, or until the cauliflower is tender.
- If you're using frozen cauliflower, be sure that it is completely thawed, and process it into a rice-like texture using a food processor. (Alternatively, you can start with frozen cauliflower rice that has been thawed, to skip the food processor step.) There is no need to cook thawed frozen cauliflower so it will save you time! Tip: You can use up to 1 ½ pounds of cauliflower if you want to use two 12-ounce bags. This crust will still hold together well!
- Once the riced cauliflower has been cooked (or thawed), transfer it to a clean, thin dishtowel. Wrap up the steamed rice in the dishtowel, twist it up, then SQUEEZE all the excess moisture out! (Be careful if your cauliflower is still hot; let it cool before handling.) A lot of extra liquid will be released, which will help you avoid a soggy pizza crust.
- In a large bowl, mix up the squeezed-out rice, egg, cheese, oregano, and salt. It won't be like any pizza dough you've ever worked with, but don't worry, it will work!
- Press the dough out onto a baking sheet lined with parchment paper. (It's important that it's lined with parchment paper, not wax paper, or it will stick.) Keep the dough about 1/4-inch thick. Wet your hands to prevent sticking, if needed.
- Bake for 30 minutes at 400ºF or until the top looks dry and golden.
- Add your favorite pizza toppings to the crust, such as sauce and cheese, then return the pizza to the 400ºF oven. Bake an additional 5-10 minutes, just until the cheese is hot and bubbly. Slice and serve warm.
Video
Notes
Nutrition
If you try this Cauliflower Pizza Crust recipe, please leave a comment and star rating below letting me know how you like it.


I’m so excited! This is the third cauliflower crust recipe I’ve tried, and the first one that actually worked! I was going to give up if I had another failure, but this was perfect!!
Hi, thank you so much for this recipe it was delicious . my crust stuck parchment paper any suggestions ?
Make sure you’re definitely using parchment paper, and not wax paper. The parchment paper should peel right off!
This was so yummy! Great site and directions! I added fresh garlic, oregano, basil and parsley to the crust……will definately make again!
I am not able to have eggs or cheese right now, so I made the crust with cauliflower and a yellow plantain. It held together well. I don’t think i made it thick enough to hold though, with the veggie toppings. Thanks for the great recipie!
HIIII
I am a HUGE pizza fan and I am so excited to try out this cauliflower pizza crust! I have recently been doing the paleo diet and was curious what I could use for cheese? Does anyone have any ideas?!
I am on the SCD with tremendous success after suffering with celiac disease for decades. I cannot tolerate any kind of dairy; I am one of those people who have the actual allergy to cow’s milk, yet even goat products cause me discomfort. I have a recipe for cashew cheese. Has anyone tried this pizza crust using cashew ‘cheese’? I am thinking cashew butter would work as well. For now, I rate this recipe with 5 stars for the ingenious concept.
I know a few people asked the question about using a flax egg instead of a regular egg. My doctor put me on a very restricted diet and eggs are currently on my list of things to avoid. So, tonight I tried this recipe using a flax egg. Megan had mentioned that you need the egg to bind everything and that’s very true! Mine fell apart… The flavor was excellent but the texture definitely wasn’t a nice crispy crust like it was supposed to be. Just a note, I did strain the cauliflower very, very well and let my flax egg sit for about 35 minutes before adding it so there was no excess water. Maybe someone else might have better luck, but for mine the flax egg didn’t work. Hopefully, in a few months I can add eggs back and try this as it was intended. 🙂
Oops meant to type “bread size” pieces
Hi Megan,
Just want you to know I shared this on my facebook page. Milani Home LLC. I’m a food blogger as well and I like to know when someone uses my recipes. Love this soooo much. I’m not eating carbs so I not only made this for pizza, I made the crust into break size pieces and use them for sandwiches. Makes a wonderful egg and bacon sandwich!!
I have NEVER liked cauliflower — but I thought I would give this a try (worst case scenario – hubby would eat all of it). OMG – It is now on the list of my favorite recipes!!!! Yes it is time consuming but well worth the time. Oh and I wear kitchen gloves to hold out some of the heat while squeezing the excess water out. I add some fresh basil to the crust mix too. Thank you so much for the step by step instructions!
This is the first time I’ve been able to eat pizza in a long long time and it hasn’t upset my stomach…..THANK YOU x 1000! This pizza was amazing, even my bf loved it! I recommend anyone who reads this to make this recipe! Only 2 things I have to say are: 1. It’s time consuming – but worth it! 2. When you squeeze the water out of the cauliflower w/out straining 1st (I didn’t have a strainer that fine) – it’s extremely hot!! Enjoy!! 🙂