This post may contain affiliate links. Please read my disclosure and privacy policy.

While chicken is a popular protein to cook, not everyone does it well. After testing this recipe multiple times, I’ve realized you can make it more foolproof with these two tips:
- Pay attention to the thickness. Chicken breasts always vary by size, so you can’t expect the exact timing to work for every piece. That’s why I took the time to develop a guide that you can use to determine the cooking time based on thickness. Check it out below!
- Use an instant-read meat thermometer. I used to cook chicken until it was no longer pink in the middle, which meant I had to slice into the center and lose all the juices to check on it. Save yourself the guesswork and use this tool for the best results.
Seasoning is also essential, so I’ve shared my favorite combination down below. You’ll get the same delicious results as oven-baked chicken breasts, in just a fraction of the time using the air fryer.
⭐⭐⭐⭐⭐ Review
“OMG, I just tried this method last night and the chicken turned out so juicy! I’ll be cooking it in the air fryer from now on. Thank you for the detailed instructions about the timing by thickness. It worked out perfectly!” – Susan
What You’ll Need for Chicken Breasts in Air Fryer
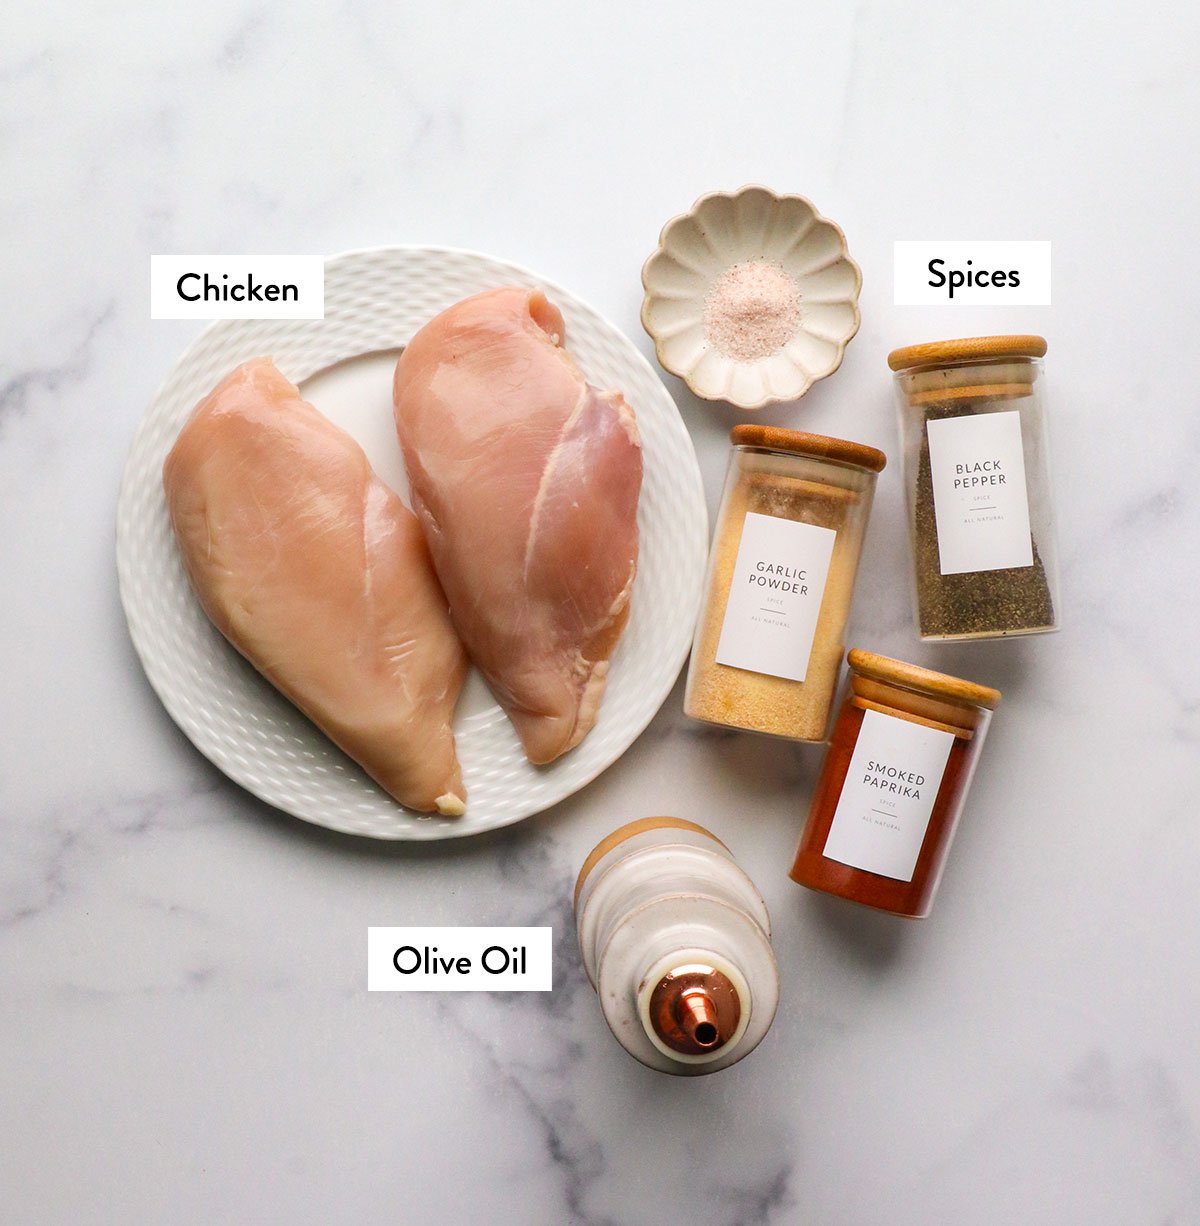
Here’s what you’ll need:
- Chicken Breasts. We’re using boneless, skinless chicken breasts for convenience. I tend to buy ones that are 8 to 12 ounces each, but pay attention to the thickness. A breast that is 1 inch thick will cook faster than one that is twice as thick.
- Olive Oil. This helps keep the chicken moist as it cooks, but you can use any other neutral oil you prefer.
- Spices. The combination of garlic powder, smoked paprika, salt, and black pepper is hard to resist. But, poultry seasoning will also work great here.
In general, I prefer a dry rub when cooking in the air fryer, so you won’t have as many drips or splatters to clean up later. Plus, there’s no marinade time, making this as fast as possible.
How to Cook Chicken Breast in Air Fryer
Step 1:
Prepare the seasoning mix by adding garlic powder, paprika, black pepper, and salt to a small bowl. Stir well.
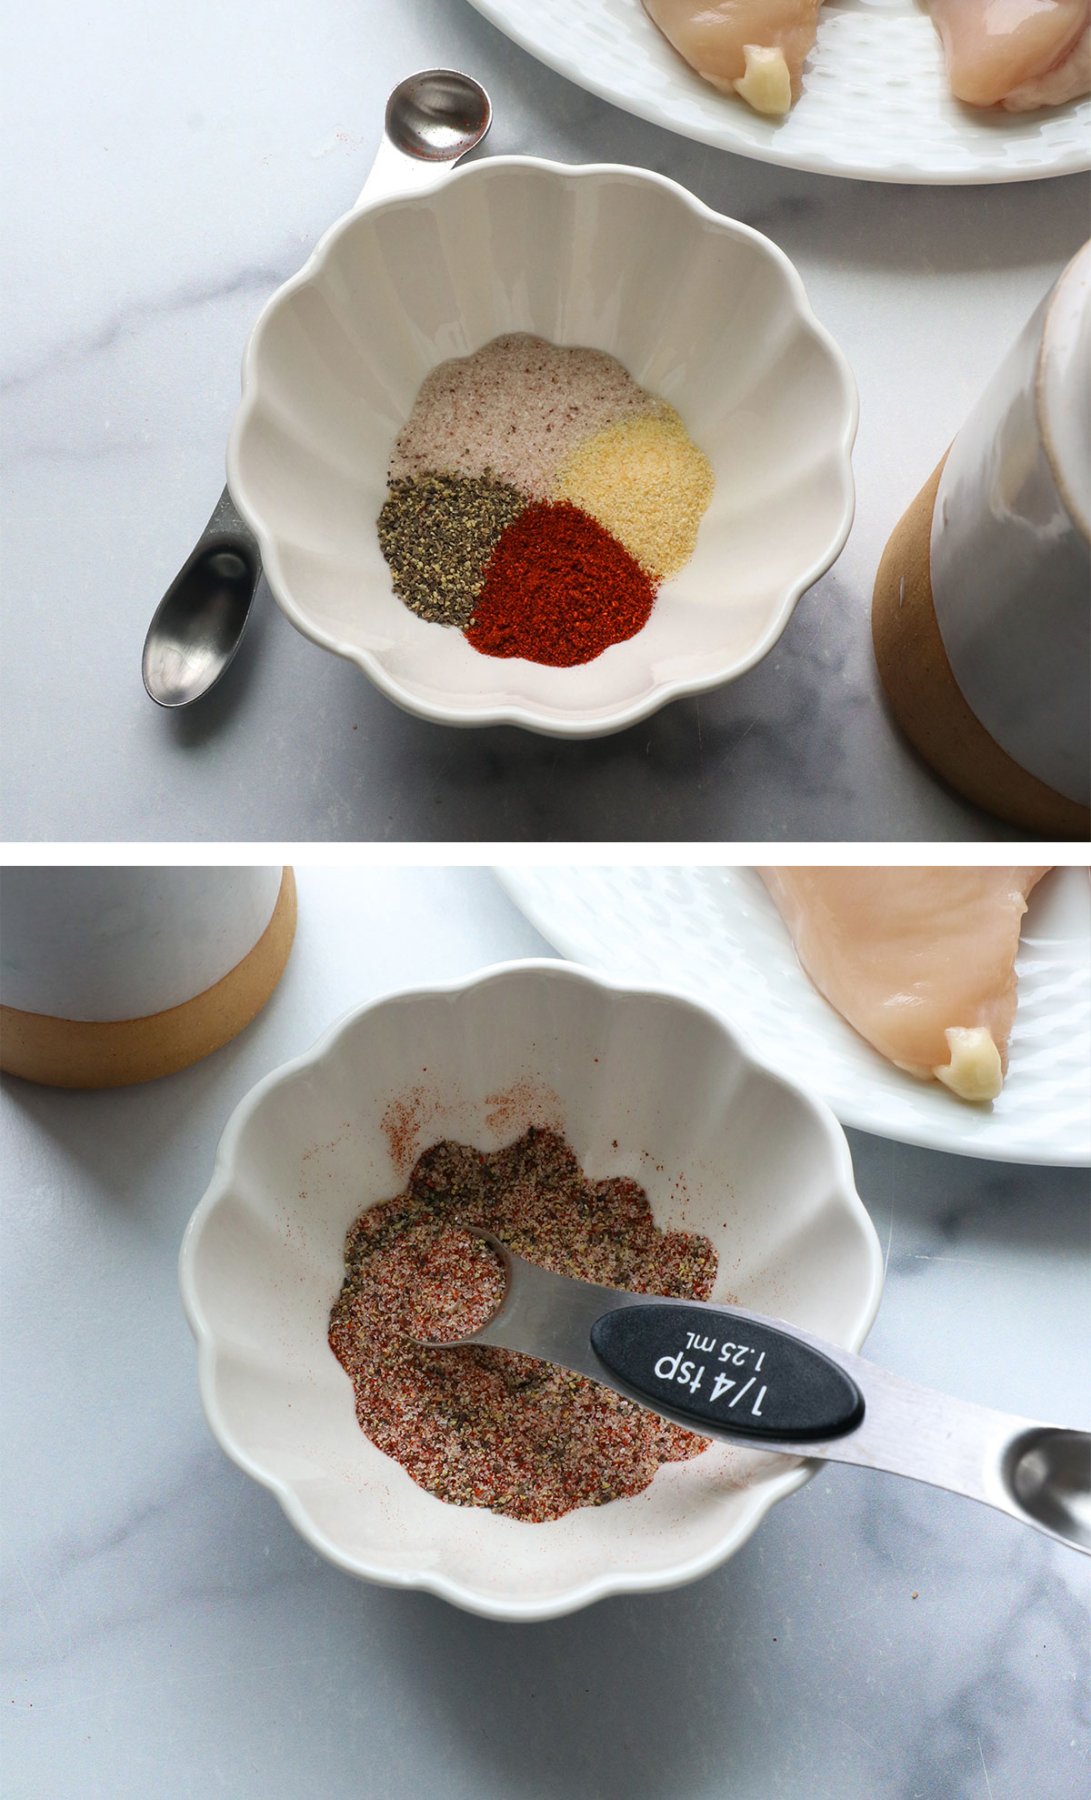
Step 2:
Drizzle the chicken breasts with olive oil and rub it into both sides. Sprinkle half of the seasoning blend over the top of the chicken.
Flip the chicken over and season it with the remaining mixture. This should season roughly one to one and a half pounds of chicken.

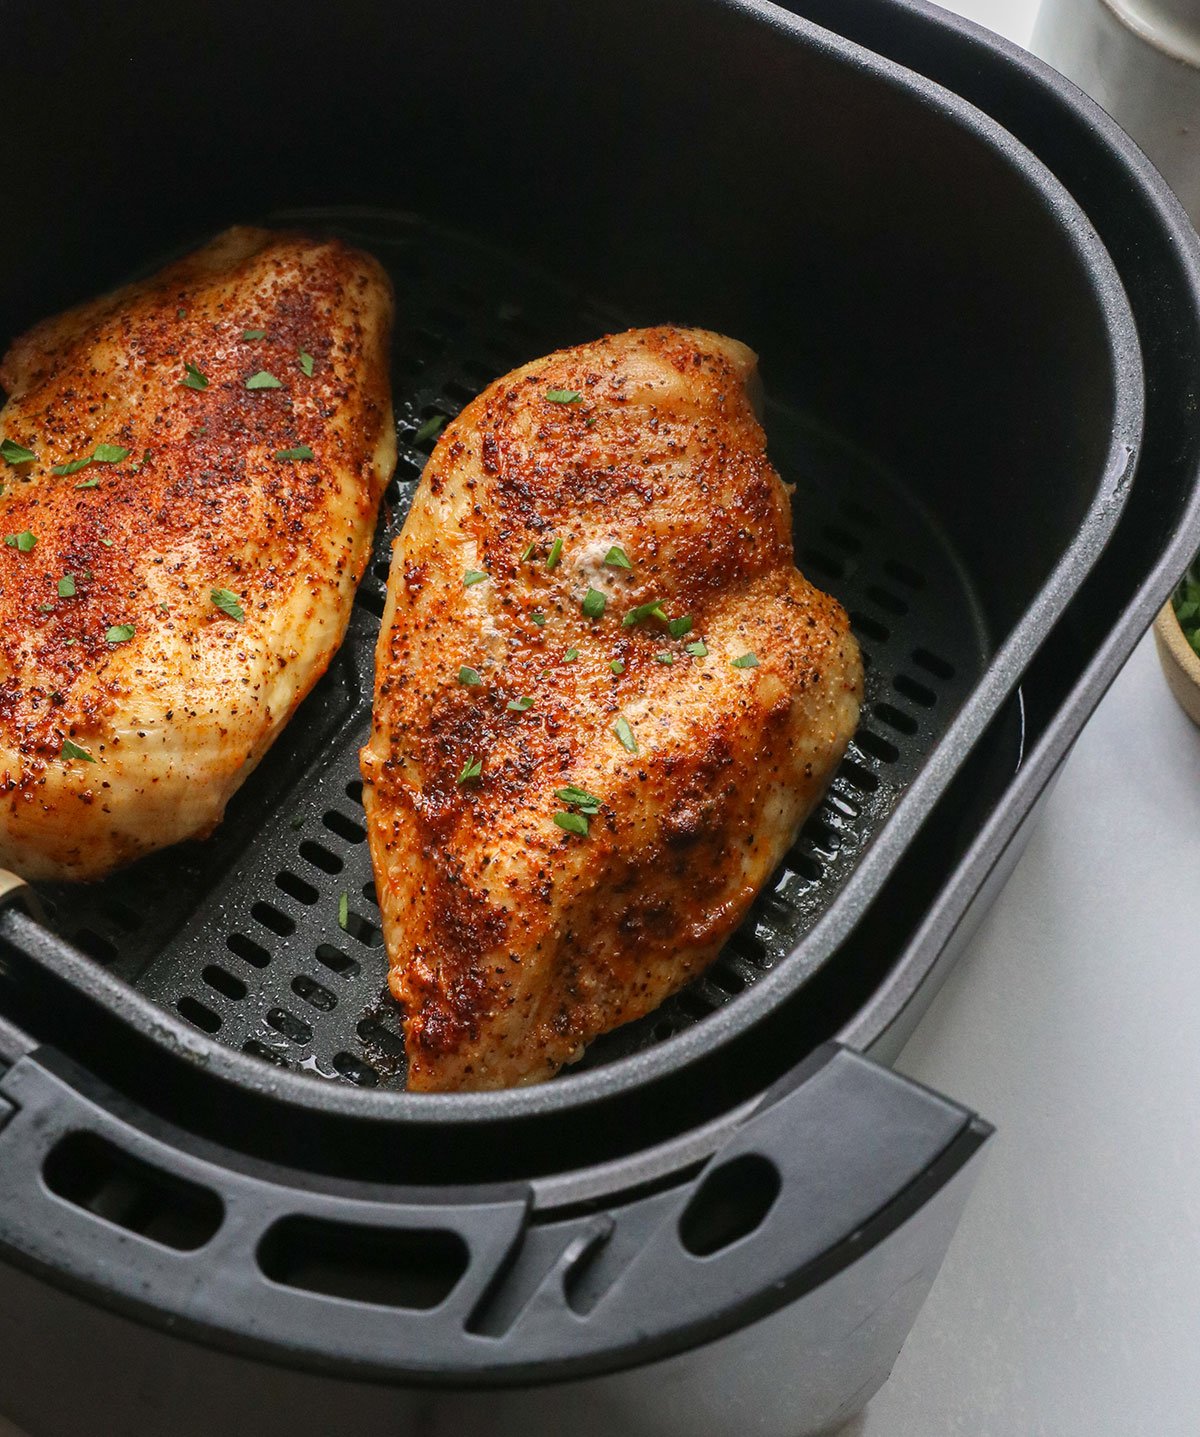
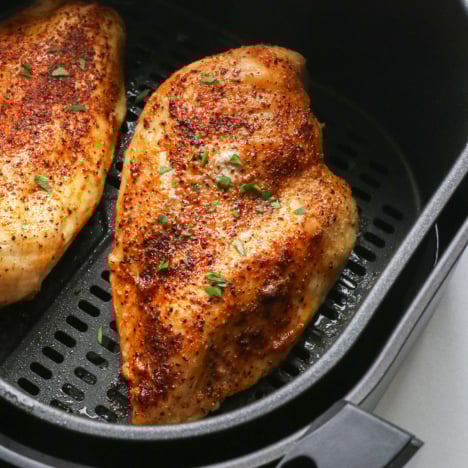
Step 3:
Arrange the seasoned chicken breasts in a single layer in the air fryer basket. Cook at 375°F for 15 minutes for chicken that is 1 inch thick.
Refer to the suggested cook times below for different chicken thicknesses.
When the cooking cycle is complete, use an instant-read thermometer to check the internal temperature of the chicken. If your chicken breasts are thin, they might be done at this point, reaching an internal temperature of 160ºF. (They will get a safe internal temperature of 165ºF as they rest.)
If your chicken hasn’t reached the proper temperature yet, return the basket to the air fryer and cook for an additional 5 minutes. Continue cooking until the chicken is thoroughly cooked through.

Want to save this for later?
Step 4:
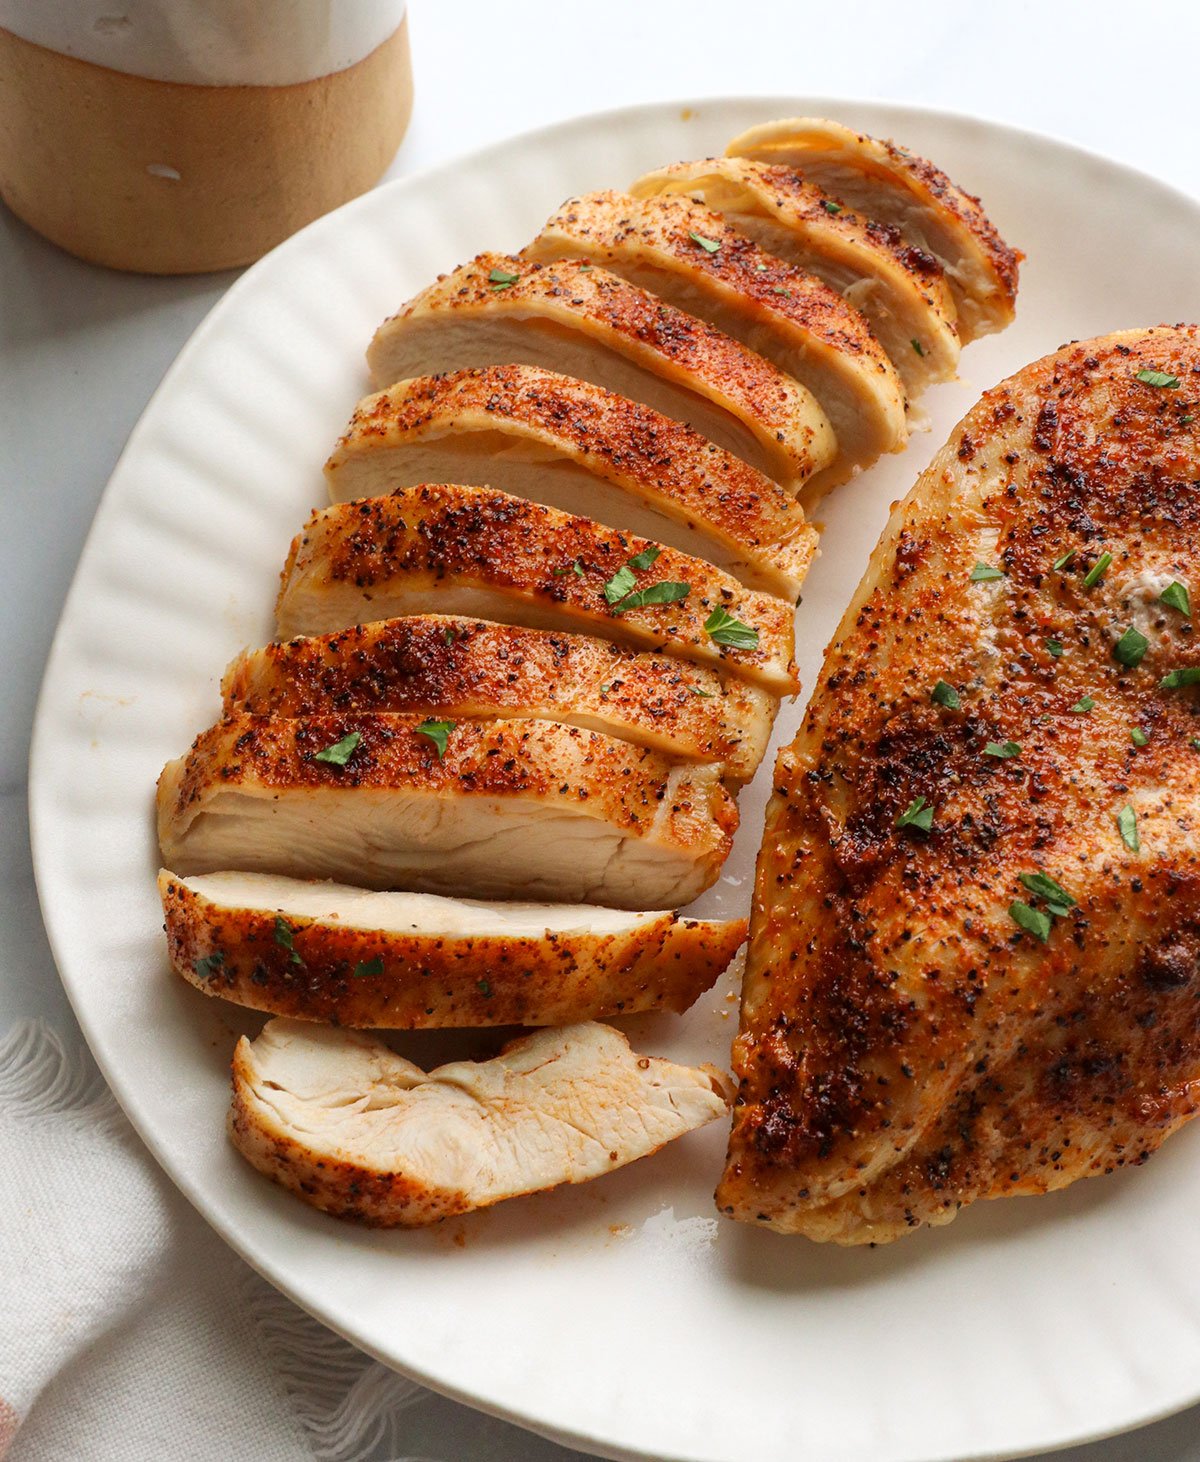
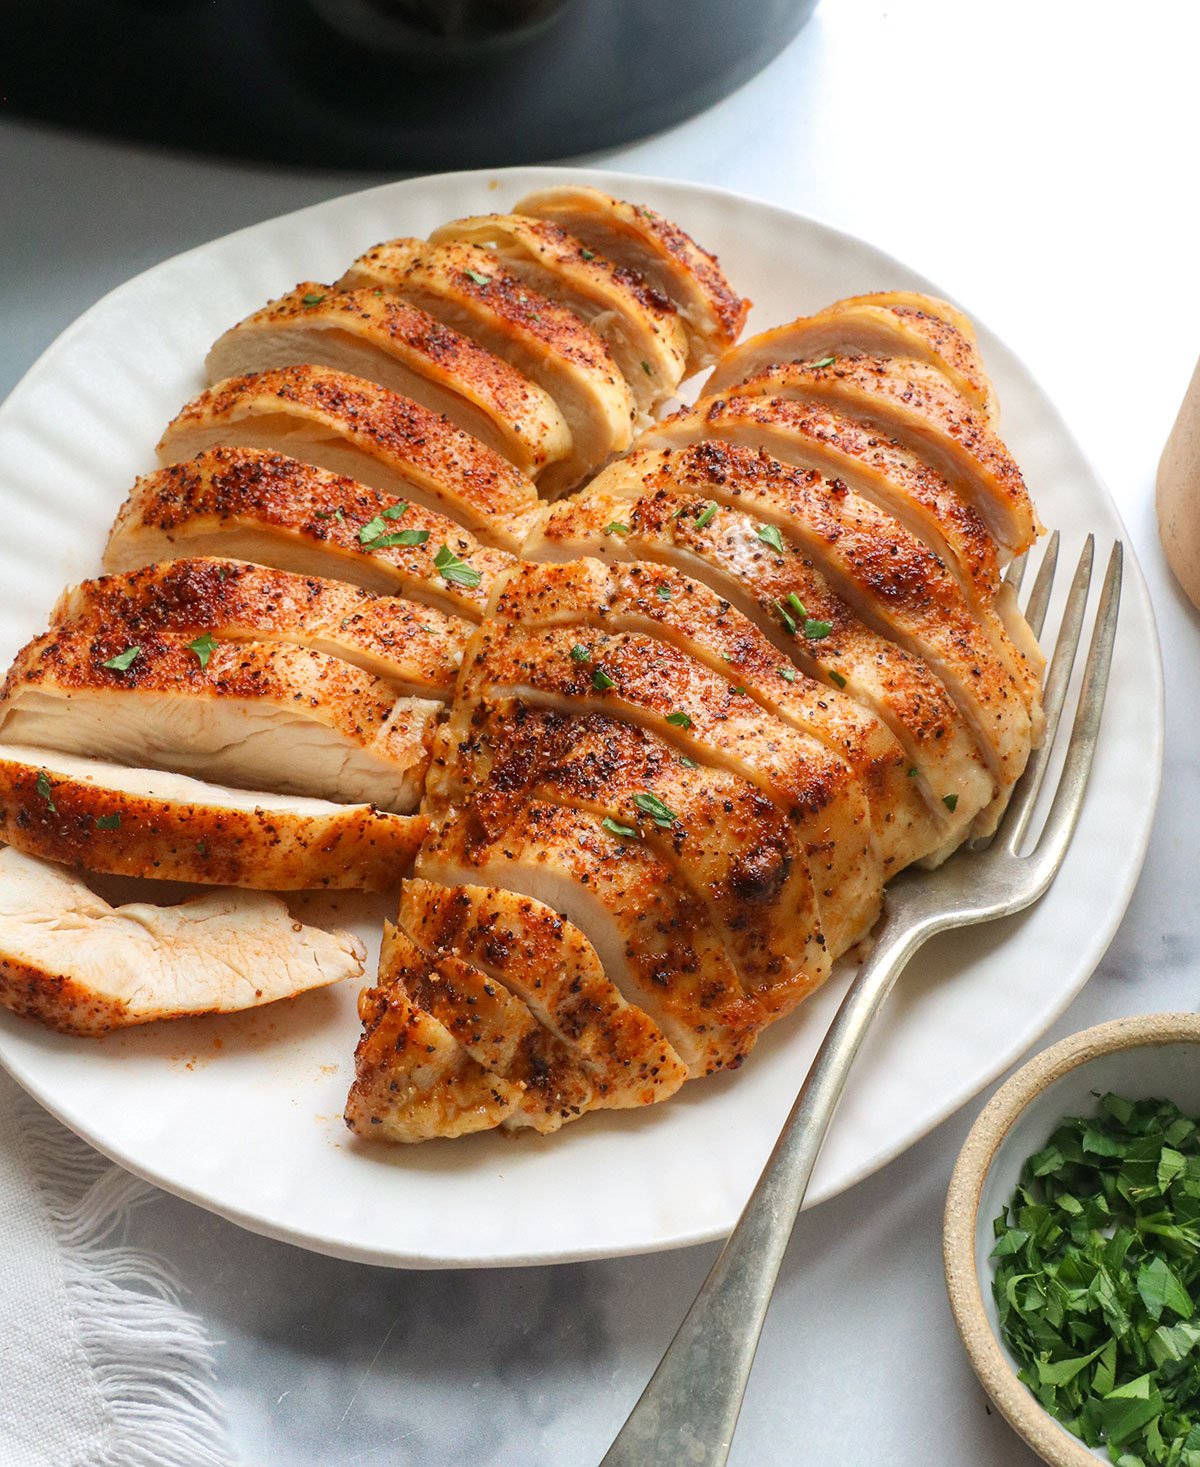
Once the chicken is cooked, remove it from the air fryer and let it rest on a cutting board for 10 minutes. This will allow it to finish cooking and redistribute the juices. (Resting = juicier chicken!)
Then it’s ready to slice and serve.
Air Fryer Chicken Breasts Cooking Time & Temperature
In my experience, the best cooking temperature for chicken is 375ºF in a basket-style air fryer.
To determine the cooking time, I use the thickness of the chicken breast as a starting point. You’ll need to add about 15 minutes of cooking time for every 1 inch of thickness.
For example:
- 1/2-inch thick: 9 to 10 minutes
- 1 inch thick: 15 minutes
- 1 1/2-inches thick: 22 minutes
- 2 inches thick: 30 minutes
Keep in mind that you’ll want to cook the chicken until it reaches an internal temperature of 160ºF, so these times are just a general jumping-off point. If your chicken hasn’t reached the correct temperature, flip it over and cook in 5-minute intervals until it’s done.
Note: I’ve recently learned that some chefs prefer to pull chicken off the heat when it reaches an internal temperature of 155°F. If you’re wondering why restaurant chicken is sometimes juicier, this might be why. With that being said, the USDA recommends not eating chicken until it reaches a safe internal temperature of 165ºF.
How to Air Fry Chicken Breast from Frozen
Frozen chicken turns out amazingly well in the air fryer. I might prefer the texture to using fresh chicken. However, the cooking time needs to increase when you cook frozen chicken in the air fryer.
In my experience, you’ll need to add at least 15 minutes to the cooking time when working with frozen chicken. It’s essential to use a meat thermometer to ensure the internal temperature reaches 160°F. (And then it will reach 165ºF as it rests before slicing.)
This may mean that you’ll need to check on the chicken and add 5 minutes at a time until it’s cooked through. A frozen chicken breast, roughly 1 inch thick, will take 30 minutes to cook at 375°F, compared to just 15 minutes for a fresh chicken breast. That’s double the cooking time!
So, be sure to set aside sufficient time to cook chicken from frozen. I think the resulting texture is worth it.
How to Use Air Fried Chicken Breast
If you have leftover cooked chicken to use up, I recommend trying one of the following recipe ideas.
- Curried Chicken Salad
- Leftover Turkey Soup (just use chicken, instead!)
- Curry Chicken Soup (add the cooked chicken at the end)
- Chicken Vegetable Soup (add the cooked chicken at the end)
- Cauliflower Fried Rice (stir in cooked chicken for more protein)
This chicken is also perfect for meal prep! You can use it to add protein to your favorite salads and sides.
Ingredients
- ¼ teaspoon smoked paprika
- ¼ teaspoon garlic powder
- ¼ teaspoon ground black pepper
- ¾ teaspoon fine sea salt
- 1 pound boneless skinless chicken breasts (about two 8 ounce breasts; 1-inch thick)
- 2 teaspoons olive oil
Instructions
- In a small bowl, combine the paprika, garlic powder, black pepper, and salt. Stir well. Drizzle the chicken breasts with the olive oil and rub both sides. Then season each side with half of the seasoning blend.
- Arrange the seasoned chicken breasts in a single layer in the air fryer basket, allowing for good air circulation, and cook at 375°F for 15 minutes. Check on the chicken after that to see if it reaches an internal temperature of 160°F. (Chicken needs about 15 minutes of cooking time per 1-inch of thickness, so adjust accordingly if using thicker chicken breasts.) Add five more minutes of cooking time, if needed, then check again.
- Remove the chicken from the air fryer to prevent overcooking, then let it rest on a cutting board for 5 minutes before serving warm. It should continue to cook as it rests, reaching a safe internal temperature of 165ºF. Leftover cooked chicken can be stored in an airtight container in the fridge for up to 3 days.
Video
Notes
- 1-inch thick: 15 minutes at 375ºF
- 1 1/2-inches thick: 22 minutes at 375ºF
- 2 inches thick: 30 minutes at 375ºF
Nutrition
More Air Fryer Recipes
- Crispy Air Fryer French Fries
- Air Fried Sweet Potato Fries
- Air Fryer Baked Potatoes
- Crispy Air Fryer Potatoes
If you try this air fryer chicken method, please leave a comment below letting me know how you like it!


I’ve used this recipe so much! It is easy, quick and delicious. I use the chicken as a main course and then the leftovers can go in salads or other things.
I followed your directions for frozen chicken breast to a T and it was delicious. Moist & juicy on inside & just a tiny bit crispy on outside. Seasonings were great. Thx
Maryanne
My husband said it was perfectly cooked. Fantastic flavor.
I’m so glad it was a hit! Thanks for letting me know.
Made this for dinner tonight. It was delicious and came out perfect! Was also a big hit with my husband!
OMG, I just tried this method last night and the chicken turned out so juicy! I’ll be cooking it in the air fryer from now on. Thank you for the detailed instructions about the timing by thickness. It worked out perfectly!
This is a wonderfully informative video on the thickness and airfryer directions for chicken. I will definitely be relying on this information! Thanks!!