This post may contain affiliate links. Please read my disclosure and privacy policy.

If you want to make homemade sauerkraut, you’re in the right place. All you need is cabbage, salt, and some clean tools to get started. Oh, and you’ll also need some patience. In most cases, your fermented veggies won’t be ready to eat for at least 2 weeks.
I originally shared this recipe in 2012, when I was very nervous about home fermentation. If you’re like me, you might be worried about knowing if it’s safe to eat. I’ll cover some things to look (and smell) for later in this post!
I think it’s also important to mention that you don’t need a fermentation crock to make this. When I started, I used a glass jar and a plastic bag filled with salt water as the “weight” to keep the cabbage submerged. So, I’ll let you know how to do that, but I also tested this with a fermentation crock to see if it’s any easier. I’ll share more on this below!
⭐⭐⭐⭐⭐ Featured Review
“Thank you so much for sharing this post. I had been wanting to give this a try for a while and your post gave me the nudge (and confidence) that i needed to do it! I must say I was more than pleased with the results and am currently obsessed! I MUST have some every day now!! Thank you, thank you!” – Colleen
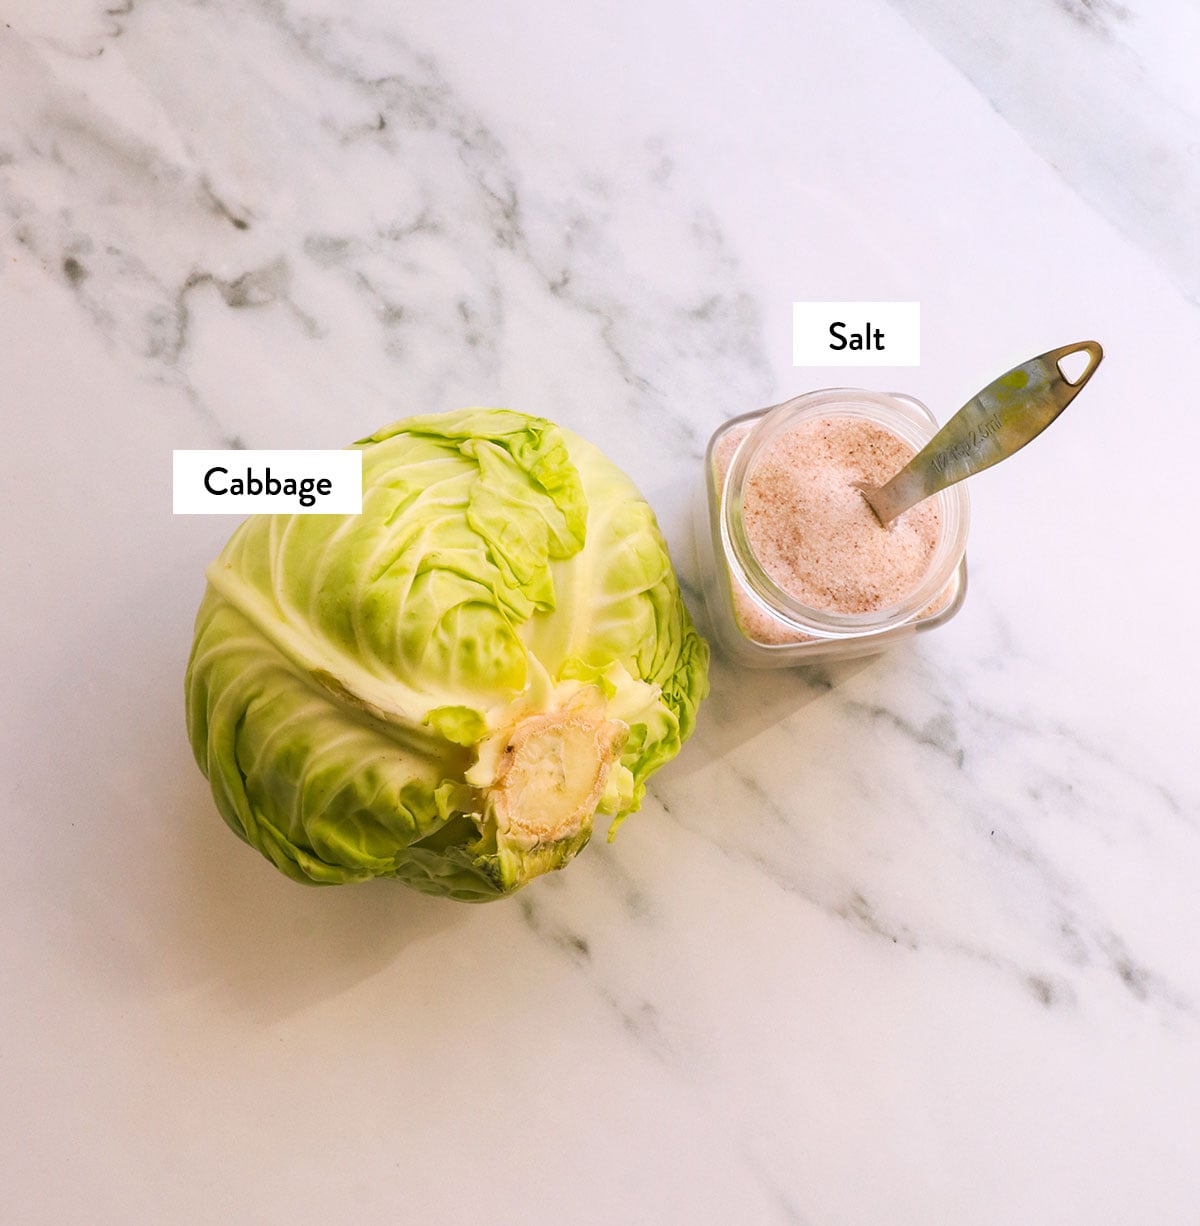
Homemade Sauerkraut Ingredients
- Cabbage. I usually work with one head of cabbage at a time, and mine tend to be about 2.5 pounds when I buy them from the store. By the time you remove the core and outer leaves, I have 2 pounds of cabbage to work with, give or take.
- Salt. I use fine pink salt (Real Salt brand) for this recipe, so keep in mind that white table salt will make this taste even saltier.
Note: You might also need to make a 2% salt water solution to keep the cabbage fully submerged. To make this, use 1 teaspoon of salt for every 1 cup of water. Boil these together until dissolved, then cool completely before pouring over the cabbage.
How to Make Sauerkraut
Step 1:
You’ll want to start with really clean tools. Sanitize your jar, knife, cutting board, tongs, and glass bowl with boiling water to kill any bacteria. I usually just wash them in the dishwasher before getting started.
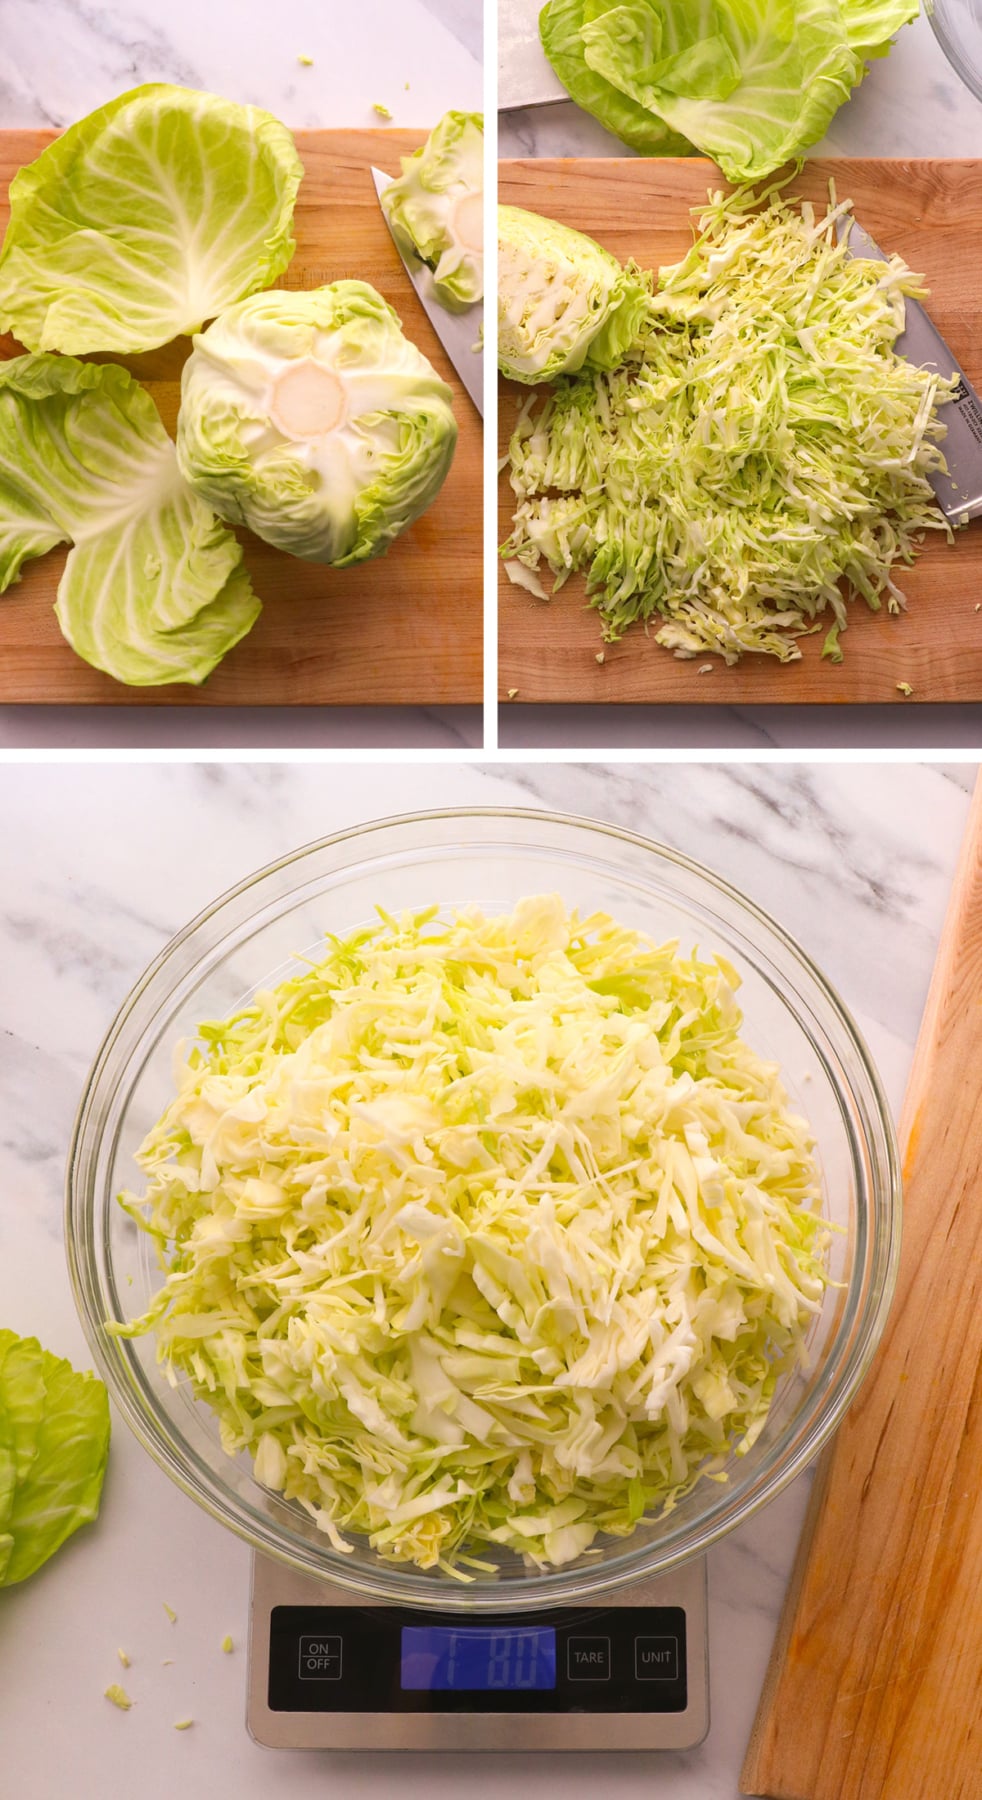
Remove any dirty outer leaves from a head of cabbage. Then remove one or two more and save them for later. Then use a sharp knife to slice away the hard core and finely shred the cabbage. The thinner you slice it, the better. (Thinner cabbage will soften faster.)
I usually transfer the shredded cabbage to a bowl sitting on a food scale that has been zero’d out, so I know exactly how much cabbage I’m using. This will help you add exactly the right amount of salt. But, I’ll also share an easy ratio I’ve used for years so you can estimate it without a food scale at home.
Step 2:
Now it’s time to salt the cabbage. Ideally, you want a 2% salt ratio by weight. So, if you have a food scale (affiliate link), you can switch the measurement to grams and simply multiply the weight of the cabbage by 0.02.
For example, I had 842 grams (about 1.8 pounds) of cabbage. If you multiply that by 0.02 you’ll get 16.84 grams, which we will round up to 17. That’s how many grams of salt you need for that exact amount of cabbage. You would then zero-out the food scale, and keep adding salt until you reach 17 grams. Easy peasy.
However, if you don’t own a food scale, then I would simply plan on using 1 tablespoon of salt per pound of cabbage. I usually get 2 pounds of shredded cabbage per head, so I plan on using 2 tablespoons of salt per head. When you use the food scale method above, you end up using a little less than that, but I’d rather use more salt than less salt.
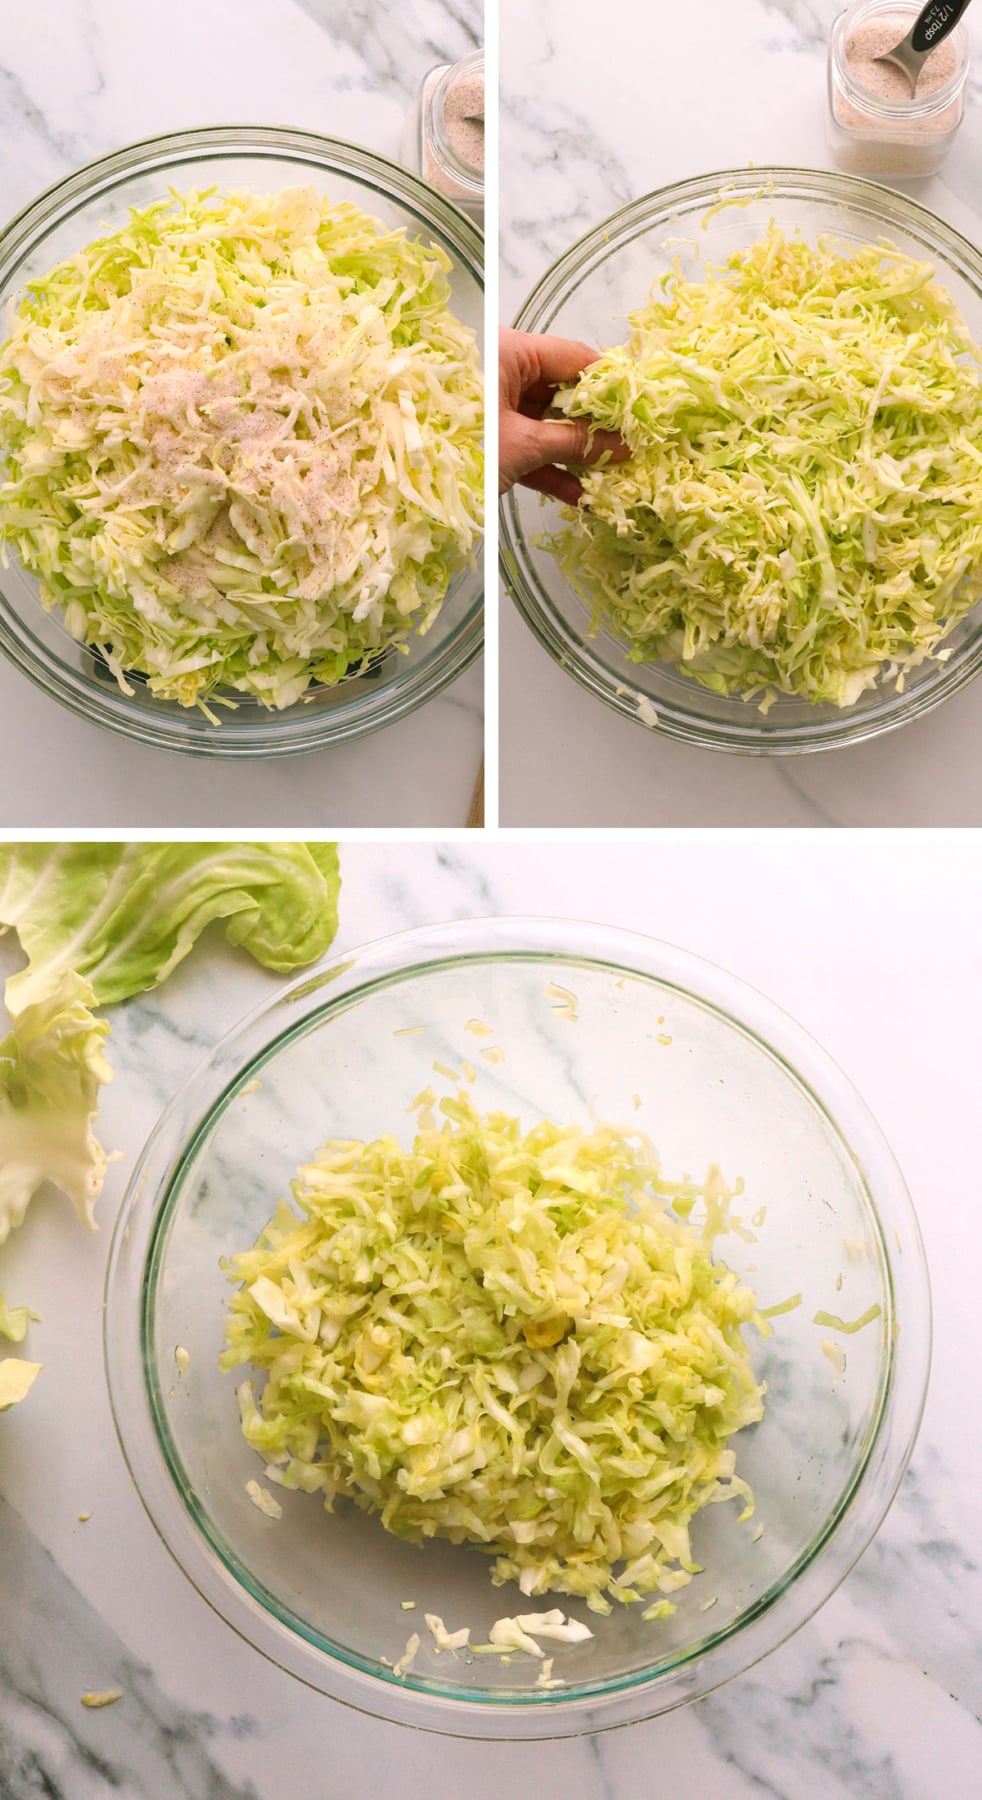
Sprinkle the salt over the cabbage and gently toss it together. Then wait for 15 minutes to let the salt draw out some of the water found in the cabbage. Once that time has passed, use your (clean) hands to massage the cabbage, rubbing and kneading it in the bowl, to help release even more water. This will be your brine! The cabbage should shrink as you do this.
Step 3:
Use your hands to transfer handfuls of the salted cabbage to a clean jar. One pound of wilted cabbage will usually fill a 32-ounce mason jar when packed tightly.
Or, you can use a fermentation crock, if you plan on fermenting veggies regularly. (I bought this one from Amazon, and it’s pretty large if you’re only fermenting one head of cabbage. I recommend using two heads of cabbage once you get the hang of it with this size container.)
If you’re not sure whether you’ll ferment veggies regularly, start with a glass mason jar. It’s something I already had in my cabinets!
Want to save this for later?
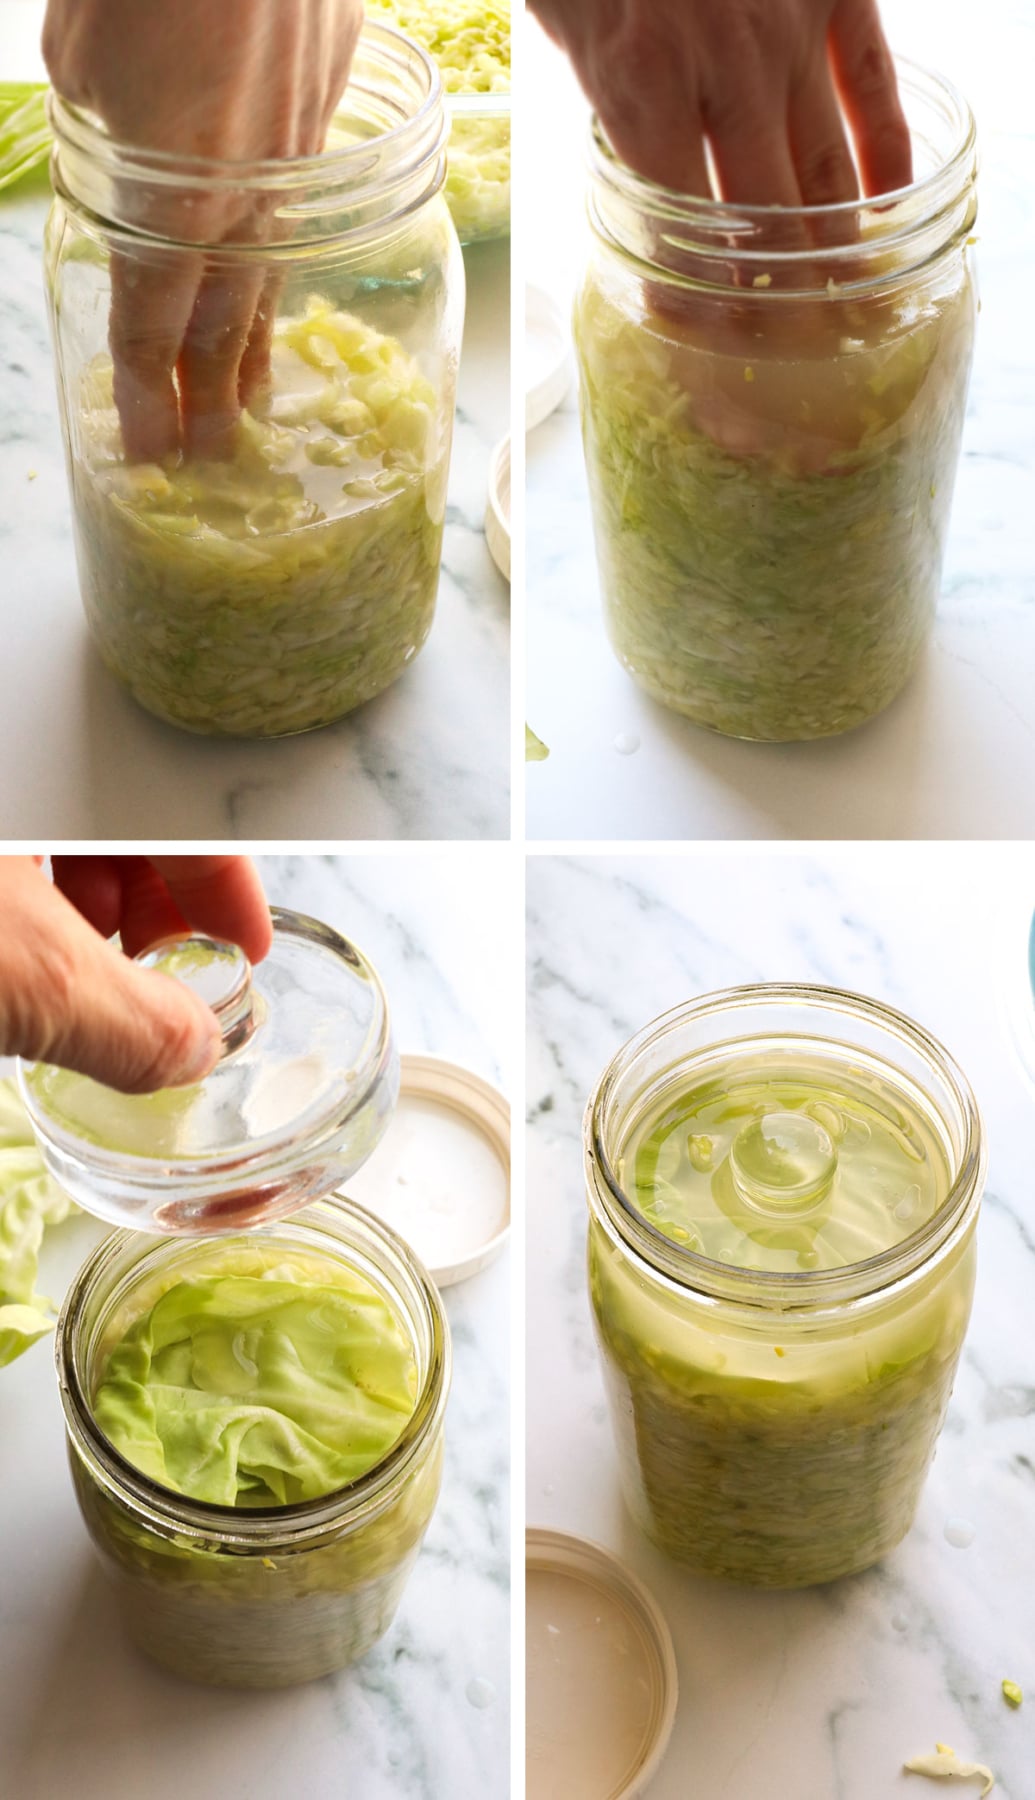
Make sure you pack the cabbage tightly into the jar; use your clean hand to push it down as much as possible. It’s ideal if you see no air bubbles. Pour the remaining liquid from the bowl into the jar. It should cover the cabbage fully.
Remember that cabbage leaf you reserved earlier? Rip it into a rough circle that fits in your mason jar. Place it on top of the cabbage, and press down so the brine liquid covers this leaf, too. The goal is to keep the cabbage fully submerged at all times.
To help with this, you’ll also want to use some sort of weight to press down on the cabbage. You can buy glass weights specifically for this purpose. But when I was just getting started, I would fill a Ziploc bag with salt water (1 teaspoon of salt dissolved in 1 cup of water) and place it on top of that cabbage leaf. Either method works!
Note: The reason you fill the Ziploc bag with salt water is that, in the off chance the bag breaks or leaks, your cabbage would still be safely submerged in a salty solution. Don’t use chlorinated water for this, as it can stop fermentation. It’s best to use spring water or filtered water.

How Long to Ferment Sauerkraut
Once you’ve fully submerged the cabbage, there’s only one thing left to do: wait. It takes 2 to 3 weeks for sauerkraut to turn appropriately sour.
Add a loosely fitting lid to the jar so carbon dioxide gas can escape during fermentation. Fermentation crocks have a release nook built into the lid, but you can also just cover your mason jar with cheesecloth and a rubber band. This will let gas escape and keep dust out.
When I first made this, I screwed a plastic lid on the jar, and it was fine. I also liked to place the jar in an insulated bag, so the temperature wouldn’t change as much, but that’s optional.
I’ve also heard that fully sealing the jar can cause it to crack from pressure… so, it’s probably safer not to fully screw on the lid. I use these plastic lids on my mason jars, and the worst thing that has happened so far is that some liquid has escaped the jar during the fermentation process. (I noticed my counter had some liquid pooling around the bottom of the jar.)
Liquid Note: If you don’t think you have enough brine to keep the cabbage fully submerged, cover it with a 2% saltwater solution. That means, dissolve 1 teaspoon of salt into 1 cup of water (or double this if needed). Let the solution fully cool, then pour it over the cabbage. This will ensure it stays under liquid the whole time.

Serving and Storage Tips
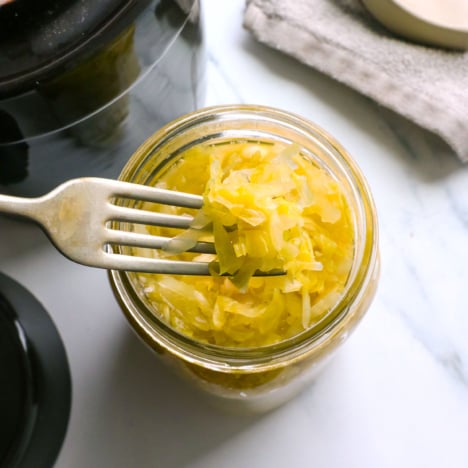
Once the sauerkraut has fermented to your liking, remove the weight and discard the top cabbage leaf. Taste it to make sure you’re happy with the flavor. If you’re pleased, secure a lid on the jar and store it in the fridge. Keeping it chilled will slow down the fermentation process, but it will still continue to ferment slightly.
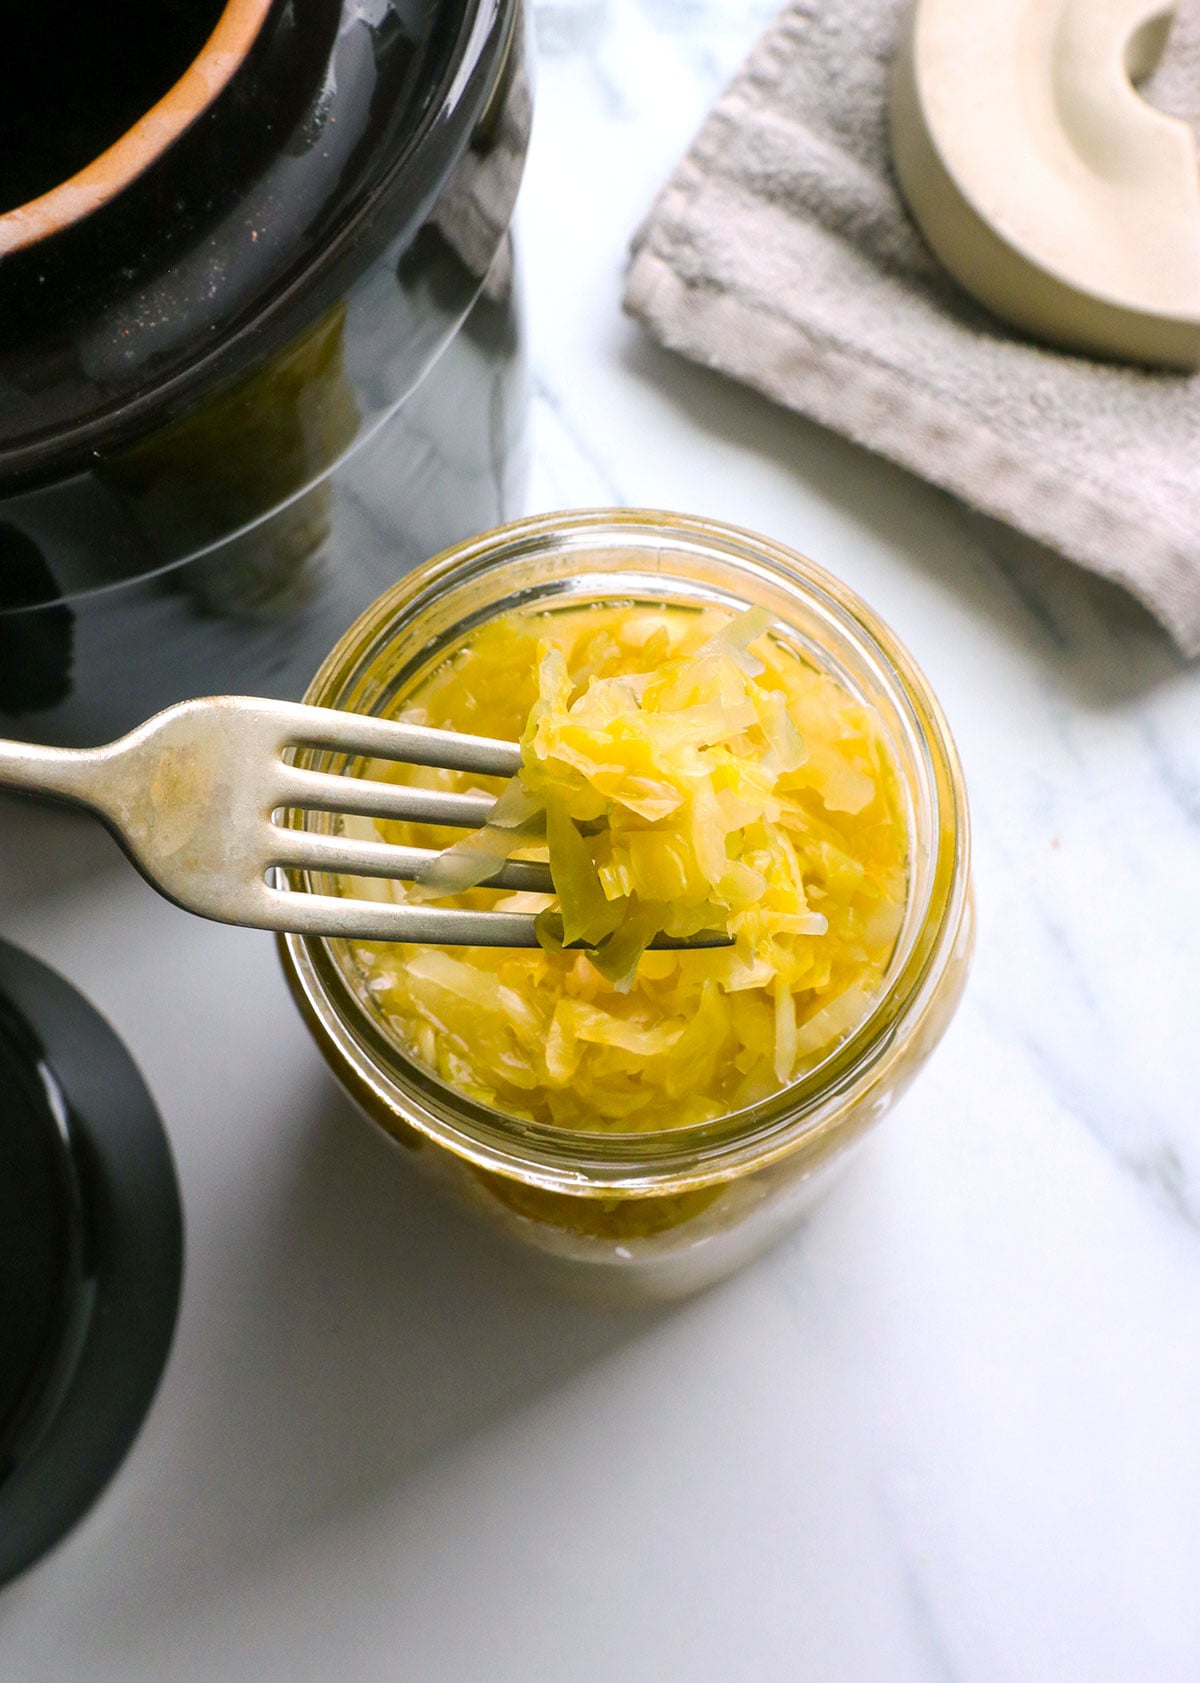
Enjoy it over the next 3 to 6 months, and always use a clean fork when removing it from the jar. (And keep the cabbage as submerged as possible, so it won’t mold.)
How To Make Raw Sauerkraut
Ingredients
- 1 head green or purple cabbage
- 2 tablespoons sea salt
Instructions
- Start with really clean tools. Sanitize your jar, knife, cutting board, tongs and glass bowl with boiling water, which should kill off any lurking bad bacteria. We only want the good kind growing in our veggies!
- Rinse cabbage well, and remove the large outer leaves. (You’ll want to save these for later.)
- Using a sharp knife, shred the cabbage and transfer it to a large glass bowl. Assuming you have 2 pounds of cabbage, add 2 tablespoons of salt and gently toss them together. Wait 15 minutes, so the cabbage will start to sweat. Then use clean hands to massage the cabbage until it starts to break down from the salt. It will release even more moisture and reduce in size.
- Transfer the massaged cabbage to a clean glass jar, preferably one that is large enough to fit your hand through the top. The most important part of making fermented veggies is that you remove all the air in the jar– so you want to pack the cabbage tightly, leaving no gaps! I used my fist to punch it down, but a clean wooden spoon would work, too.
- While there is already plenty of moisture released from the cabbage to make the brine, I like to add a little salt water solution to make sure the liquid level is completely ABOVE the shredded cabbage. (Do not use tap water; see the ingredient notes in this post if you need to cover it with a 2% salt water solution.)
- Once you’ve added the water, use the reserved cabbage leaves to press down the shredded cabbage– keeping it submerged under the liquid.
- Ideally, you’d fill up the jar all the way to the top, but mine didn’t work out that way. If that’s the case for you, too, simply fill a plastic bag with salt water (in case it bursts in the jar, you want it to be salt water!) to use as a “weight.” Place the salt water bag on top of the large cabbage leaf layer, and seal the jar. You should be able to see the liquid layer above the shredded cabbage line.
- Cover the sealed jar loosely with a lid, so gas can escape, or with cheese cloth and a rubber band. Let it ferment for 2 weeks and check on it occasionally to make sure the cabbage it still fully submerged.
- Once the sauerkraut has fermented to your liking, remove the weight and outer leaves and discard. Note: It’s not uncommon for a layer of mold to develop on the outer leaves. This doesn’t mean your sauerkraut is ruined! Simply discard the layer of mold, and everything underneath the brine should be safe. As always, use your best judgement– if it smells off, don’t eat it.
- Store in the fridge and enjoy! The sauerkraut will last for months in the fridge, so feel free to make a BIG batch!
Notes
Nutrition
More Recipes to Try
- Banana Bark
- Baked Tofu
- Healthy Zuppa Toscana
- Healthy Instant Pot Recipes
- Lentil Salad
- Jennifer Aniston Salad
If you try this sauerkraut recipe, please leave a comment and star rating below to let me know how you like it.


Oh no! I meant to say in above recipe,3 tbs.salt……………………………………… I want to add that as soon as you put the salt on natural juice start coming out of the cabbage,use your hands to mix the salt in.Put into crock(I just ordered a big fermenting crock on line,still waiting for it to get here)tamp down until juice covering.
Hi, just want to tell you that I make my own Sauerkraut too….
But you don’t have to use so much salt,some recipes use no salt! They say it is better for you but does not last so long! My recipe is as follows…
5 pounds shredded cabbage
3lbs.salt
fresh garlic (or not)I love it!
fresh dill
3 tbs.salt not 3 lbs.!
LOLOL!
Really needed that laugh!
Please do not attempt a “low salt” or “no salt” sauerkraut recipe until you have made at least a couple of batches of typical brined sauerkraut. You want to be completely comfortable with the fermenting process, and familiar with the stages the fermenting cabbage goes through first.
The salt serves several purposes. First, during the massage part of the recipe it begins breaking down the cabbage. But more importantly, it helps create an environment in which the beneficial bacteria can flourish.
Consider this: if you thoroughly cleaned all your utensils and prep surfaces before making the sauerkraut, there should be no bacteria and therefore no fermentation once the cabbage is submerged in the brine, right? Of course this isn’t the case, and millions of bacteria will survive. Your job as the Ferment-Meister is to ensure that the good bacteria thrive, thereby crowding out the undesirable bacteria.
There are actually several type of bacteria that successively break down the cabbage during fermentation. With a little practice you can use your nose to identify how far along in the process your sauerkraut is. By the end, between the salt, the “tanginess”, and the overcrowding it’s a pretty inhospitable environment, and all growth essentially grinds to a halt. Et viola, you’ve got delicious sauerkraut!
At any rate, stick to the salt recipes. As pointed out, you can always rinse the sauerkraut before serving to remove excess salt — and it will still be one of the best things you can eat!
What a great sauerkraut tutorial and you are quite pretty!! I may start eating like you if I can look as healthy & gorgeous as you (in a male body of course). What a pretty smile….God bless the internet!
Thank you! What a lovely, informative recipe! I like the way you think Meagan 🙂 I need to heal my gut, and am starting here.
Where do you get a jar like that?
I found mine at a local hardware store!
Megan, thanks so much for this post. I am trying to make raw kraut for the first time and used a different recipe…I have a couple of questions, 1) I may have used too much salt and the recipe I made it from said that after the fermenting process and transferring to the fridge for a month, you should rinse it off before eating it…does that sound right? I may have goofed here but any help would be appreciated (I’m on day 4 of the fermenting process). Thanks!
Hmmm… I’ve never rinsed my sauerkraut before, but I would imagine if you’re rinsing it AFTER the fermentation process, that’s totally fine! (And probably a good idea, to reduce sodium consumption!)
Hope it turns out well for you! 🙂
Thanks for the easy, clear recipe.
My only concern with your version is the use of the plastic bag inside the glass jar — surely some chemicals could leach from the plastic into the cabbage, especially considering all the fermentation that’s going on. Plus, the ‘spring water’ in a plastic bottle. I’d suggest either sterilizing water from the tap by boiling it, then letting it cool in a glass container, or using a high quality filter.
Thanks,
Kelly
Yes, the plastic bag isn’t ideal– preferably, you’d fill the jar all the way to the top, so you won’t need a weight at all! I had heard that even boiled tap water may affect your results, because it may not remove all the chlorine and additives, which is why I used the bottled spring water. But, yes, the plastic bottle isn’t the best choice. Next time I’ll buy the kind that comes in glass bottles!
For those concerned with using a water-filled plastic bag to weight the cabbage down, you can purchase (on Amazon and elsewhere) little round glass weights that you set on top of the cabbage to hold it down. They usually come in a box of four. I’m sorry now that I donated my set a couple of years ago and wish I’d kept them.
I’m on my third try with your sauerkraut recipe! With my first batch, the liquid overflowed my jar on Day 2, so I thought this might contaminate it– I threw that batch out. On my second try (which I did not fill as much), we sampled it after three days, and it had not fermented enough, but we contaminated it by accidentally double-dipping with the fork. To be on the safe side, we threw out batch #2! The third batch is currently on Day 6, but I’m concerned it might be contaminated because the liquid at the top of the cabbage has turned brownish. This scares me! Have I ruined yet another batch? Help!
Just my two cents: I doubt you’re “contaminating” it by double-dipping into it w/ a fork. If there’s enough good bacteria being created in the ferment, it should crowd out any ‘bad’…
I do recommend starting gradually with fermented veggies– they are powerful, and can make you feel bloated if you eat too much too soon!The important thing is to massage to release water and not other water to add but remove the water from cabbage and only leave little wet.
We’ve been making huge (as in 200 quarts) batches of sauerkraut for about 30 years. We make it in crocks, letting it ferment for about 2 months. If you “stomp” the cabbage until the juice flows, there is no need to add water (which will seriously dilute the flavor). This is a 2-times-a-year family tradition for us- once to make it and once to can it. It’s a great way to keep the siblings, kids & grandkids close.
And we have a bunch of blue ribbons from the county fair to brag about!
Wow, what a cool family tradition! I bet the results are delicious, too!! 🙂