This post may contain affiliate links. Please read my disclosure and privacy policy.

Even though it’s becoming easier to buy a cauliflower pizza crust these days, nothing beats the flavor or texture of this homemade version. I originally posted this recipe back in 2011, when I learned the secret to making a cauliflower crust that isn’t soggy. (Hint: you need to squeeze out the moisture!)
But now that we’ve been making this pizza crust for over a decade, I’ve learned some important time-saving tricks you need to know about. For example, you can start with frozen cauliflower to skip a cooking step. And you can start with pre-riced cauliflower, which lets you skip using the food processor.
Be sure to read all the tips below if you’d like to make a frozen pizza crust for future use or need to make any substitutions.
⭐⭐⭐⭐⭐Featured Review
“I have tried a few different cauliflower crust recipes and this is by far the best one! I have made it exactly as the recipe indicates many times and it always turns out perfect.” – TP
Cauliflower Pizza Crust Ingredients
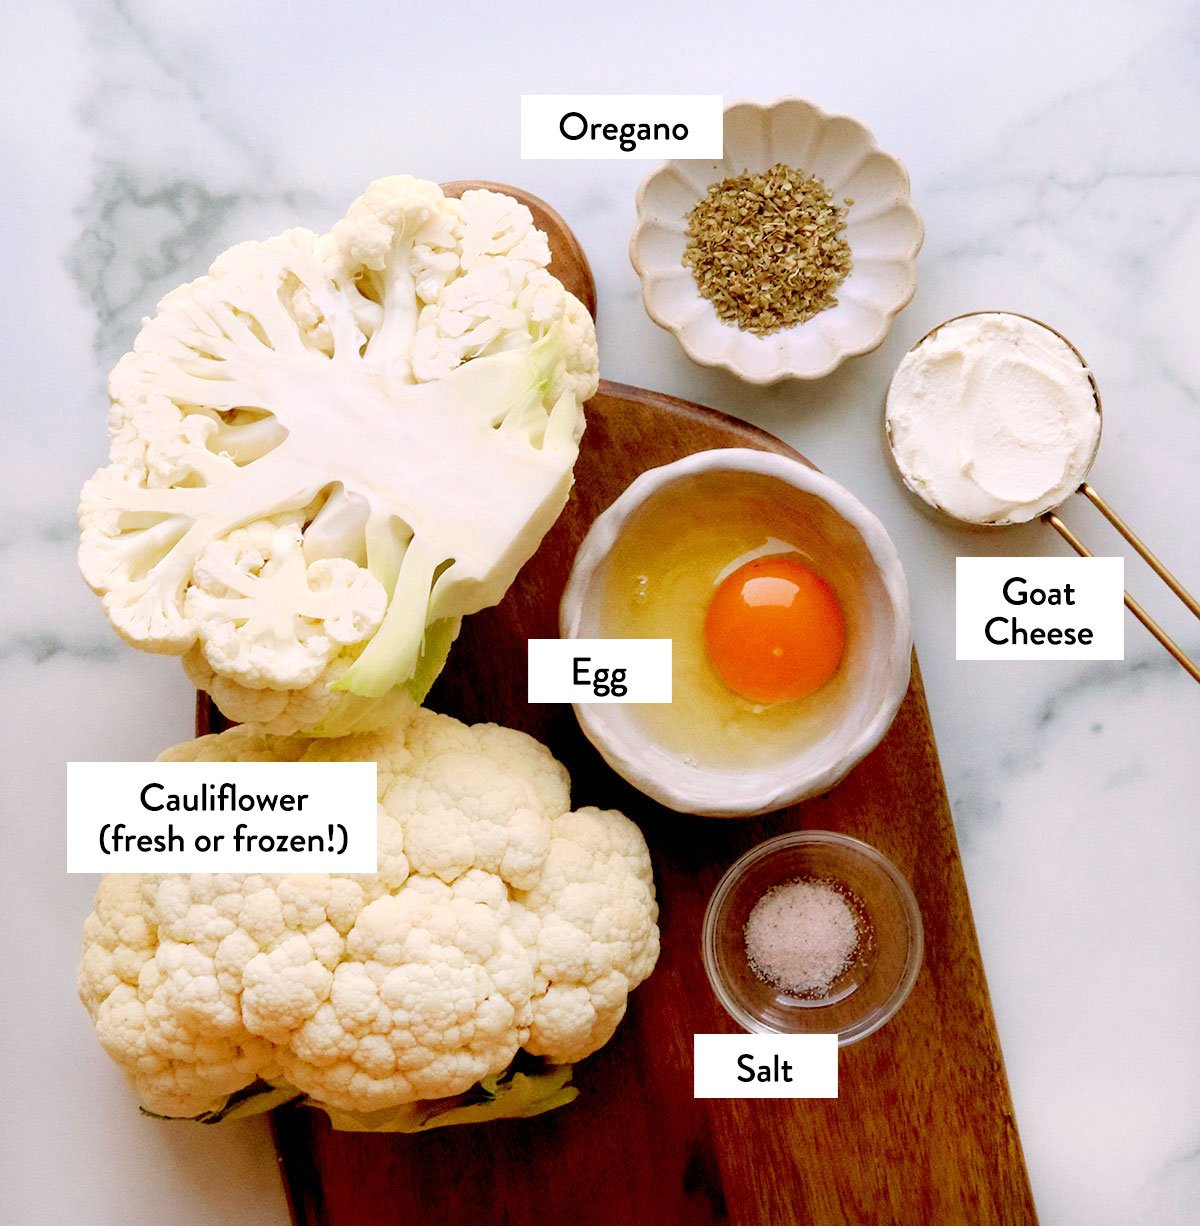
- Fresh (or Frozen) Cauliflower. While you can certainly make this recipe with fresh cauliflower florets, it’s 100% easier to start with thawed frozen florets. (You can either let the bag thaw in the fridge overnight or warm it up to thaw it faster.) Your life will be even easier if you can find frozen, riced cauliflower at the store. I’ll walk you through all the variations I’ve tested below.
- Egg. This adds protein and holds the crust together. I don’t recommend using an egg substitute for this recipe, but I have tested a vegan Cauliflower pizza crust if you need an egg-free recipe.
- Cheese. Even if you’re not the biggest fan of goat cheese, soft goat cheese (also known as chevre) creates the best texture for cauliflower pizza crust. I highly recommend trying the recipe as written, but other varieties of cheese will work as well. Read the comments below for feedback on mozzarella or Parmesan.
- Spices. I think pizza crust tastes best with a little extra flavor. Adding oregano and salt boosts the overall flavor so you don’t feel like you’re eating a crust made mostly of cauliflower.
How to Make Cauliflower Pizza Crust
Step 1:
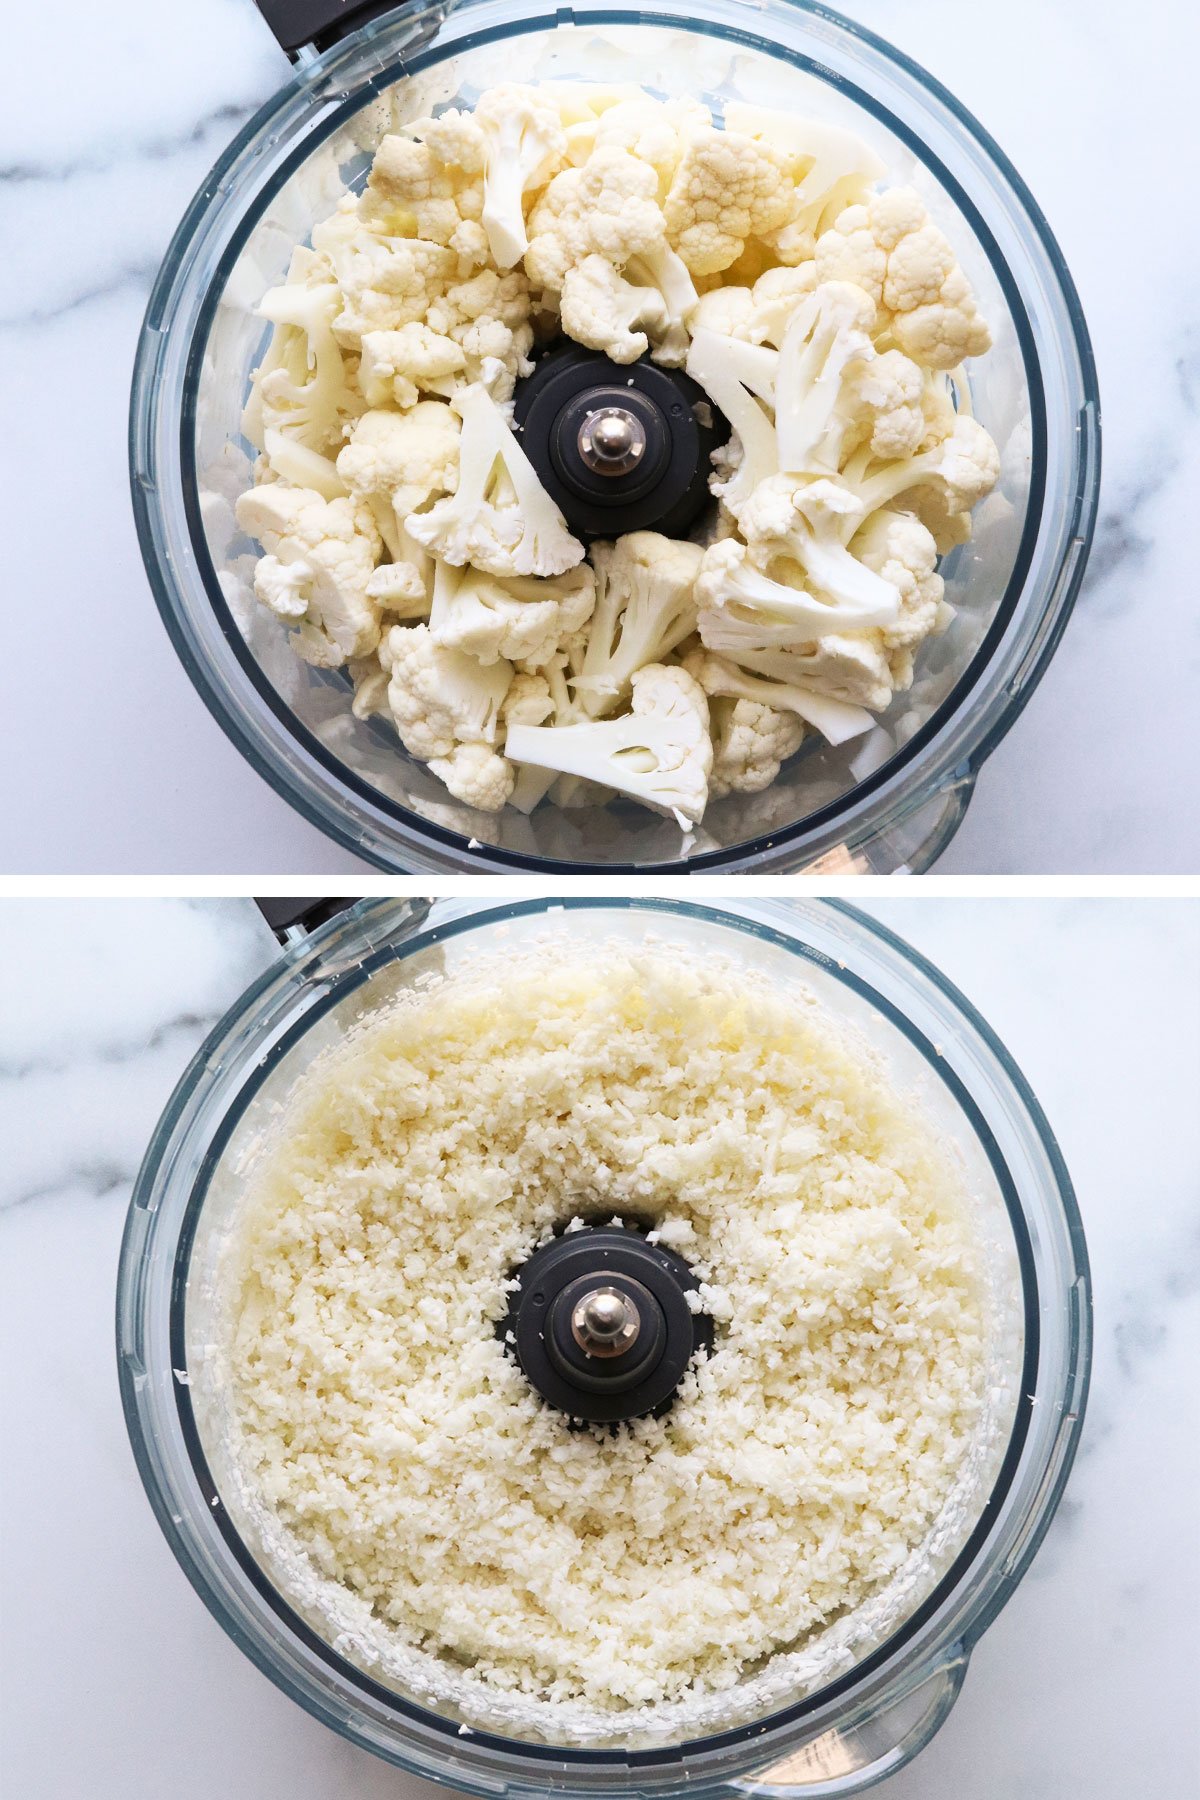
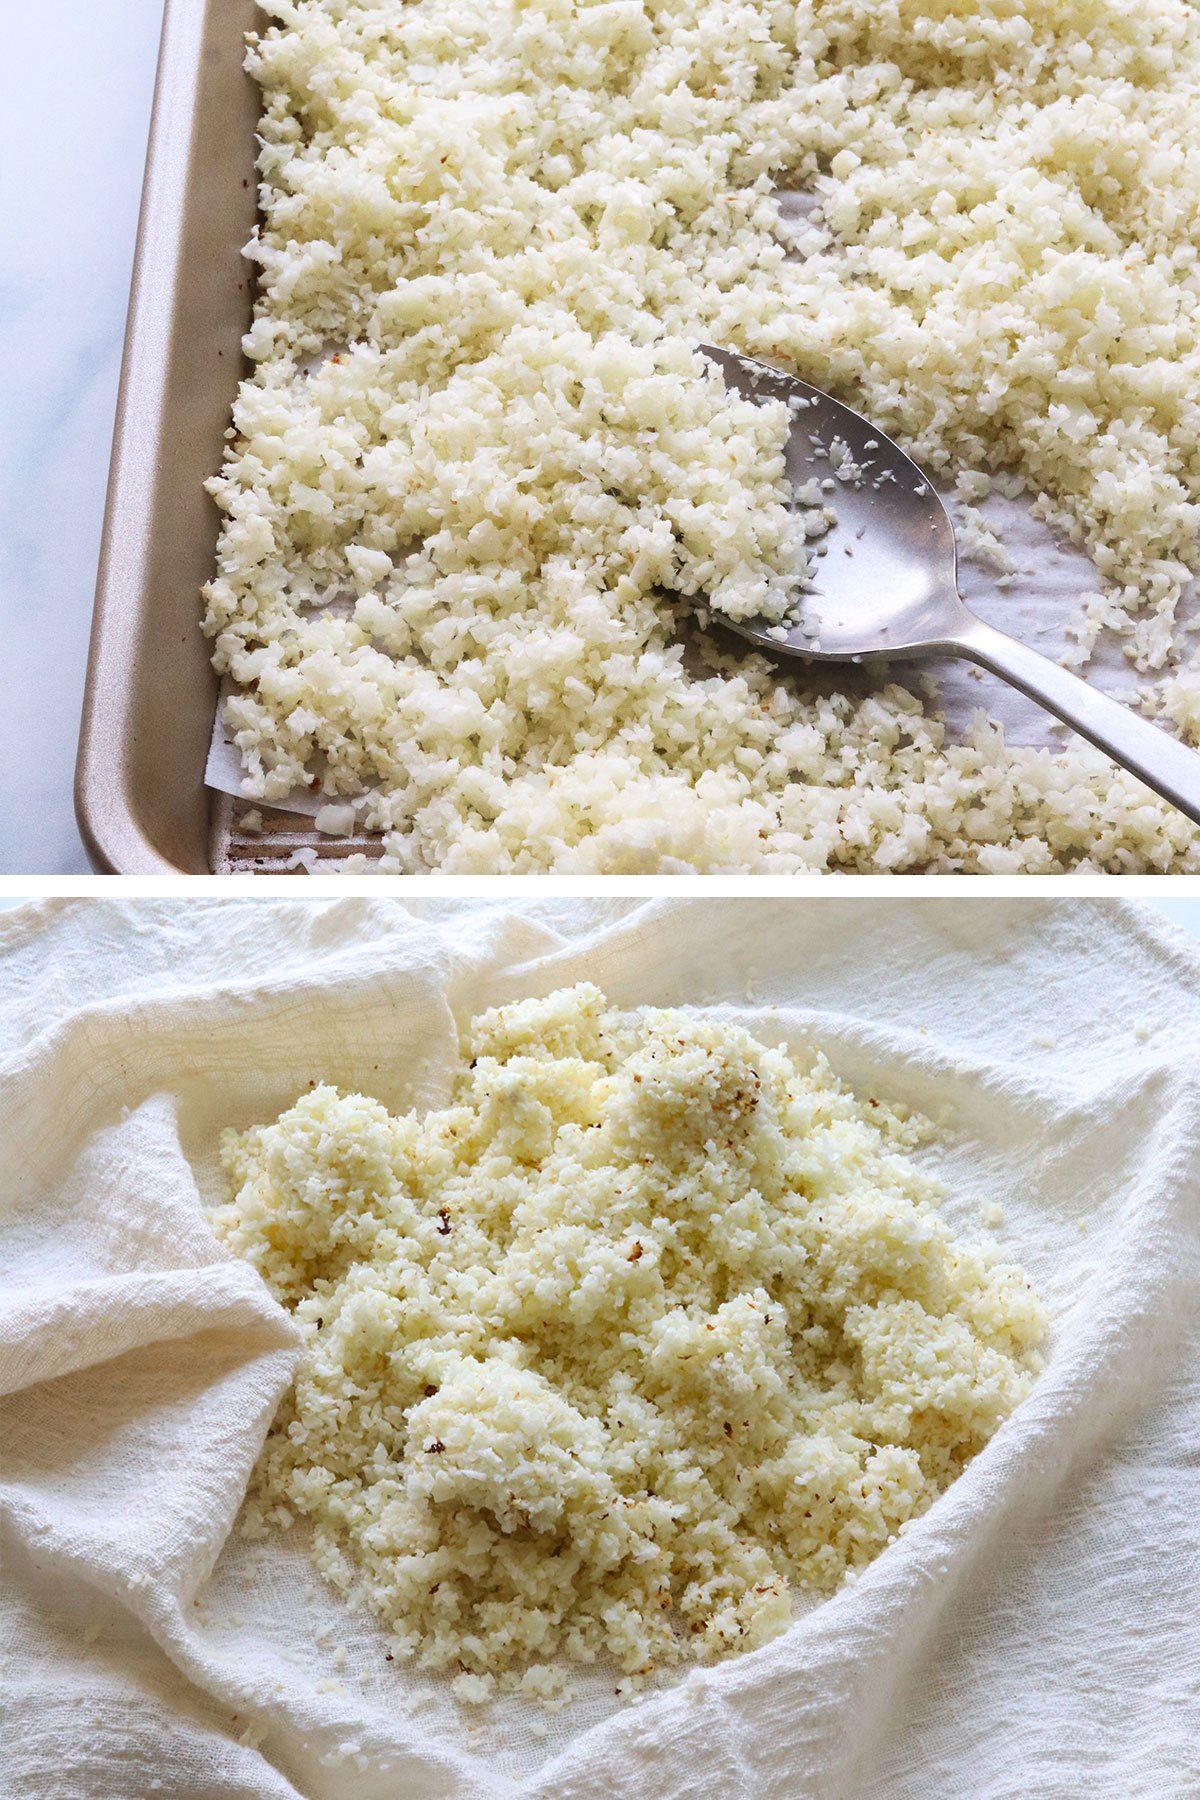
Preheat the oven to 400ºF and line a large baking sheet with parchment paper. If you’re using fresh cauliflower, place one pound of cauliflower florets in a food processor fitted with an S-blade. (Mine is a 12-cup size.)
Briefly pulse the florets until they have a rice-like texture.
**YOU CAN SKIP THIS if you start with pre-riced cauliflower from the store. If you end up using a little more or a little less cauliflower, that’s okay, too. This recipe is quite forgiving.
Step 2:
Transfer the cauliflower rice to the prepared baking sheet and spread it out into an even layer. Place it in the oven to soften and cook for 15 minutes.
Alternatively, you can place the cauliflower in a covered microwave-safe bowl and cook for 4 to 5 minutes on high to steam it. Or, you can cook it in a large skillet with a 1/4 cup of water for 8 to 10 minutes, until it has softened and the water has evaporated.
Once the cauliflower has cooked, let it cool for 10 minutes, or until it is safe to handle without burning yourself.
**YOU CAN SKIP THIS if you start with a 16-ounce bag of fully thawed frozen cauliflower. Previously frozen cauliflower has the same tender texture as if it were cooked! All you have to do is rice it in a food processor, then skip to the next step.
Megan’s Time-Saving Tip
If you can find frozen riced cauliflower (like the Trader Joe’s variety below), you can SKIP the first two steps. Just let it thaw fully, then proceed to the next step, where you’ll squeeze out the excess moisture. I’d use two 12-ounce frozen bags of cauliflower rice to make a single pizza crust in this case.

Step 3:
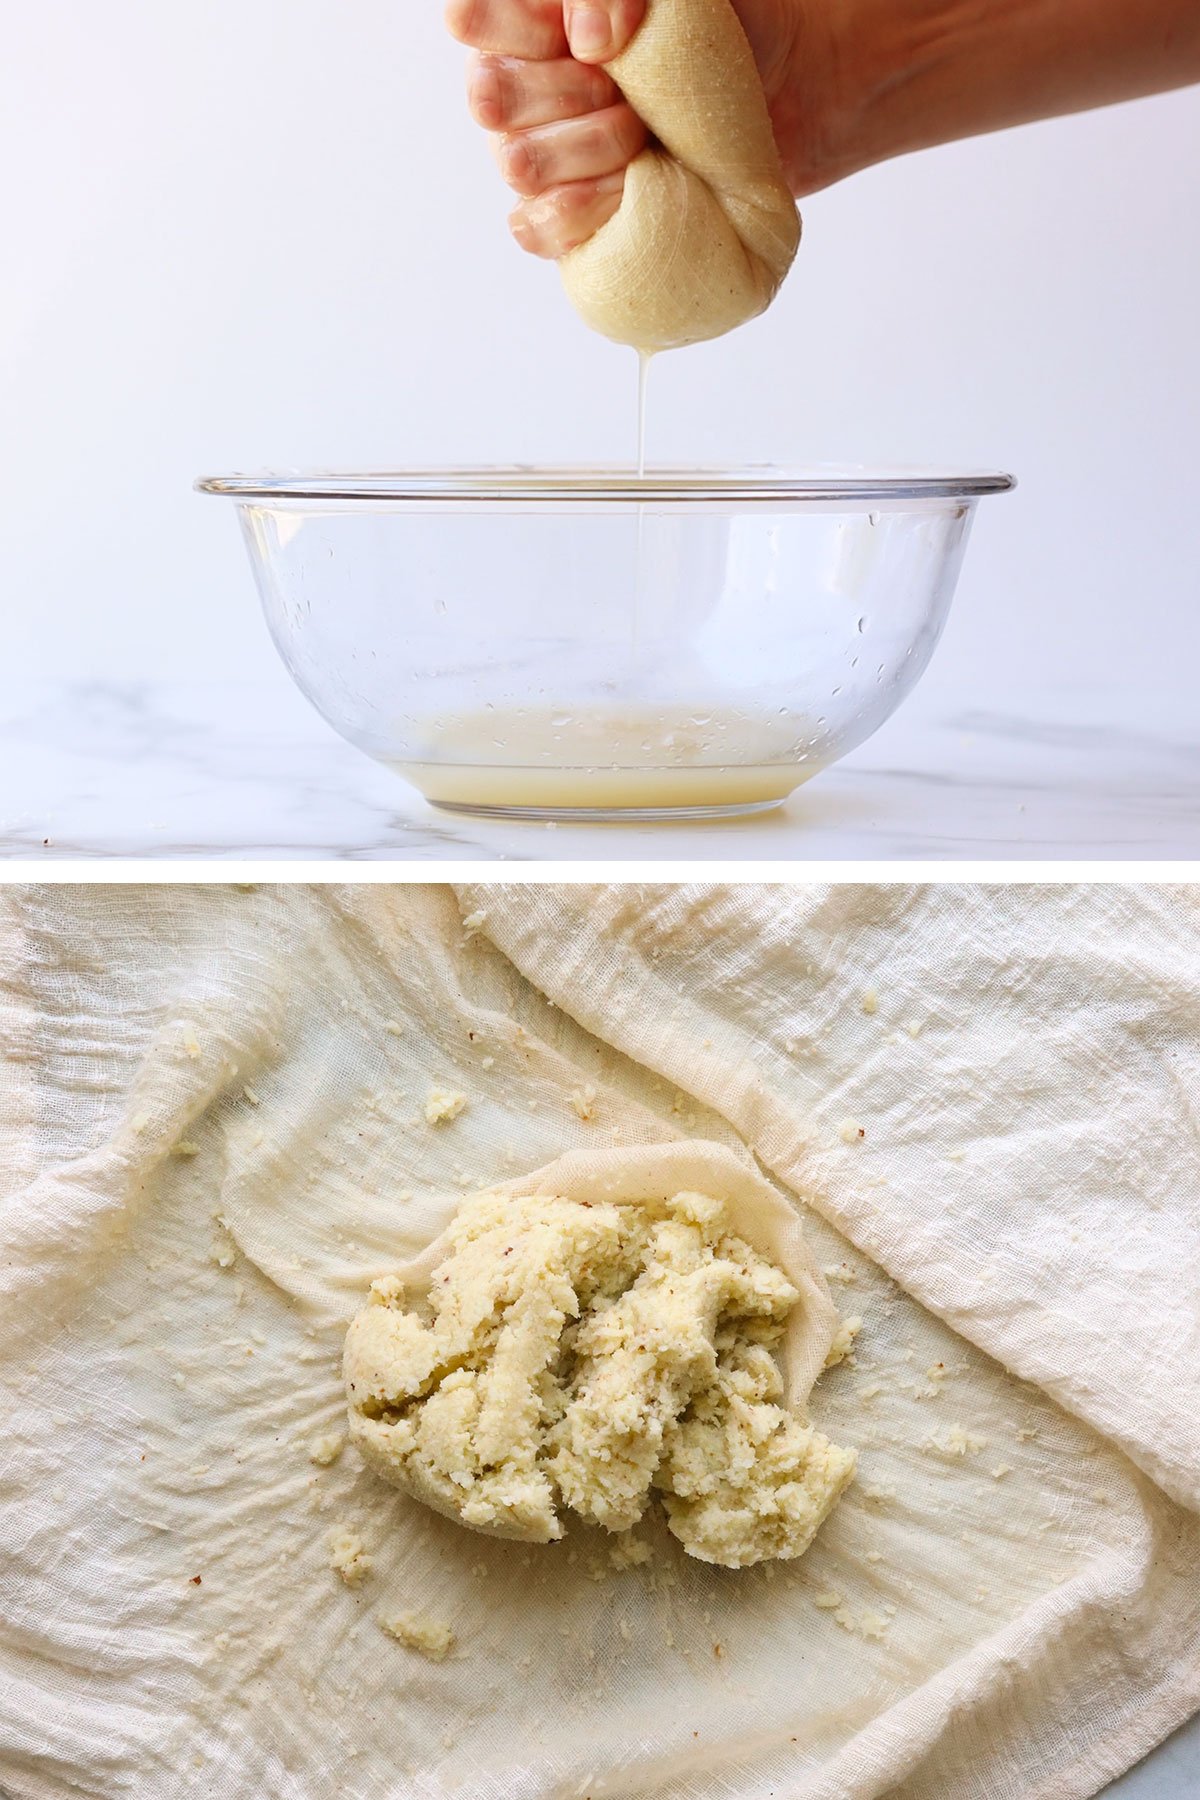
Transfer the riced cauliflower to the center of a clean dish towel or cheesecloth. Arrange the towel (filled with cauliflower rice) over a small bowl, then squeeze as much liquid as possible from the cooked cauliflower.
It might not feel like there’s excess moisture at first, but you may be surprised by how much liquid is released! (There should be at least 3 to 4 tablespoons of liquid in the bowl.)
It’s okay if the cauliflower looks like a small ball of mush when you’re done.
Want to save this for later?
Step 4:
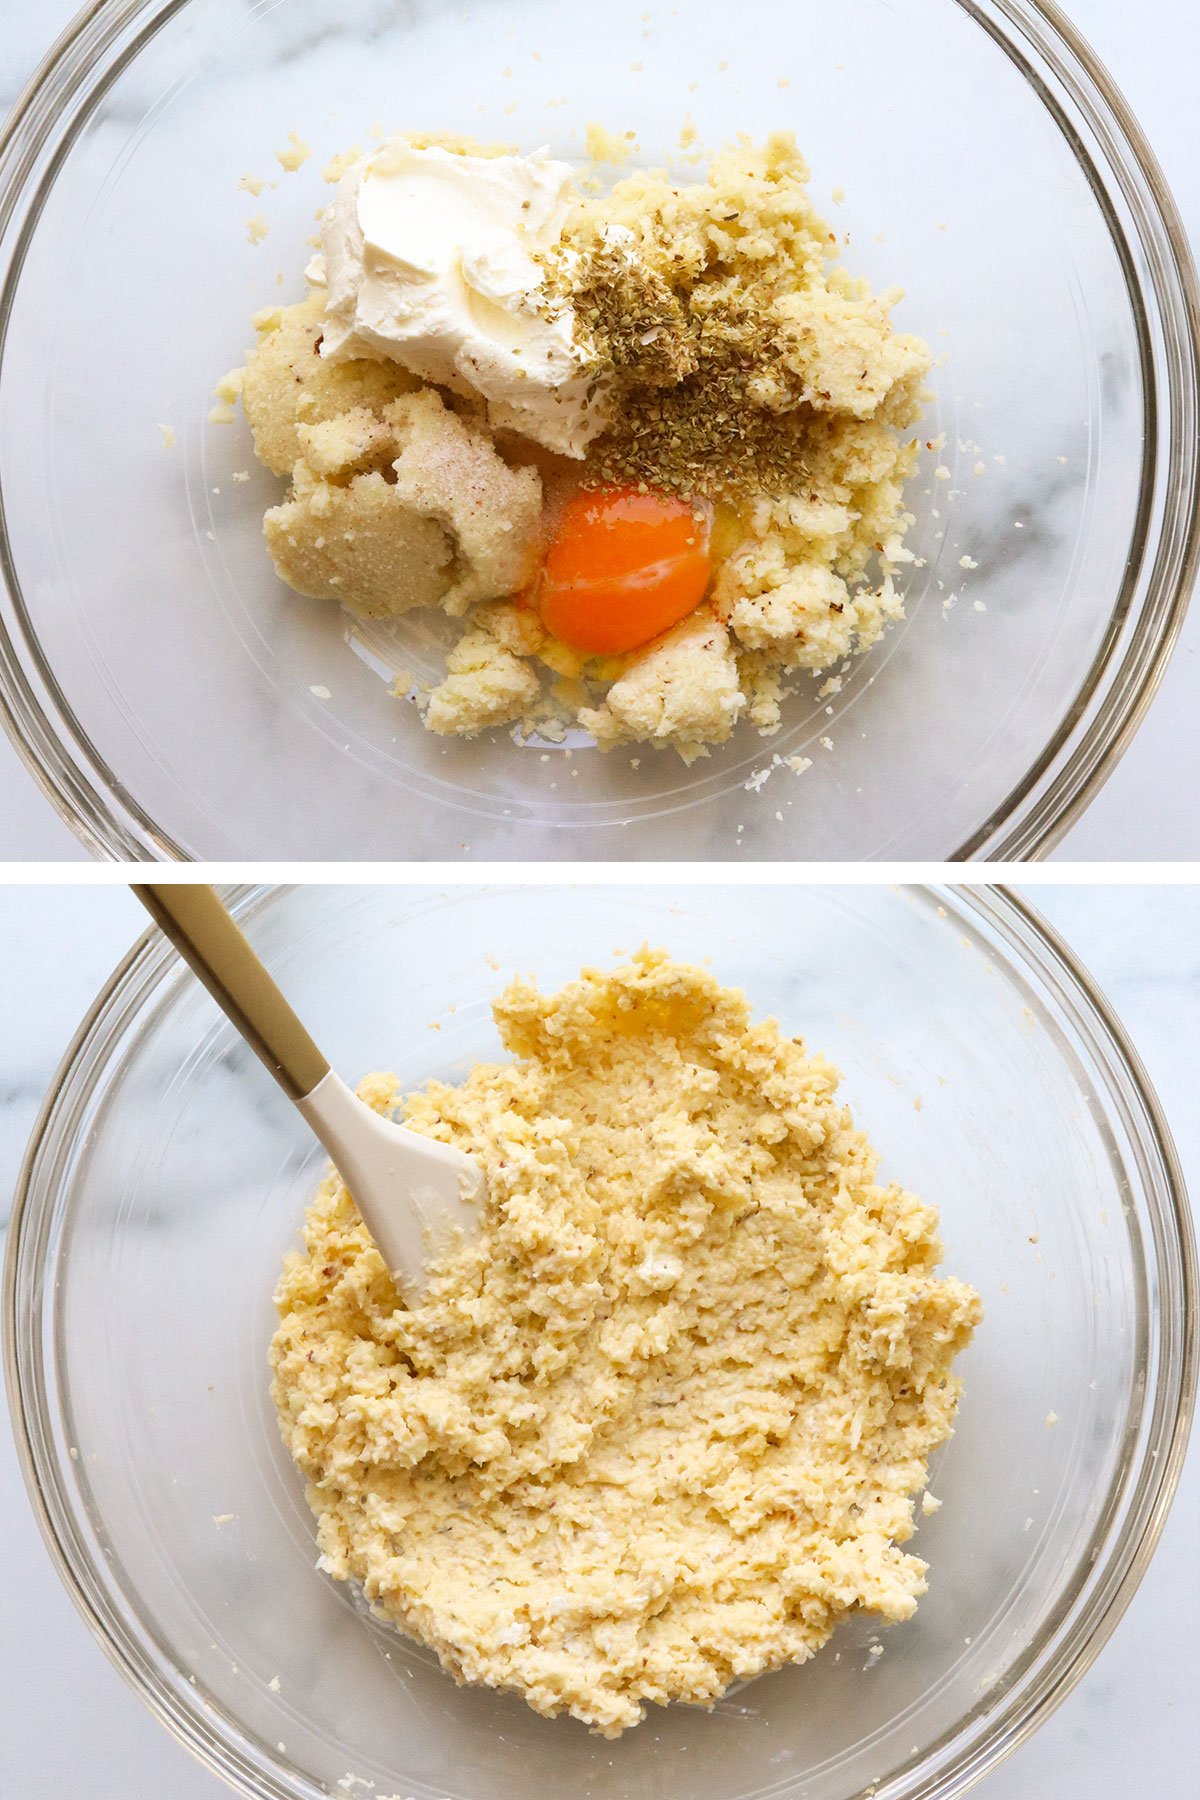
Transfer the cauliflower rice you just squeezed into a large bowl, then add 1 large egg, 1/3 cup soft goat cheese (chevre), 1 teaspoon dried oregano, 1/4 teaspoon salt, and a pinch of black pepper, if desired.
Use a spatula to stir well until the cauliflower mixture looks relatively uniform. It won’t feel like regular pizza dough, so don’t worry about that.
Step 5:
Arrange a fresh piece of parchment paper on the large baking sheet, if needed, then transfer the cauliflower mixture to the center of the pan.
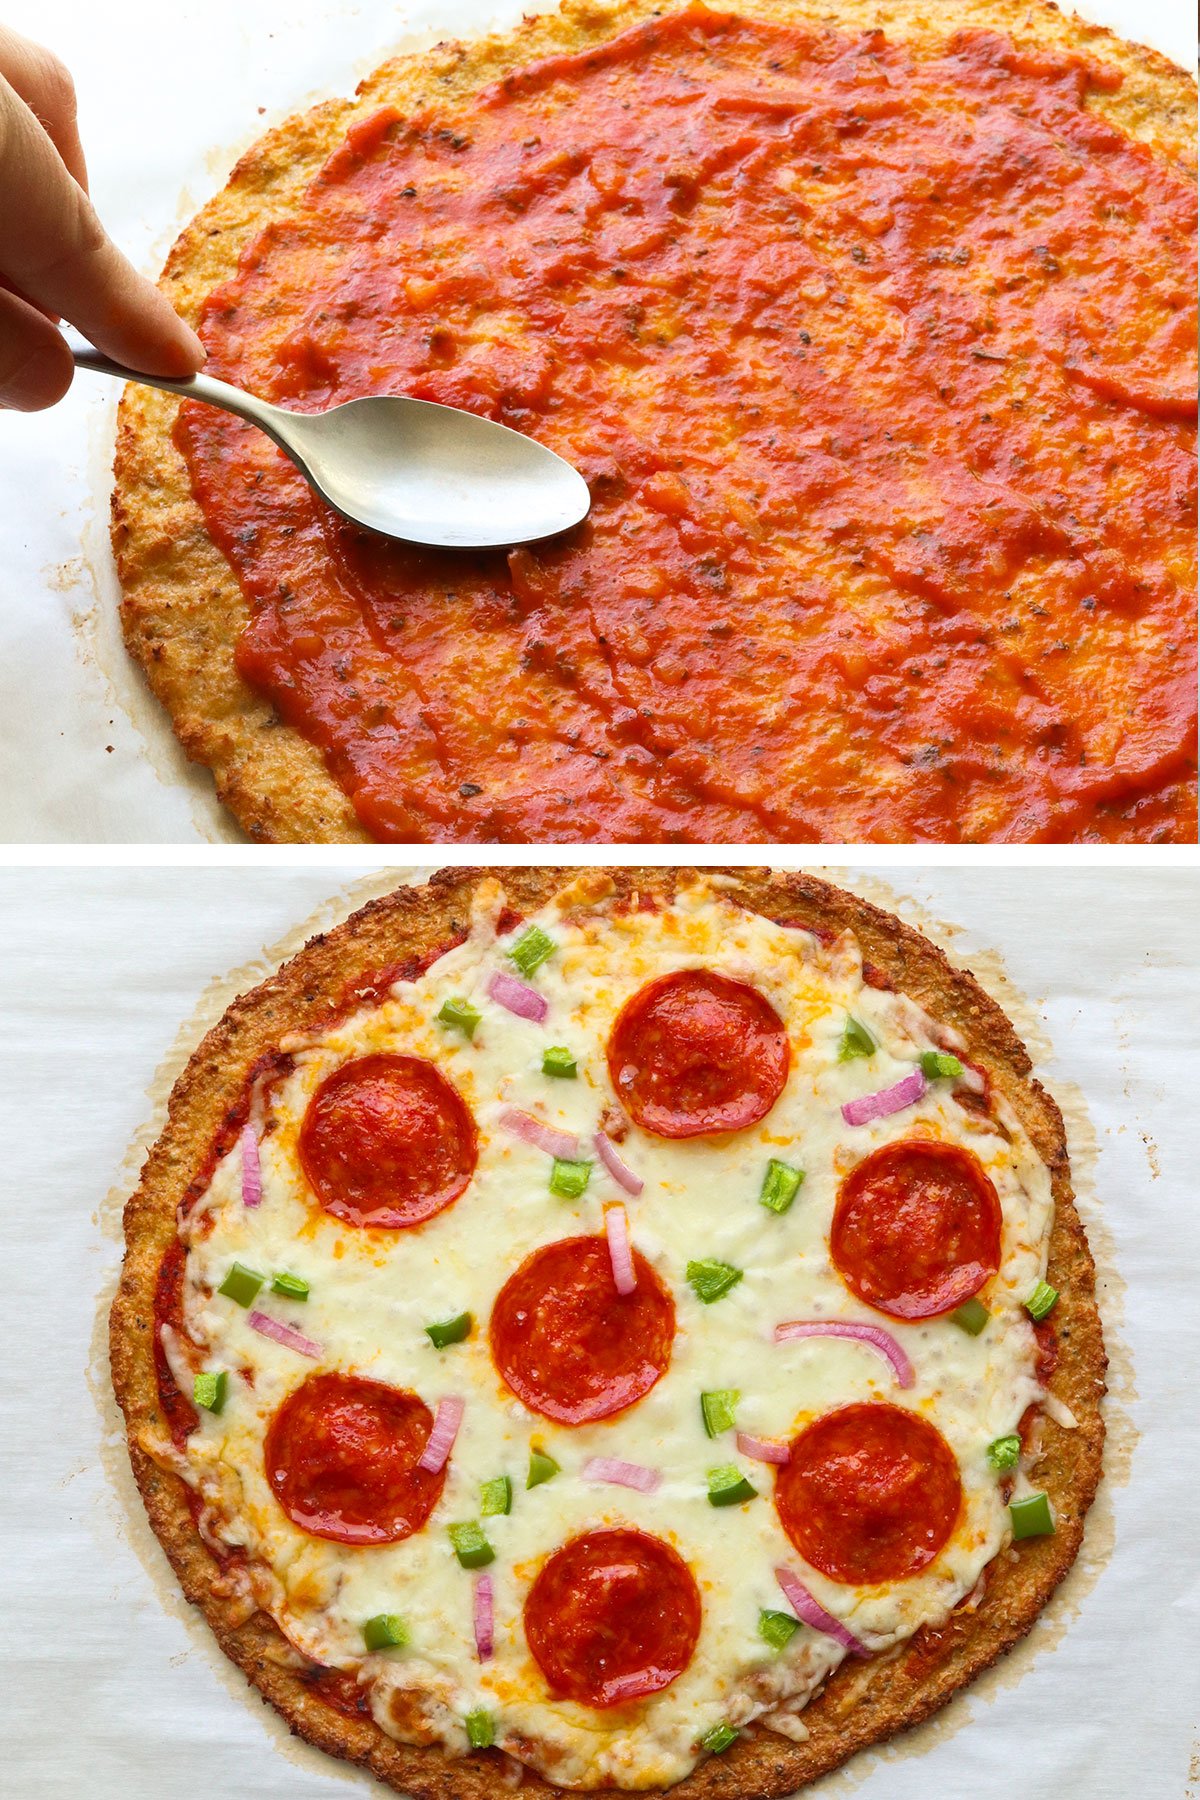
Use your hands to gently press the cauliflower pizza dough into a round pizza crust, about 10 to 12 inches wide. Be patient, as it will feel weird and slightly sticky to work with!
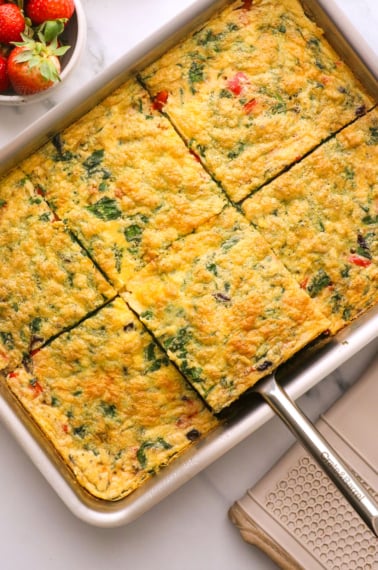
Make the crust as thin and flat as possible without leaving any holes. The pan in my photos below is 16 inches by 14 inches for reference. So the crust can fill the pan quite a bit!
Note: Get your hands wet if the crust is sticking to your fingers; wet hands help prevent sticking!
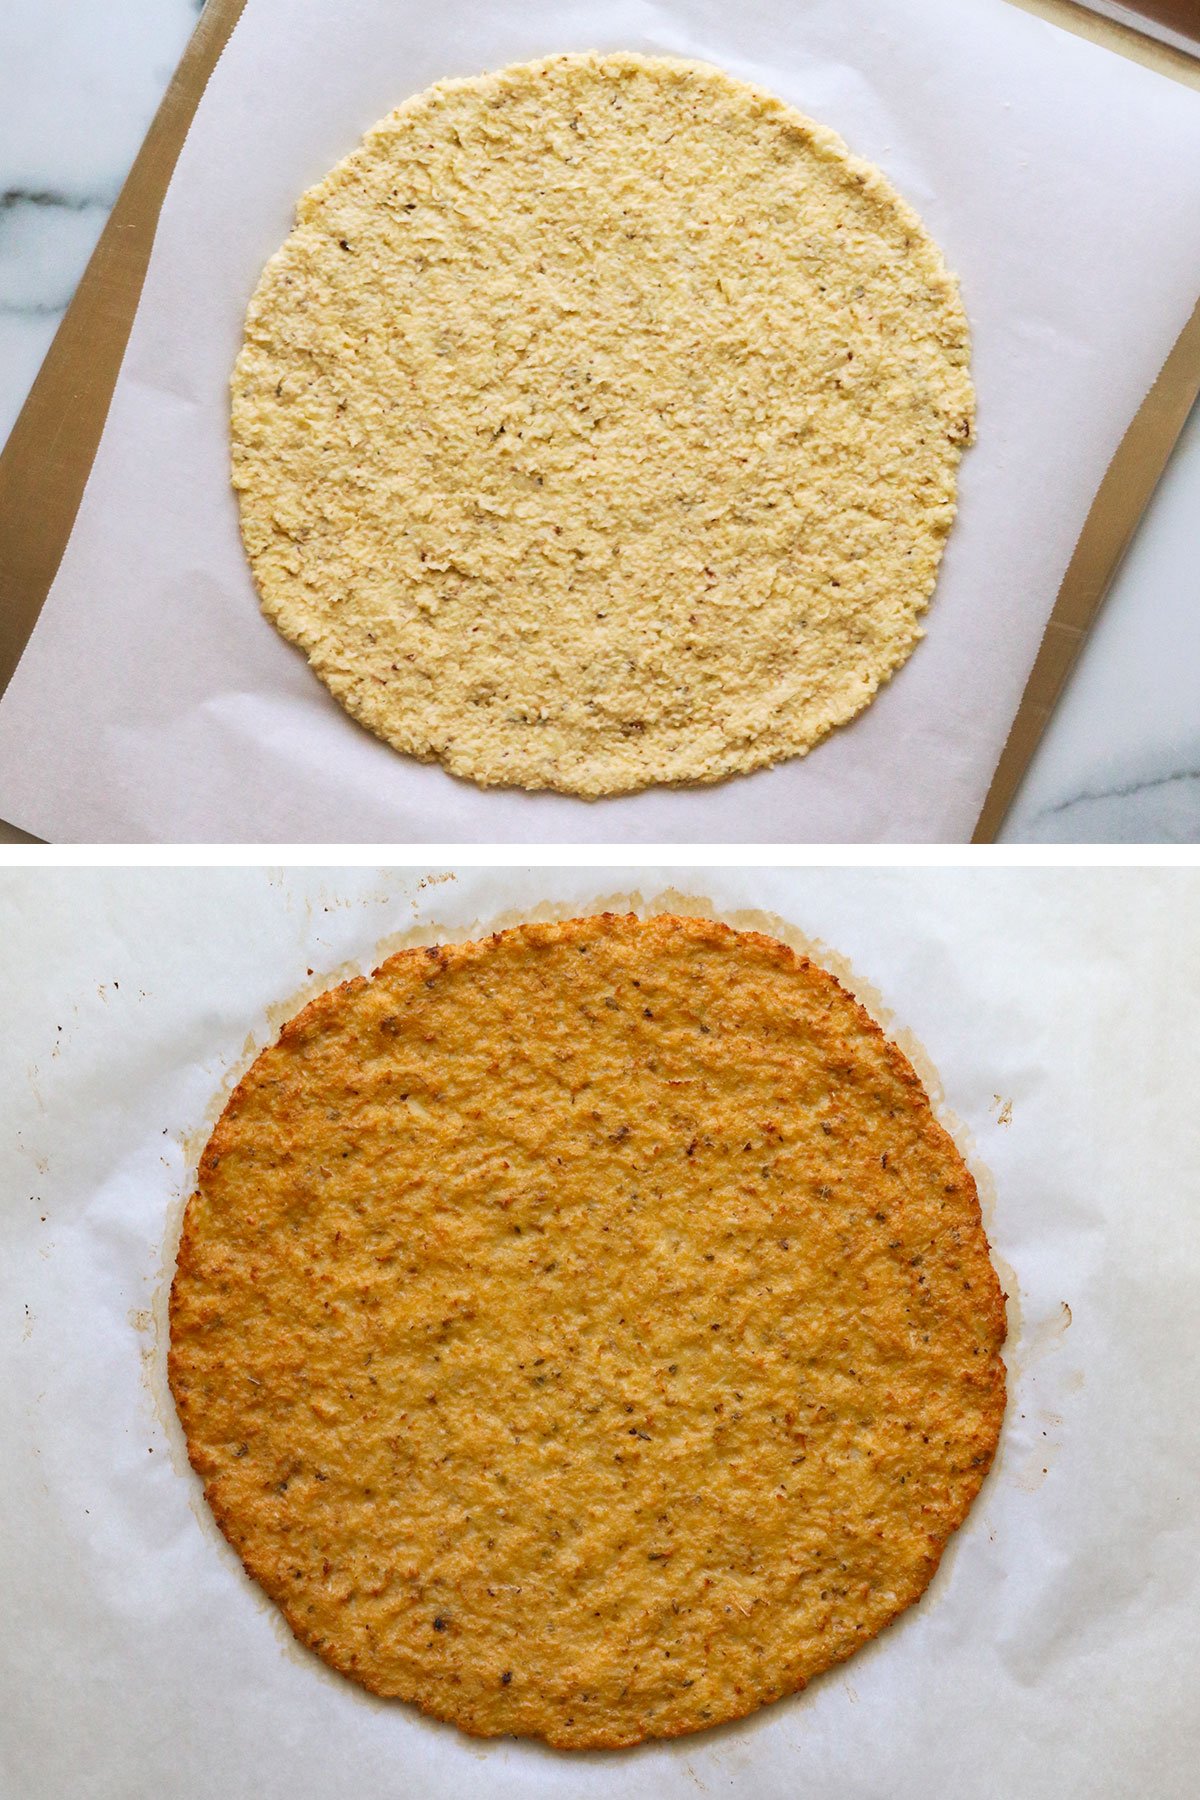
Step 6:
Transfer the pan with the cauliflower crust to the oven and bake for 30 minutes at 400°F, or until golden brown. There’s no need to flip it. Once the top looks dry and golden, it’s ready for toppings!
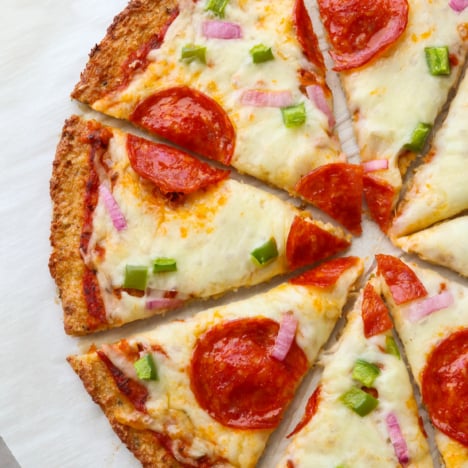
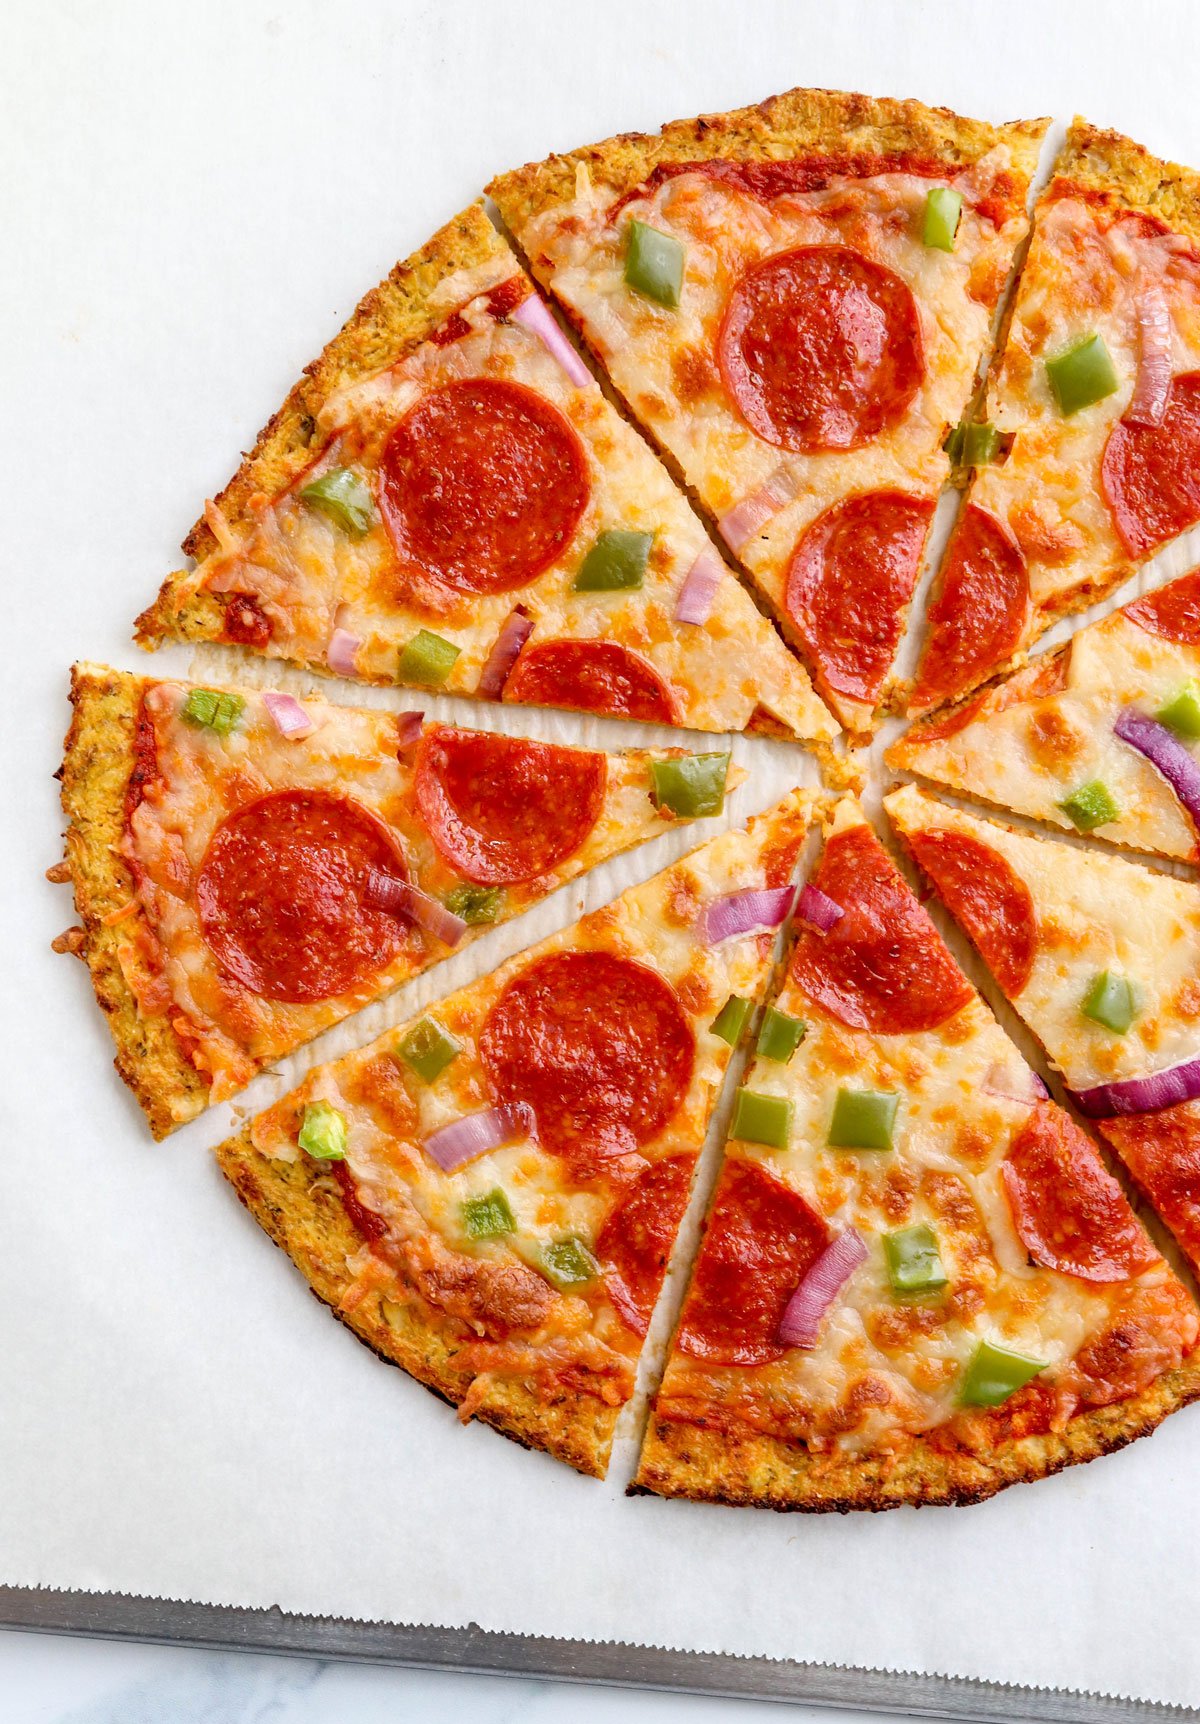
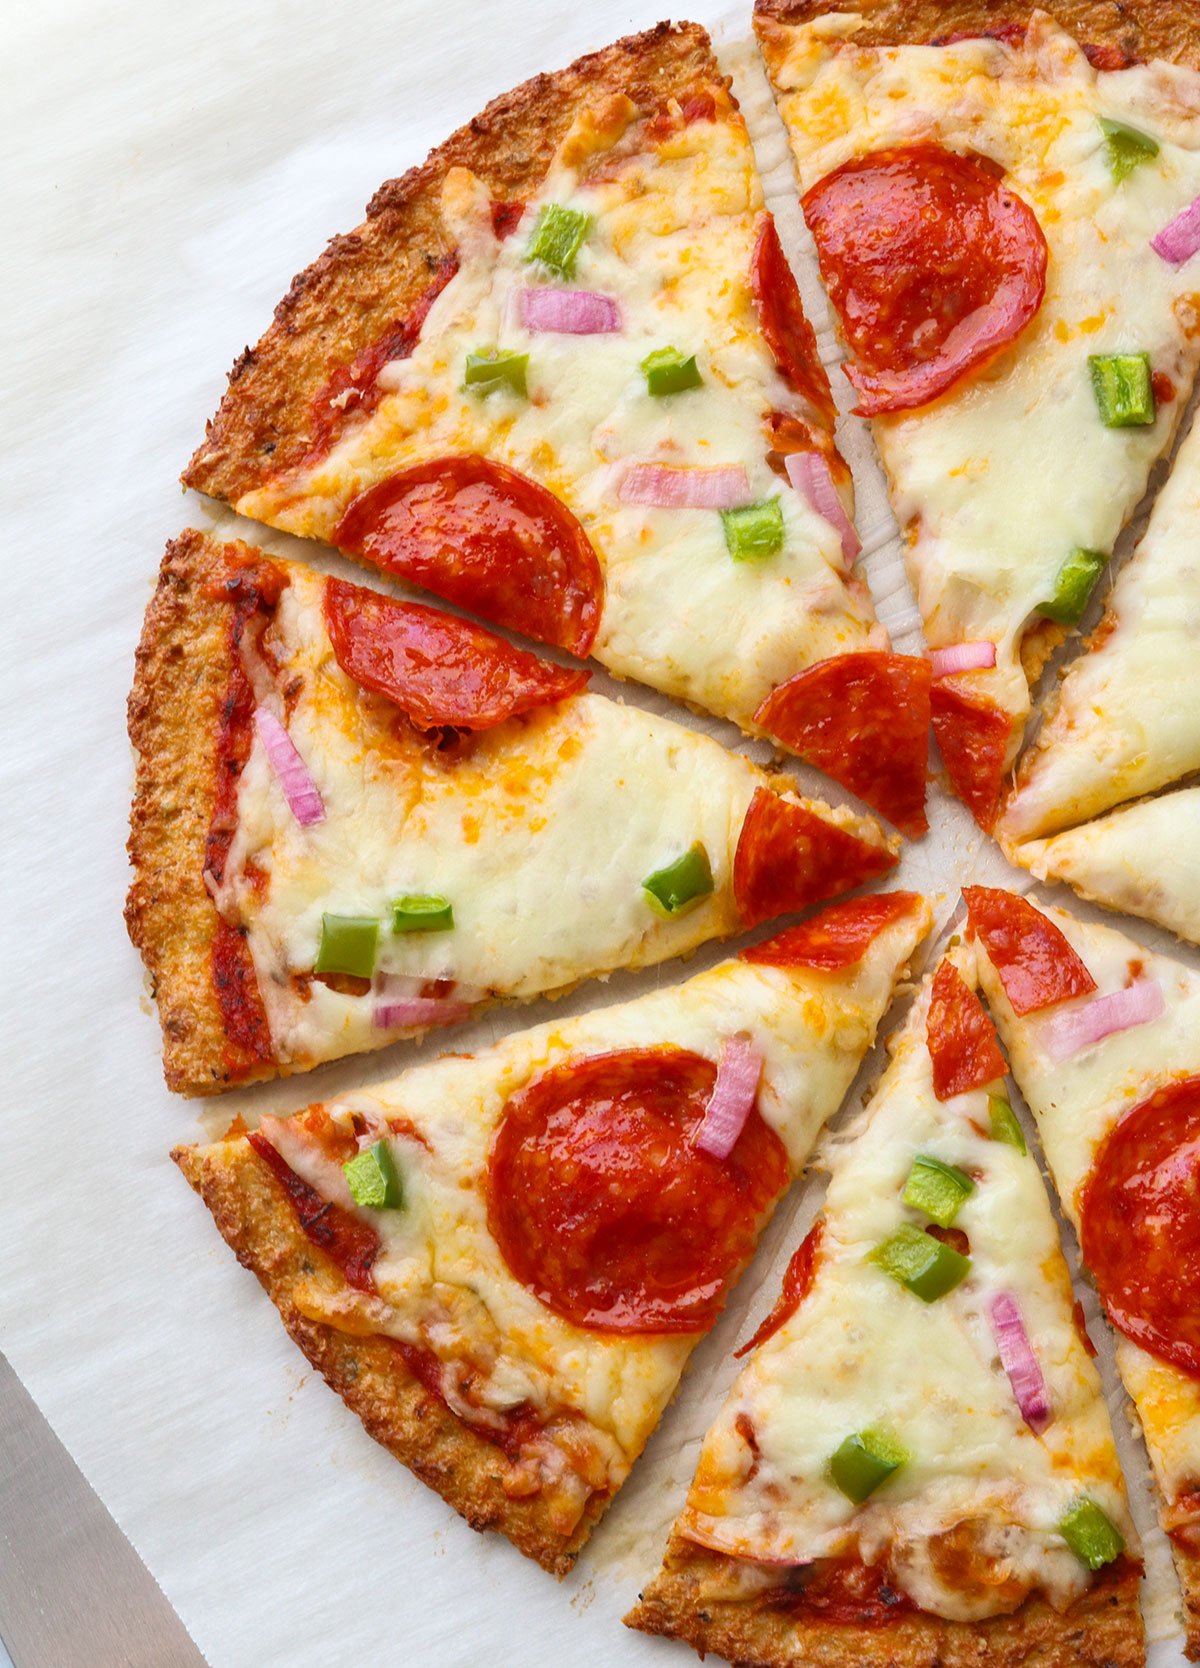
Add a thin layer of pizza sauce, mozzarella cheese, and any toppings you love, like pepperoni, mushrooms, onions, fresh basil, or olives.
Return the pizza to the oven to bake until the cheese has melted, about 10 more minutes. You can turn on the broiler and watch closely if you want the cheese to turn golden even faster.
Let the pizza cool for 5 minutes, then cut it into slices. Because you took the time to remove excess moisture, the crust should be easy to pick up by hand!
Storage + Reheating Tips
Leftover pizza slices can be stored in an airtight container in the fridge for up to 5 days. Or you can freeze them for up to 3 months.
You can reheat individual pizza slices in the air fryer at 350ºF for 3 minutes. Or, if you want to freeze a whole crust to cook later, check out the tips below.

The Secret to Perfect Caulifower Pizza Crust
Ingredients
- 1 pound cauliflower florets (or thawed from frozen; see notes)
- 1 large egg , beaten
- ⅓ cup soft goat cheese (or grated Parmesan)
- 1 teaspoon dried oregano
- ¼ teaspoon salt
Instructions
- Preheat the oven to 400ºF. If the cauliflower isn't already riced, add the cauliflower florets into a food processor and pulse briefly, until it has a rice-like texture. Line a large baking sheet with parchment paper, then spread the cauliflower rice out in a single layer. Bake for 15 minutes, or until the cauliflower is tender.
- If you're using frozen cauliflower, be sure that it is completely thawed, and process it into a rice-like texture using a food processor. (Alternatively, you can start with frozen cauliflower rice that has been thawed, to skip the food processor step.) There is no need to cook thawed frozen cauliflower so it will save you time! Tip: You can use up to 1 ½ pounds of cauliflower if you want to use two 12-ounce bags. This crust will still hold together well!
- Once the riced cauliflower has been cooked (or thawed), transfer it to a clean, thin dishtowel. Wrap up the steamed rice in the dishtowel, twist it up, then SQUEEZE all the excess moisture out! (Be careful if your cauliflower is still hot; let it cool before handling.) A lot of extra liquid will be released, which will help you avoid a soggy pizza crust.
- In a large bowl, mix up the squeezed-out rice, egg, cheese, oregano, and salt. It won't be like any pizza dough you've ever worked with, but don't worry, it will work!
- Press the dough out onto a baking sheet lined with parchment paper. (It's important that it's lined with parchment paper, not wax paper, or it will stick.) Keep the dough about 1/4-inch thick. Wet your hands to prevent sticking, if needed.
- Bake for 30 minutes at 400ºF or until the top looks dry and golden.
- Add your favorite pizza toppings to the crust, such as sauce and cheese, then return the pizza to the 400ºF oven. Bake an additional 5-10 minutes, just until the cheese is hot and bubbly. Slice and serve warm.
Video
Notes
Nutrition
More Low-Carb Recipes to Try
- Cauliflower Fried Rice
- Zucchini Lasagna
- Chicken Vegetable Soup
- Zucchini Hummus (no beans)
- Cottage Cheese Dip
- Mexican Chicken Soup
- Healthy Chicken Burgers
If you try this Cauliflower Pizza Crust recipe, please leave a comment and star rating below, letting me know how you like it.


Its in the oven at the moment. Was actually easier than it seemed. Next one should take me half the time.. I don’t pretend to be a chef. I just prepare clean food for my wife who beat breast cancer. We eat alot of chicken and broccoli. Brussels sprouts, and asparagus. This will be our option this week. More chicken tomorrow. I’ll look for a recipe of yours to tackle tomorrow.. thank you so much-Mike
Can’t wait to try this! Do you think the Follow your Heart brand of cheese would work in the crust? Trying to keep it DF! Thanks for your great recipes!!
I haven’t worked with that brand of cheese recently, so I’m not sure, but I think it’s worth a shot! I’d love to hear how you like it.
Is the bag of frozen cauliflower already cooked? I’m wondering if I could freeze my own riced cauliflower and then defrost it so I can skip the step of roasting it.
It’s possible that the cauliflower is blanched before it’s frozen for the store. However, I think you’d get the same result if you simply freeze your own cauliflower rice and then fully thaw it? In my experience, thawed veggies are usually mushier than fresh… and that’s all you need to squeeze out the moisture. Hope it works for you!
Great recipe! I had some skeptical family members when I proposed an alternative to our regular sourdough pizza night, but everyone approved!
I did a 50-50 mix of parm and queso fresco (run through the food processor right after the cauliflower) and it made a soft but resilient crust.
I wonder if you have found a use for the cauliflower juice that is pressed out? Tastes nice, might be a good stock for a soup?
My wife is a recent breast cancer survivor. At dr. request she has to change to a cleaner diet. This recipe looks great. I’ll be making pizza for dinner today…wish me luck I just.hope she likes it. Thank you for this post