This post may contain affiliate links. Please read my disclosure and privacy policy.
If you’re not hard-boiling eggs in your Instant Pot, you’re missing out. Not because it’s necessarily faster, although it does feel like that, but mostly because the pressure cooker makes the process almost completely hands-off.
While writing The Fresh & Healthy Instant Pot Cookbook, I tested how to cook eggs in the Instant Pot for months. I know some people prefer a jammy egg yolk, while others want it to be as hard as possible. Both things are possible in the pressure cooker!
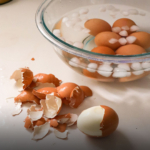
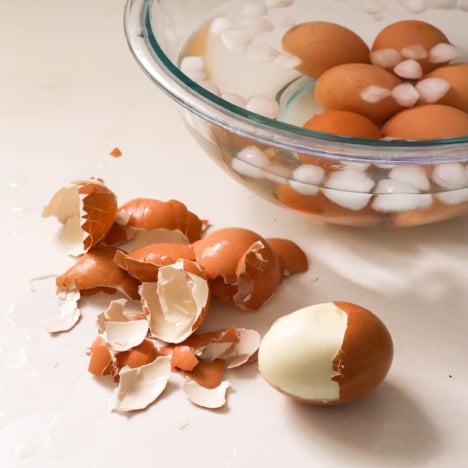
As a bonus, Instant Pot hard-boiled eggs are easy to peel when they’re done. Be sure to follow the tips below closely if you want to avoid a green or gray ring around the yolk, too.
⭐⭐⭐⭐⭐ Featured Review
“My new go-to method for hard-boiled eggs! Turns out great every time. A friend was astounded when she saw me set my eggs in the instant pot, added some water, pushed a button, and walked away. Yes, it really is that easy!” – Alex
Hard Boiled Eggs in the Instant Pot
Step 1:
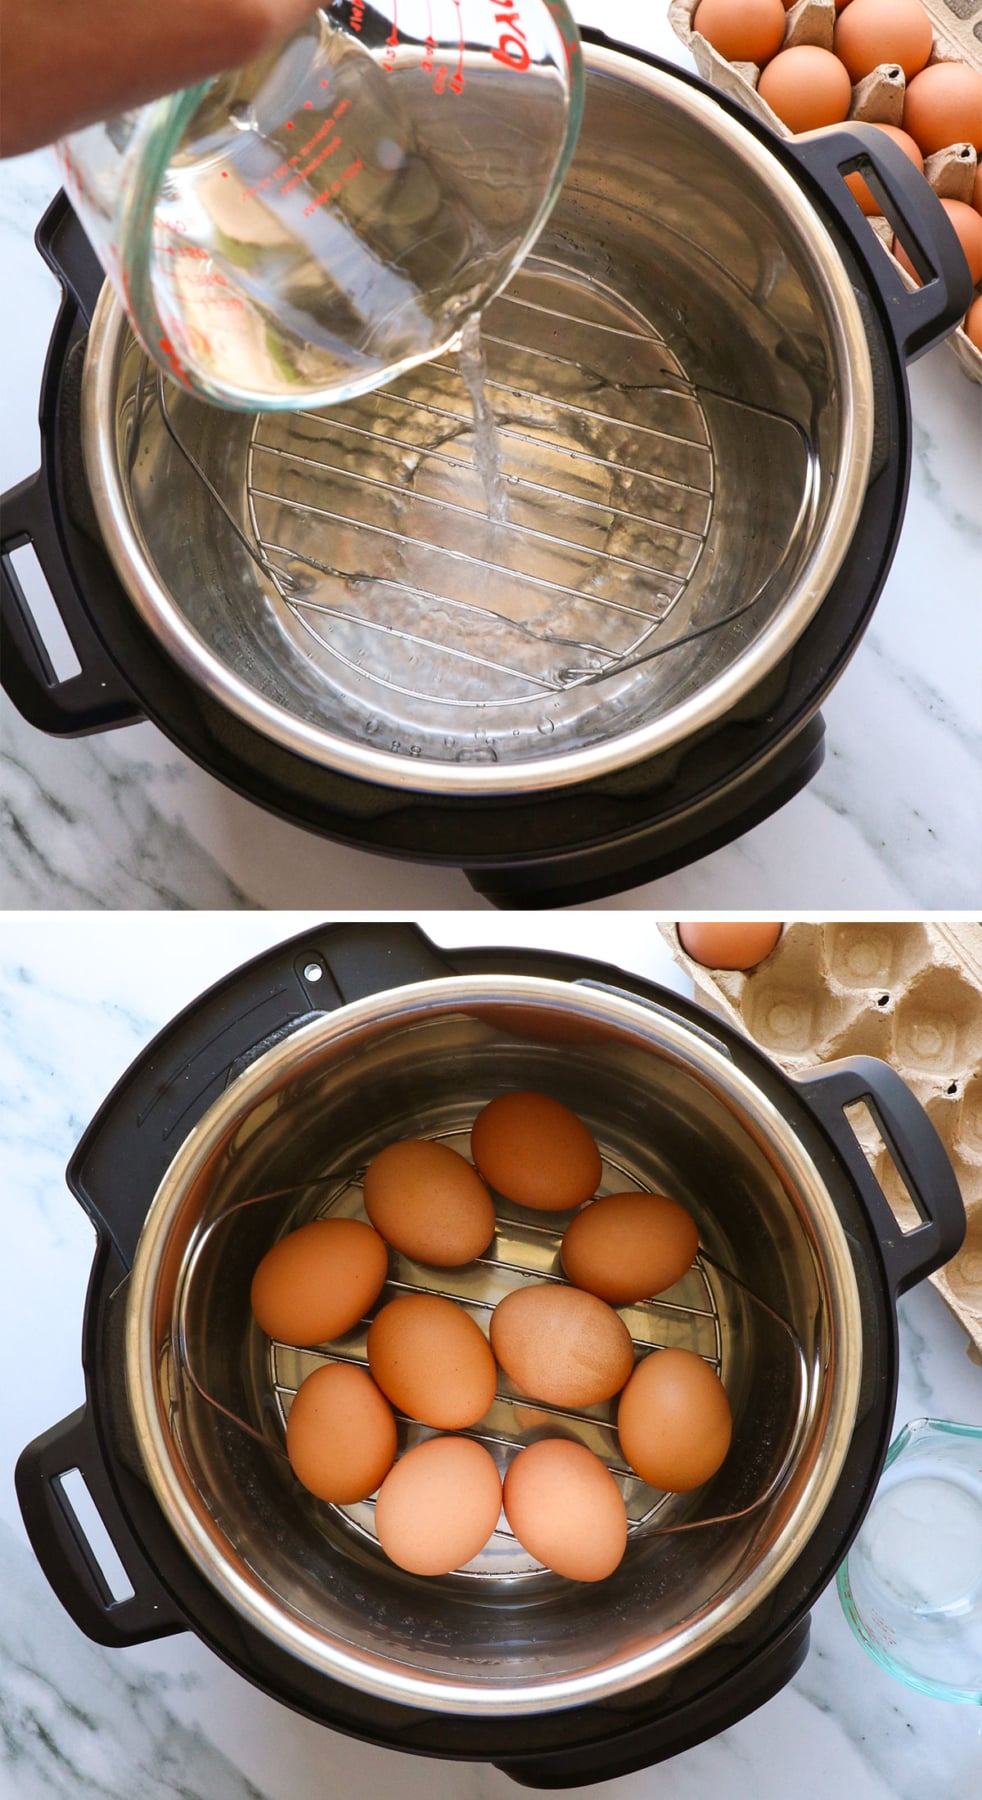
Place a trivet in the stainless steel bowl of your Instant Pot, then pour 1 cup of water into the bottom. Place as many eggs as you want to cook on the trivet. I’ve cooked up to a dozen at a time, but you can also cook just a couple, if you prefer.
Secure the lid on your Instant Pot and, if needed, move the steam release valve to the “Sealing” position.
Note: Newer Instant Pots (purchased after 2020) have auto-seal lids, meaning the release valve is automatically in the “Sealing” position. So, if you have a newer model, you won’t have to worry about this!
Step 2:
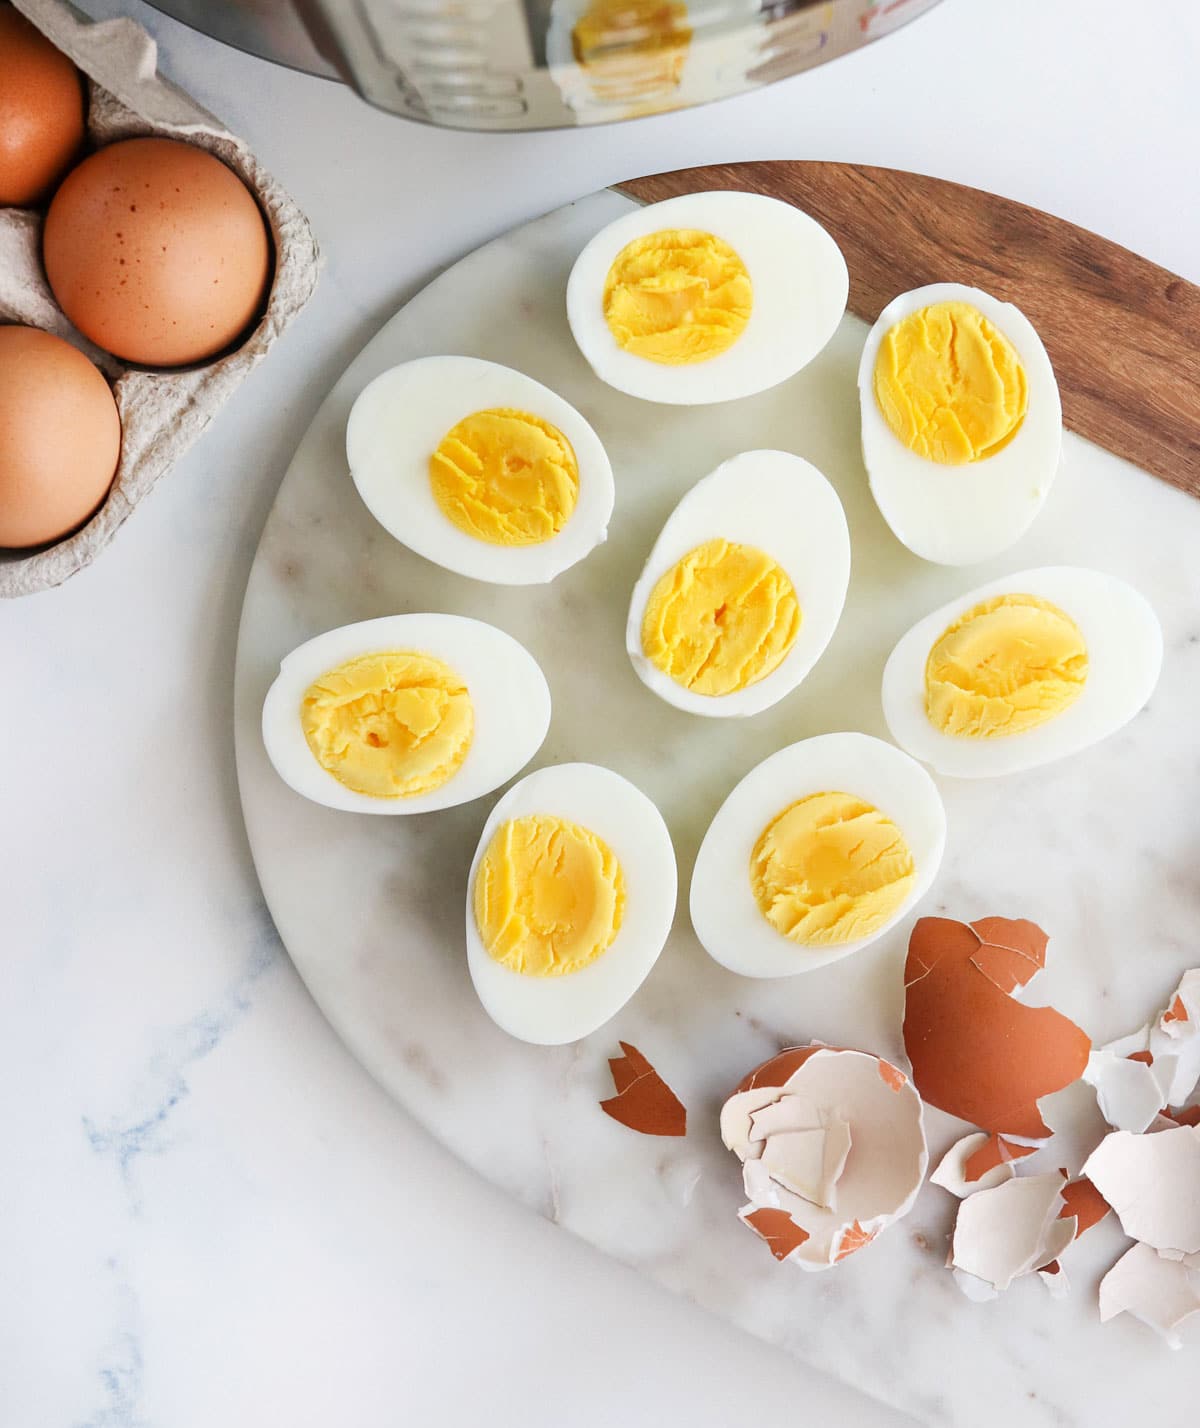
Use the Manual or Pressure Cook button to cook at high-pressure for 5 minutes. This is the timing I use when I want hard-cooked eggs with a solid yolk. See the tips below if you prefer a different texture.
The machine will take approximately 5 minutes to come to pressure, then it will cook for 5 minutes. While you wait on this, fill a bowl with ice and water, so you’re ready as soon as the eggs are done cooking.
Note: If you prefer your egg yolks to be anything other than fully hard-cooked, see the other timings I tried by scrolling down a little bit. I tested this a lot of different ways!

Step 3:
When the cooking cycle is complete, you have two options:
- Quickly release the pressure by moving the steam release valve to the “Venting” position. Steam will shoot out of the vent, so don’t be surprised by that! This will make your yolks slightly softer and ensure no green ring forms around them.
- Wait up to 5 minutes, then move the steam release valve to “Venting.” This will make the yolks even more solid, but I only recommend waiting this long if your eggs were cold from the fridge when you started. If you used room-temperature eggs, you’ll start to get a green ring around the yolks by waiting this long, so use a quick-release in that case.
As soon as the floating valve in the lid drops, meaning the pot is no longer pressurized, it’s safe to open the lid. Immediately remove the lid and use tongs to transfer the eggs to the ice water bath. I like to let them chill for 5 minutes.

Want to save this for later?
How Long to Pressure Cook Eggs (Various Timings I tested)
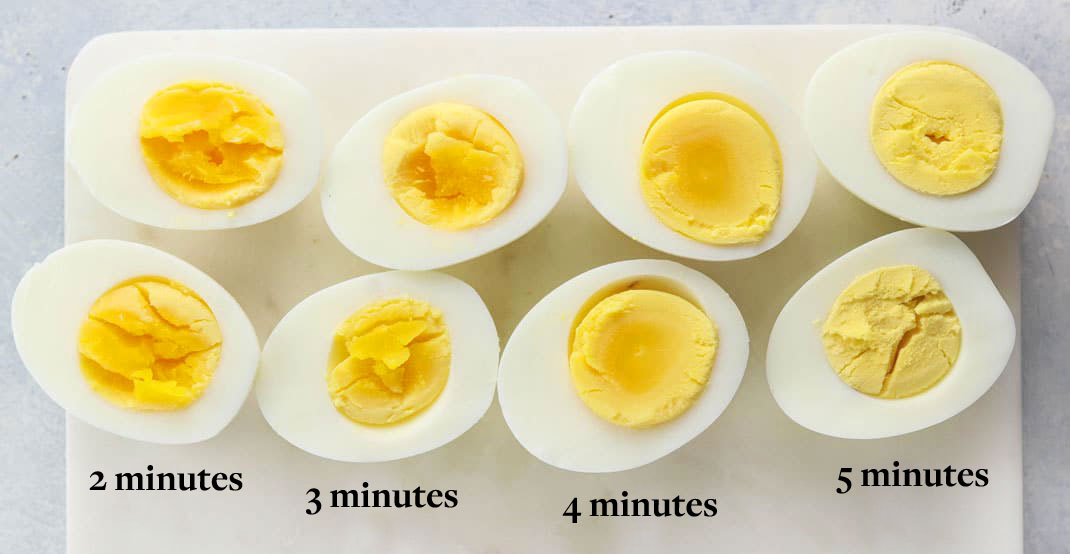
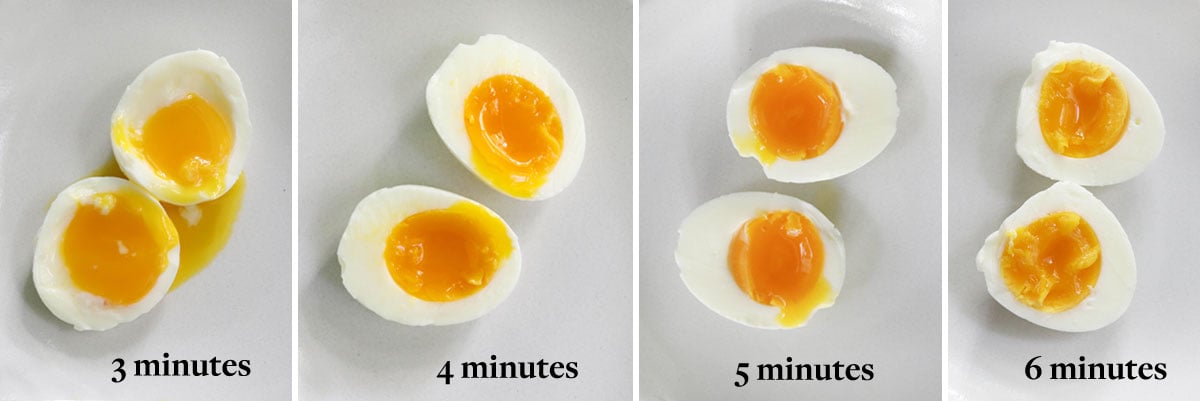
If you’re a curious person like me, you might be wondering… what happens if I use a different cook time? I tried 4 different cooking times for hard boiled eggs, all with a 5-minute natural release. (And I tested these with a quick-release even further down, if you want soft cooked eggs.)
I took a photo of each one below, and as you can see, they all turned out relatively “hard cooked” but some yolks are softer than others. Feel free to adjust your timing based on what type of yolk you’re going for.
Note: If you’d like to watch a video tutorial showing the difference between a quick release and a natural release, watch my How to Use Your Instant Pot video.)
Soft-Cooked Eggs in the Instant Pot
If you prefer an egg with a runny or “jammy” egg yolk, you’ll want to perform a quick release instead of a natural release. (This means you’ll immediately switch the steam release valve to the “Venting” position, the moment the cooking cycle beeps that it’s complete.)
Here are the cooking times for soft-cooked eggs in the Instant Pot:
- 3 minutes = very runny yolk with the whites mostly set, but not totally.
- 4 minutes = gooey yolk with totally set whites.
- 5 minutes = jammy yolk, with the outer part of the yellow starting to set.
- 6 minutes = slightly jammy center and slightly hard-cooked yellow edges.
Instant Pot Hard Boiled Eggs (Easy to Peel!)
Ingredients
- 4 large eggs (or as many as you want to cook)
Instructions
- Fill your Instant Pot with 1 cup of water and place the metal trivet inside. (I use the one that came with my machine.) Place the eggs on the trivet, then secure the lid on the pot. Make sure you turn the vent at the top to the "Sealing" position, if needed. Note: This recipe assumes you're starting with eggs cold from the fridge; see the recipe notes if you're not.
- Press the Manual or Pressure Cook button, then cook at high pressure for 5 minutes. (Or use just 3 or 4 minutes for a runnier yolk; see notes.)
- For hard-cooked egg yolks, let the pressure naturally release for 4 minutes after the cooking process is complete. When the screen on the Instant Pot reads LO:04, move the steam release valve to "venting" to quickly release the remaining pressure. Make sure your hand isn't over the vent so you don't get burned by the steam. For softer egg yolks, perform a quick release: move the steam release valve to the "Venting" position as soon as the cooking cycle is complete.
- When the floating valve next to the steam release valve has dropped, it's safe to remove the lid. Use tongs to carefully remove the hot eggs. Place the eggs in a bowl of ice water to stop the cooking process. Let them cool for 5 minutes before peeling and serving. They are easiest to peel when you remove them from the ice bath, so I recommend peeling them immediately.
- Transfer the eggs to an airtight container in the fridge and store for 4-5 days.
Video
Notes
- 3 minutes = very runny yolk with the whites mostly set
- 4 minutes = gooey yolk with totally set whites
- 5 minutes = jammy yolk, with the outer part of the yellow starting to set
Nutrition
More Instant Pot Recipes
- Quinoa in the Instant Pot
- Pressure Cooker Black Beans
- Instant Pot Spaghetti Squash
- Chickpeas in the Instant Pot
- Pressure Cooker Lentils
- Instant Pot Steel Cut Oats
If you try these hard-boiled eggs, please leave a comment and star rating below to let me know how the timing works for you! We can all benefit from your experience.


Oh wow 🤩 this was truly the best recipe for hard boiled eggs ever and for the instant pot too🥰💗💕🍽️cannot wait to find more incredibly delicious recipes for the instant pot..
I love this method of cooking eggs, and it works brilliantly!
The easiest way to make hard boiled eggs ever! I’ve been using this recipe for a couple of years now and they are perfect every time and peel so easily. I cook for 5 min and then do 4 min. I take the whole pot and just throw it in the sink and run cold water on them and peel almost immediately. Perfection!
Ooh, I love the idea of just running cold water over the whole pot! Thanks for sharing, Carrie!
My go-to blog for everything!
Thank you!! ❤️
Same! If it’s Detoxinista you can trust the recipe 🙂
You are too kind, Karen. Thank you for trusting my recipes! I’m so happy to have you here. 🙂
What elevation are you at? I started cooking hard boiled eggs in my instant pot just after Easter (5 min high, 5 min natural release, quick release, then 5 min ice water bath). I love that the shells come off so easily, and that I can make a bunch pretty fast. But most have ended up with a good sized green ring around the yoke. I want the yoke cooked through. I am wondering if, because we are at 7,000ft, they cook faster.
Interesting! I live in the Midwest, under 1,000 ft elevation. I bet that could make a difference! Usually the green ring occurs if the eggs don’t cool fast enough or are cooked for too long, so maybe try shaving off a minute of cook time next time, or skip the natural release to see how your eggs turn out. It will take some experimenting, so maybe cook only 1 or 2 eggs at a time until you figure it out!
Thank you! I wondered about decreasing the cook time. When I am cooking two dozen it takes a couple minutes to get them into the ice water.
This is my go to hard boiled egg recipe! So easy with consistent results!
This worked for me! Some were a bit hard to peel and others were easy.
this method still overcooks the eggs. I cooked mine for 3 minutes with instant steam release and it still overcooked them. If there is a green ring around the yolk, its over cooked. I will try 1 minute next time and see how it goes.
Hard boiled eggs use to drive me nuts! No matter how I cooked them, I would lose half the egg when peeling. Megan’s instant pot recipe is a game changer! It is SO easy, and I get the perfect hard boiled egg every single time. Thank you!
My new go-to method for hard-boiled eggs! Turns out great every time. A friend was astounded when she saw me set my eggs in the instant pot, added some water, pushed a button, and walked away. Yes, it really is that easy!